Assign Jira Work Items to Alert Acknowledgers in OpsGenie
Platform Notice: Cloud Only - This article only applies to Atlassian apps on the cloud platform.
Summary
Learn how to automatically assign Jira tickets to users who acknowledge OpsGenie alerts using Jira automation and integration.
Solution
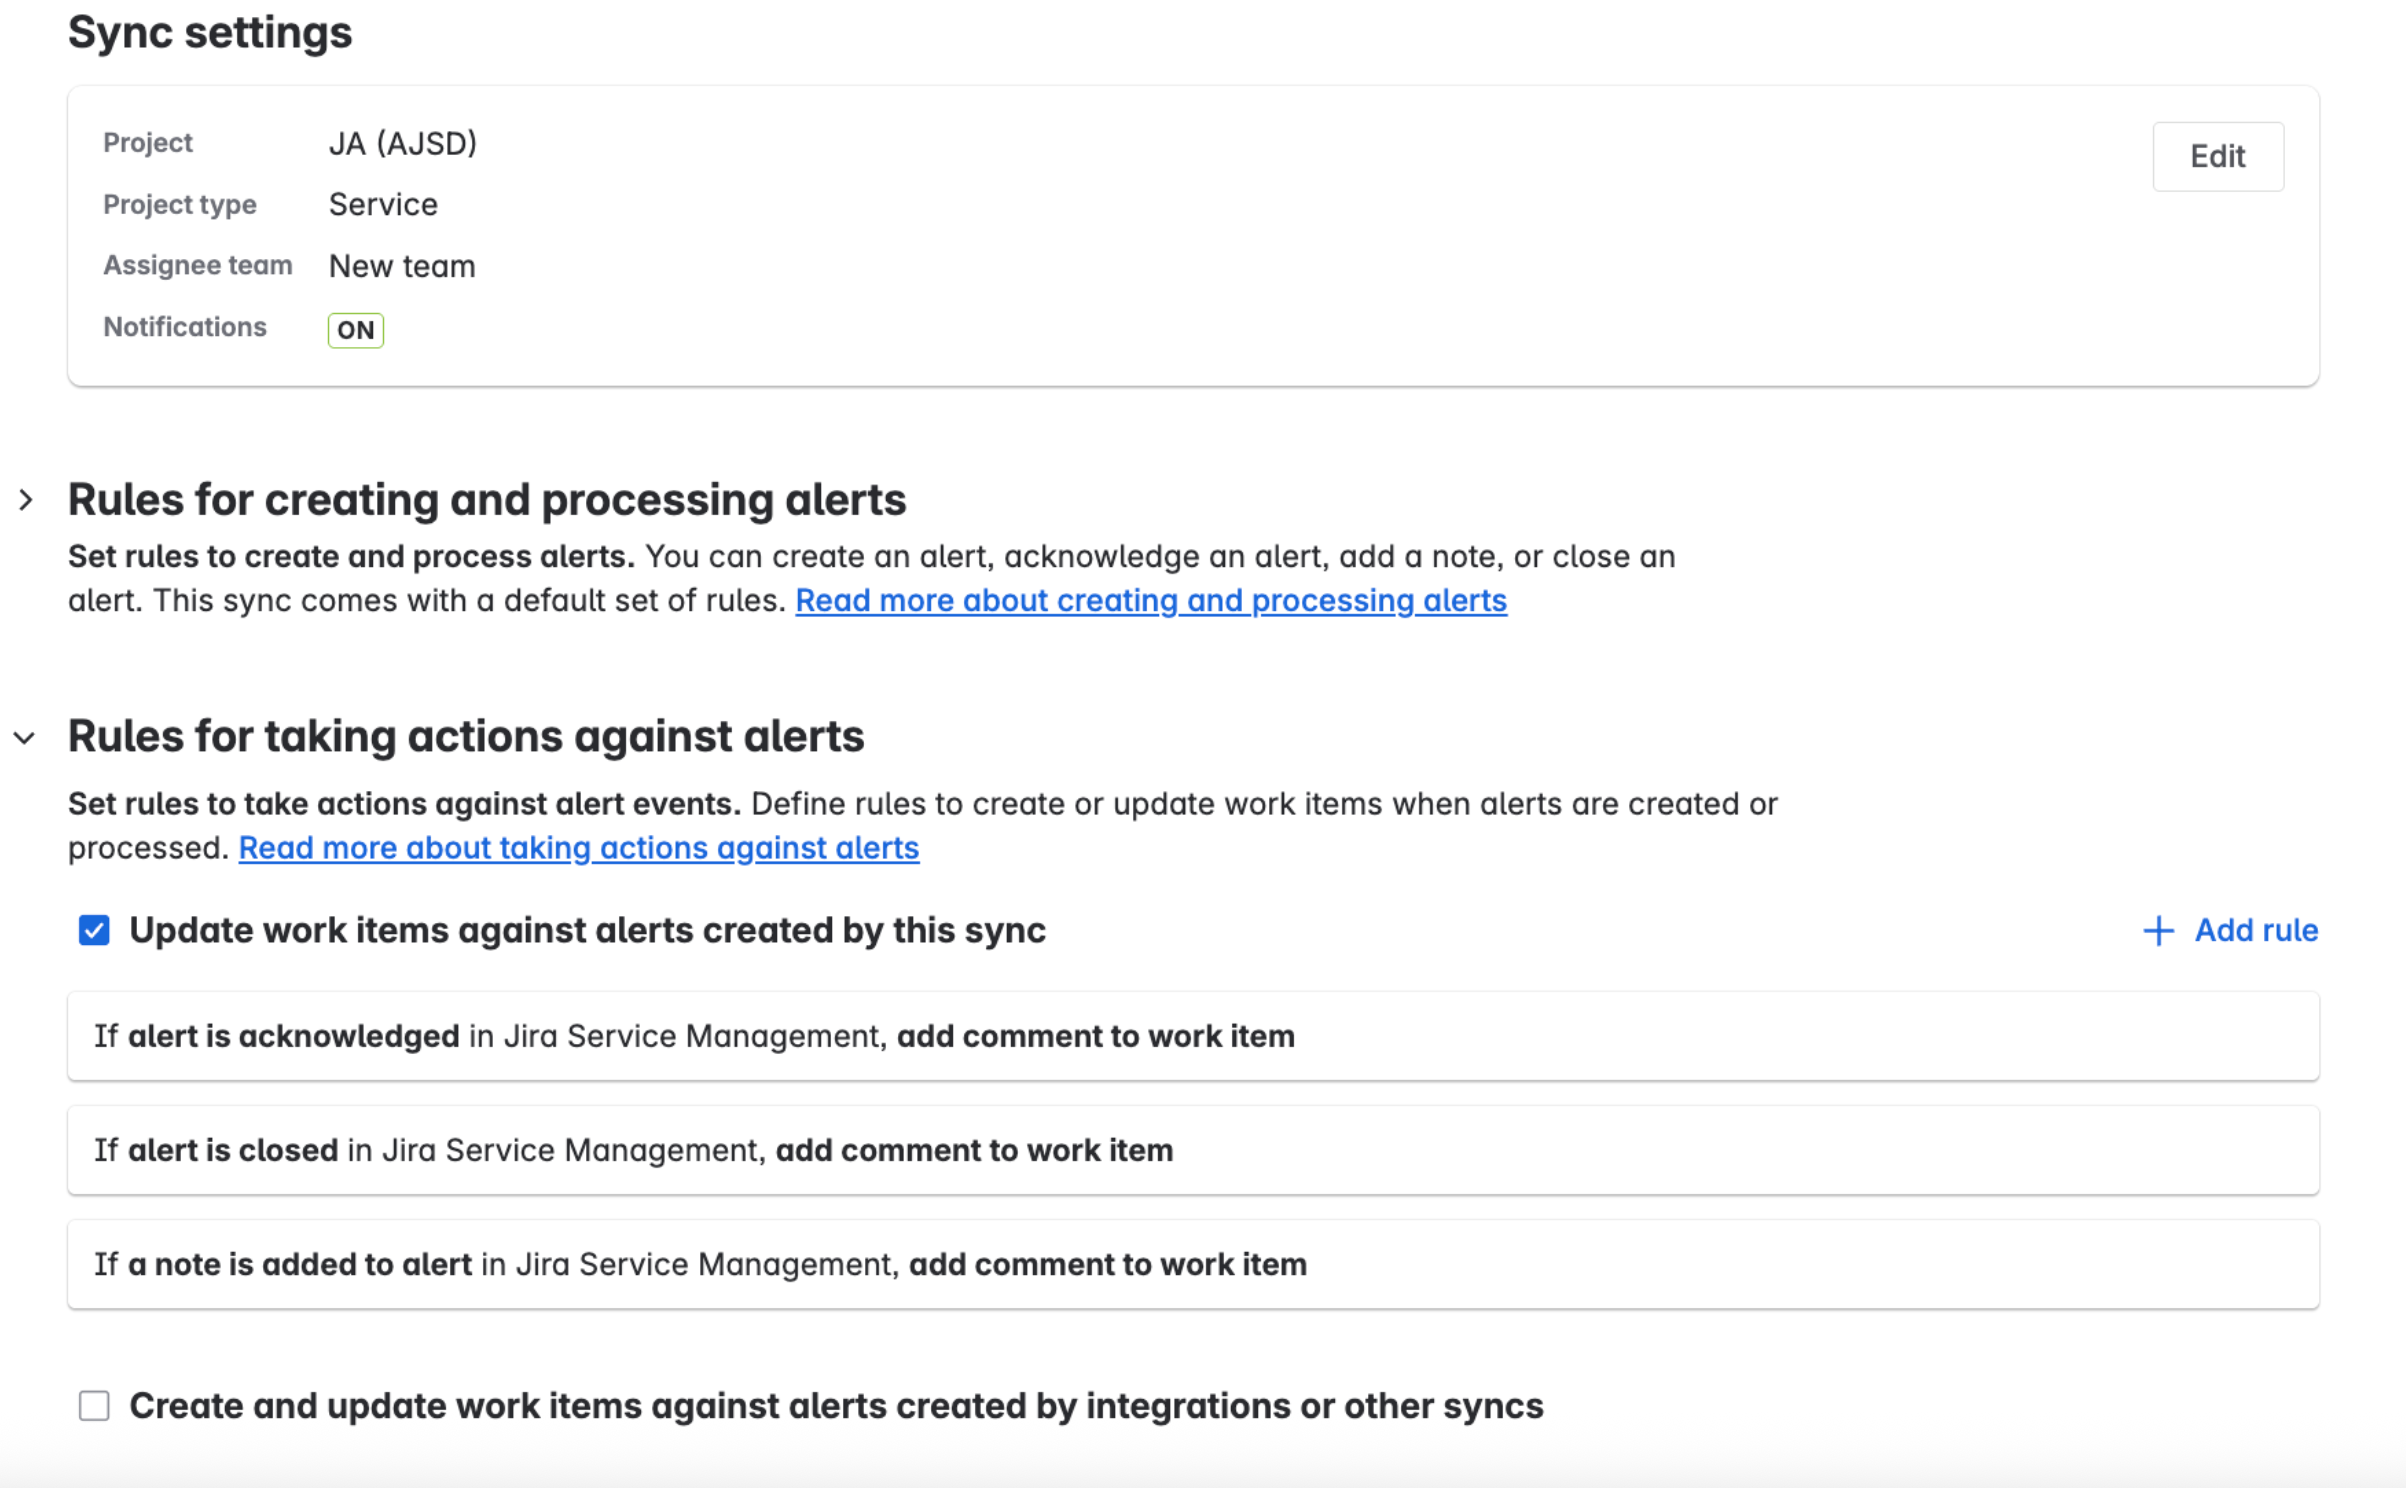
Part 1: Setting up Jira Service Management Sync integration
Go to Teams > Select your team > Select Go to operations > Select Sync.
Create a Sync integration with the desired Project, if you already don’t have one.
Under Rules for taking actions against alerts make sure that "Update work items against alerts created by this sync" checkbox is selected.
Map the integration to add a comment on the ticket when the alert is acknowledged. It should be there by default however, if it is not, click on Add update rule and add the action such as:
If alert is acknowledged in Jira Service Management, add comment to work item.
Part 2: Configure an automation rule in JSM to filter the username from comments added in part 1 and assign the tickets accordingly
For the automation rule to work as expected the name of the user needs to be unique
In Jira go to the project connected to the Sync integration and click on Project Settings > Automation and follow the below instructions:
Automation rule overview
Trigger: When a comment is added to Jira work item.
Conditions:
If user who added the comment is the same user configured for the Sync integration in our case the user is (System).
If the comment body contained "acknowledged alert".
Actions:
Extract the user name value from the comment body using text manipulation - Reference: Jira smart values - text fields.
Save the user name into a variable.
Send an API request to get the user name account ID (To update the Assignee user picker field the value must be the account ID for the user not their display name).
From the web response body extract the account ID.
Set the assignee field with the value of the account ID.
Parameters used in the automation rule
In the Create Variable action set the {{modifiedcomment}} variable to the below value:
{{issue.comment.last.body.substringBetween("[Sync] "," acknowledged")}}Send web request action parameters:
URL: https://<Your-Site-Name>/rest/api/2/user/search?query={{modifiedcomment.urlEncode}}
Headers:
Authorization - Reference Link to generate the Authorization token Automation for Jira - Send web request using Jira REST API.
Once the token is generated convert it to base64 using the below steps:
How to convert to Base 64
We need to encode the credentials "<EMAIL>:<API_TOKEN>" with base64. We can make this through any online tool like Base64 encode. Note: Make sure not to include a line break at the end.
Apart from that, it's possible to Encode to base64 through terminal:
$ echo -n "email@example.com:<YOUR_TOKEN_HERE>" | base64
Use base 64 in the authorization header.
Content-Type - application/json.
Under Wait for response click on the checkbox for Delay execution of subsequent rule actions until we've received a response for this web request.
In the edit action for assign select smart value and set it to the following: {{webResponse.body.first.accountId}}.
Was this helpful?