Assets in Jira Service Management Data Center: Set or change the import source of Assets objects
Platform Notice: Data Center Only - This article only applies to Atlassian apps on the Data Center platform.
Note that this KB was created for the Data Center version of the product. Data Center KBs for non-Data-Center-specific features may also work for Server versions of the product, however they have not been tested. Support for Server* products ended on February 15th 2024. If you are running a Server product, you can visit the Atlassian Server end of support announcement to review your migration options.
*Except Fisheye and Crucible
Summary
Every object in Assets has an import source, which records the import that created or last updated it. This value used to be read only, so administrators could not correct it. As a result, objects with a missing or mismatched import source were skipped by an import's missing objects action and were never updated or removed as expected.
This feature lets administrators view, set, and clear an object's import source, either one object at a time or in bulk, so the missing objects action works on objects that were previously skipped.
Environment
Jira Service Management Data Center 10.3.24 and later
Jira Service Management Data Center 11.3.9 and later
What is an import source, and why were objects skipped?
When an import runs, it stamps every object it creates or updates with itself as the import source. During later imports, an object is only considered for the missing objects action if it was previously created or updated by that same import source.
Objects created manually, or created before version 5.7, have no import source, so imports ignore them. Setting the correct import source on those objects brings them back under the missing objects action.
Solution
If you cannot upgrade to a version that includes this feature, the earlier workaround is still available. See Objects are not marked as missing by the import due to null or different import source.
Before you begin
This feature is enabled by default and is controlled by a feature flag.
A new Import source select dropdown appears in the edit menu of an object. You can also add the same field to an object layout so it shows in the side panel, as described in Step 1.
If the feature flag is ever turned off, the import source stays read only and the controls described below do not appear.
Step 1: Add the Import source field to the object layout
The import source control appears in the object view side panel. You add it once per object type through the layout configuration.
Open the object type you want to edit and click the dropdown Object Type > Configure.
Press Configure page layout on the top right.
Add a new side panel and select Import source from the Panel content dropdown field.
Save the layout.
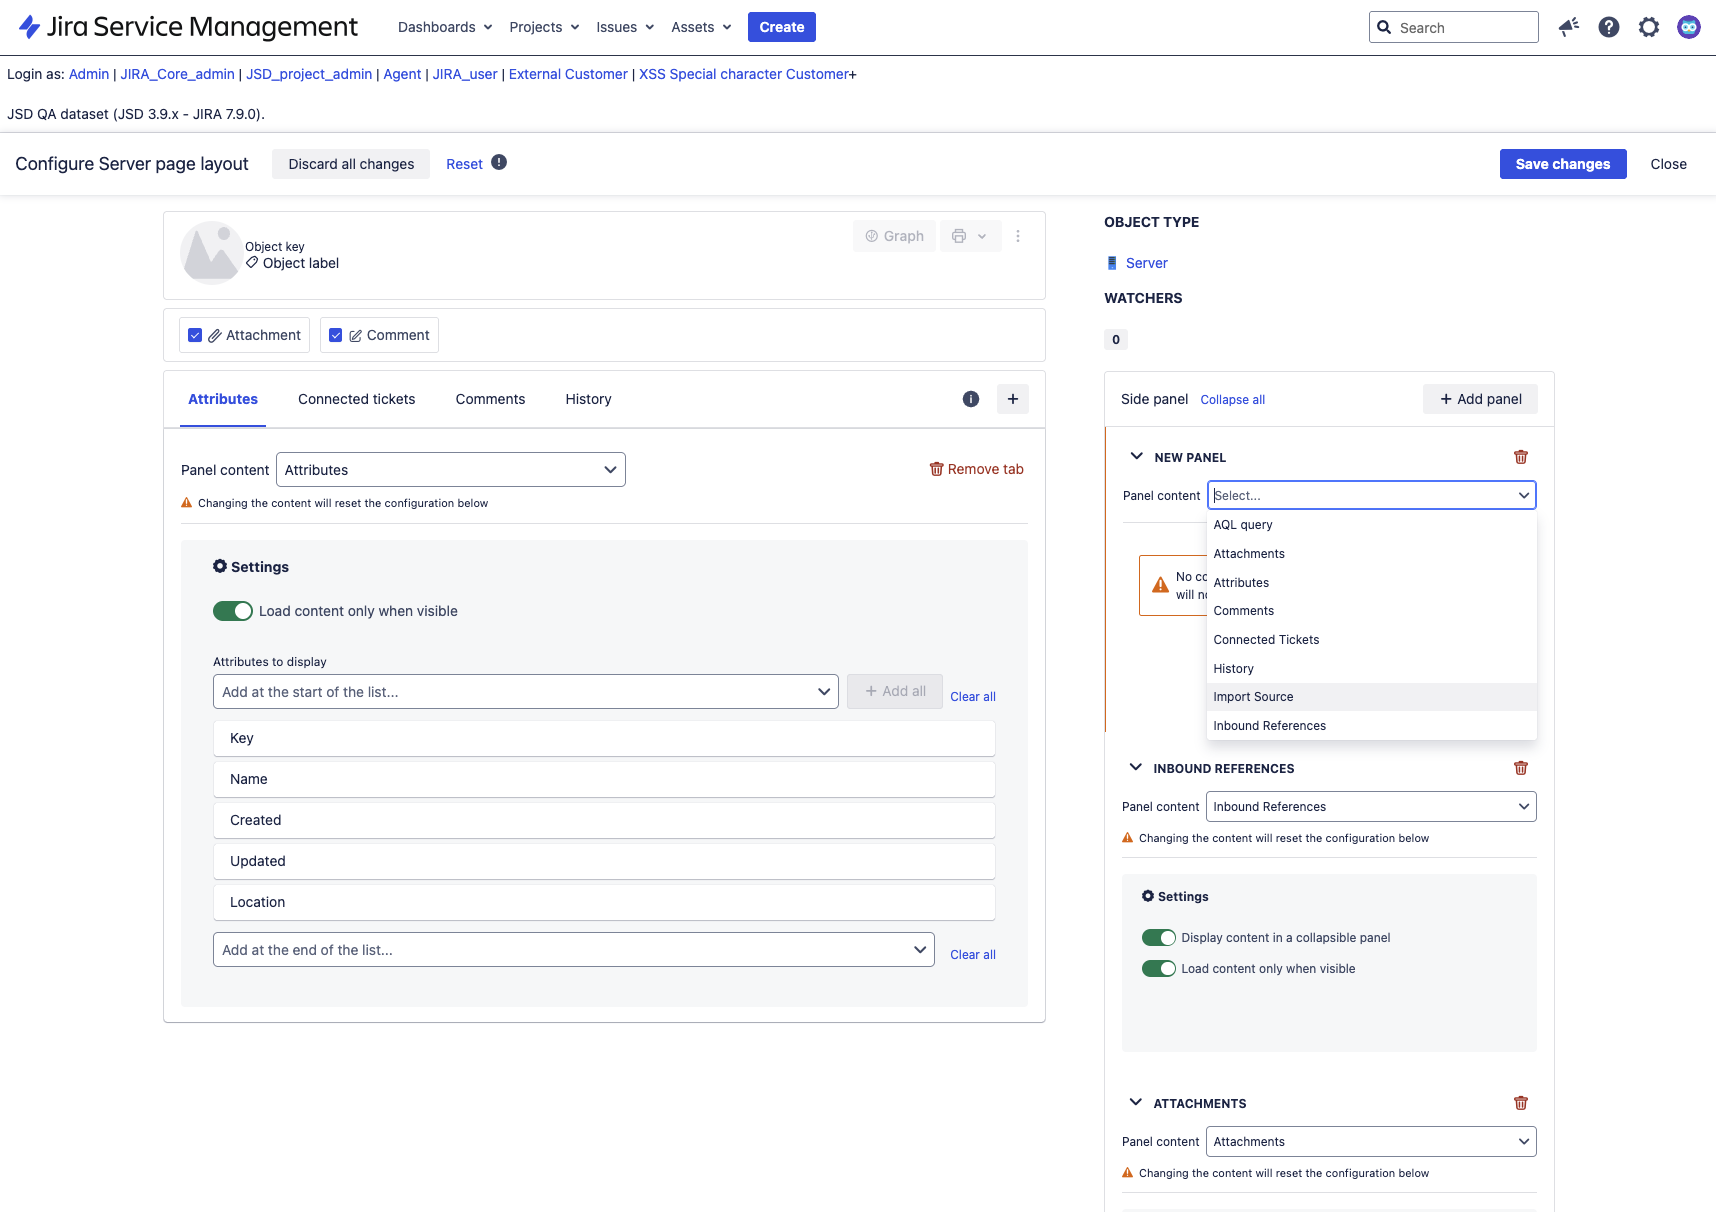
The import source now shows as a dropdown in the side panel when you view an object of that type.
Step 2: Set or clear the import source on a single object
There are two ways to set or clear the import source on a single object.
Option 1: From the object's edit menu
An Import source dropdown is available in the object's edit menu, even if you have not changed the layout.
Open the object you want to change.
Open its edit menu.
In the Import source dropdown, select the import source you want to assign, or clear the value to remove it.
Save your change.
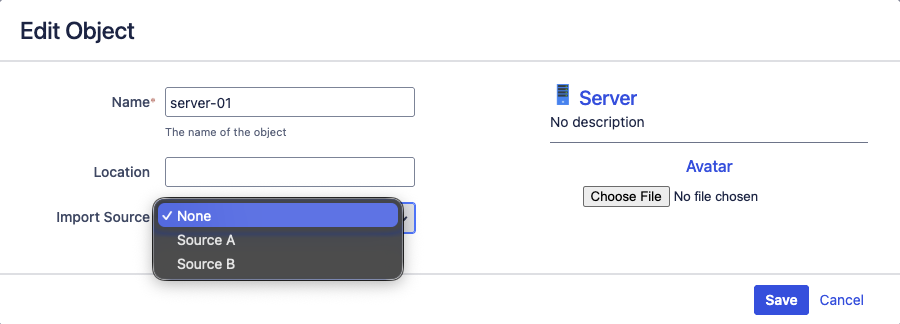
Option 2: From the side panel
If you added the Import source field to the layout in Step 1, you can also change it directly from the side panel.
Open the object you want to change.
In the side panel, find the Import source dropdown.
Select the import source you want to assign, or clear the value to remove it.
Save your change.
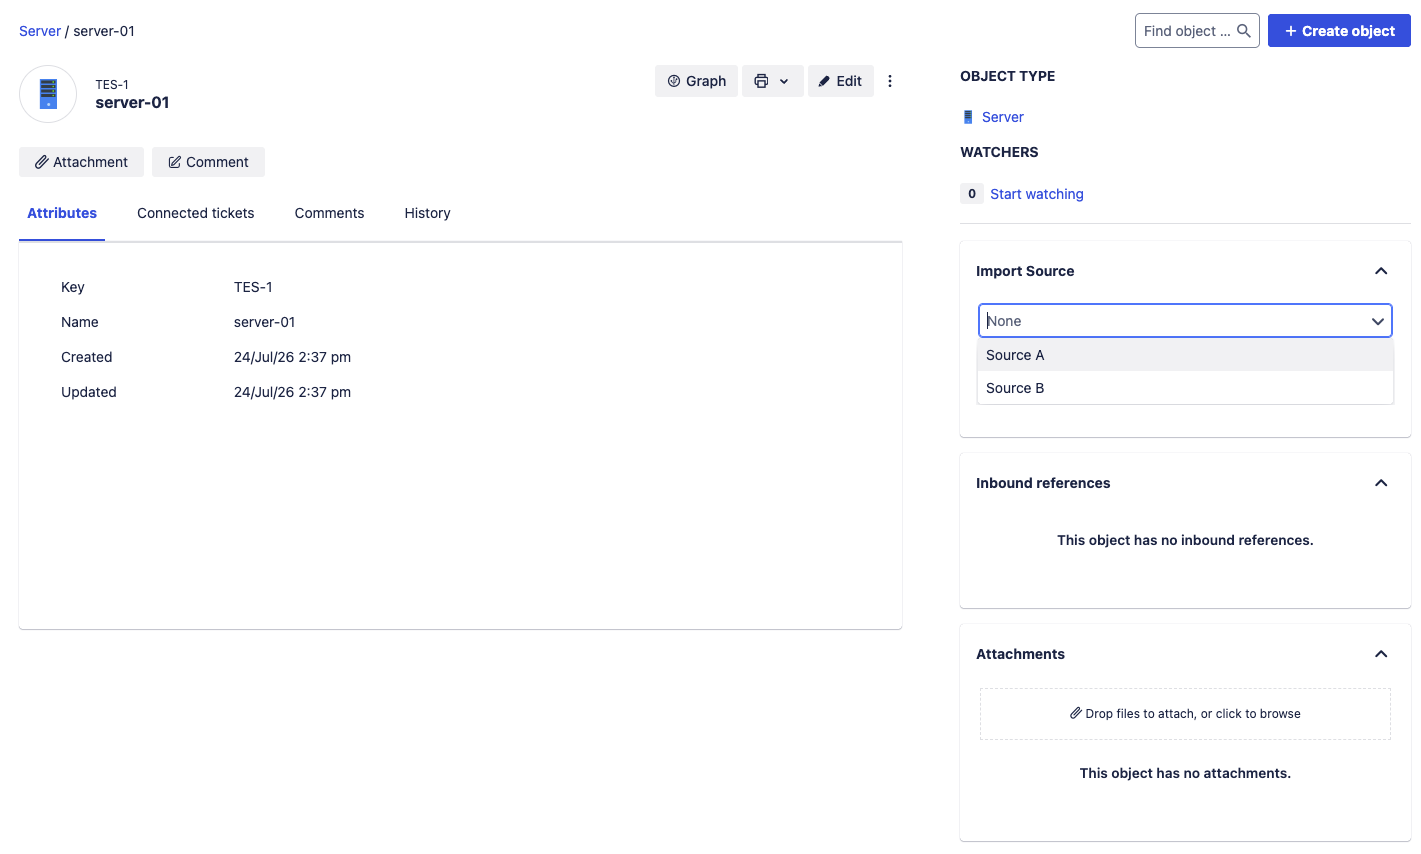
Step 3: Set the import source on multiple objects at once
If many objects need the same import source, you can update them together instead of one by one.
Open the object list or search results that contain the objects you want to update.
Select the bulk actions dropdown and click Edit objects to set the import source for all selected objects.
Verify and save the change.
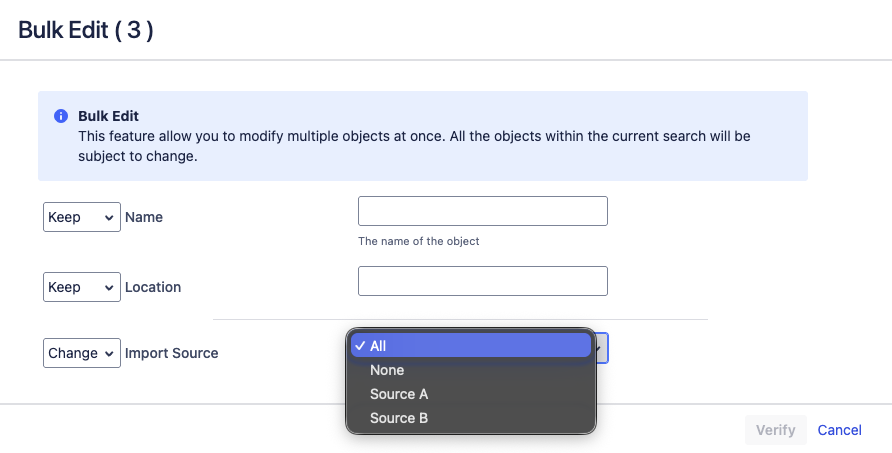
Step 4: Synchronize the import to confirm missing objects are handled
Once the affected objects carry the correct import source, synchronize the import again. Objects that are no longer present in the data source are now updated or removed according to your Missing objects setting.
Open the object schema that contains the import.
From the schema, open Object Schema > Configure > Import and select the import you want to use.
Select Synchronize manually to start the import, or wait for its next scheduled synchronization.
Confirm that the previously skipped objects are now handled as expected.
Related content
Objects are not marked as missing by the import due to null or different import source (earlier workaround)
JSDSERVER-15727 (resolved report)
Was this helpful?