Jira Align Enterprise Insights Self-Hosted - Installation script can't connect to the Database
Summary
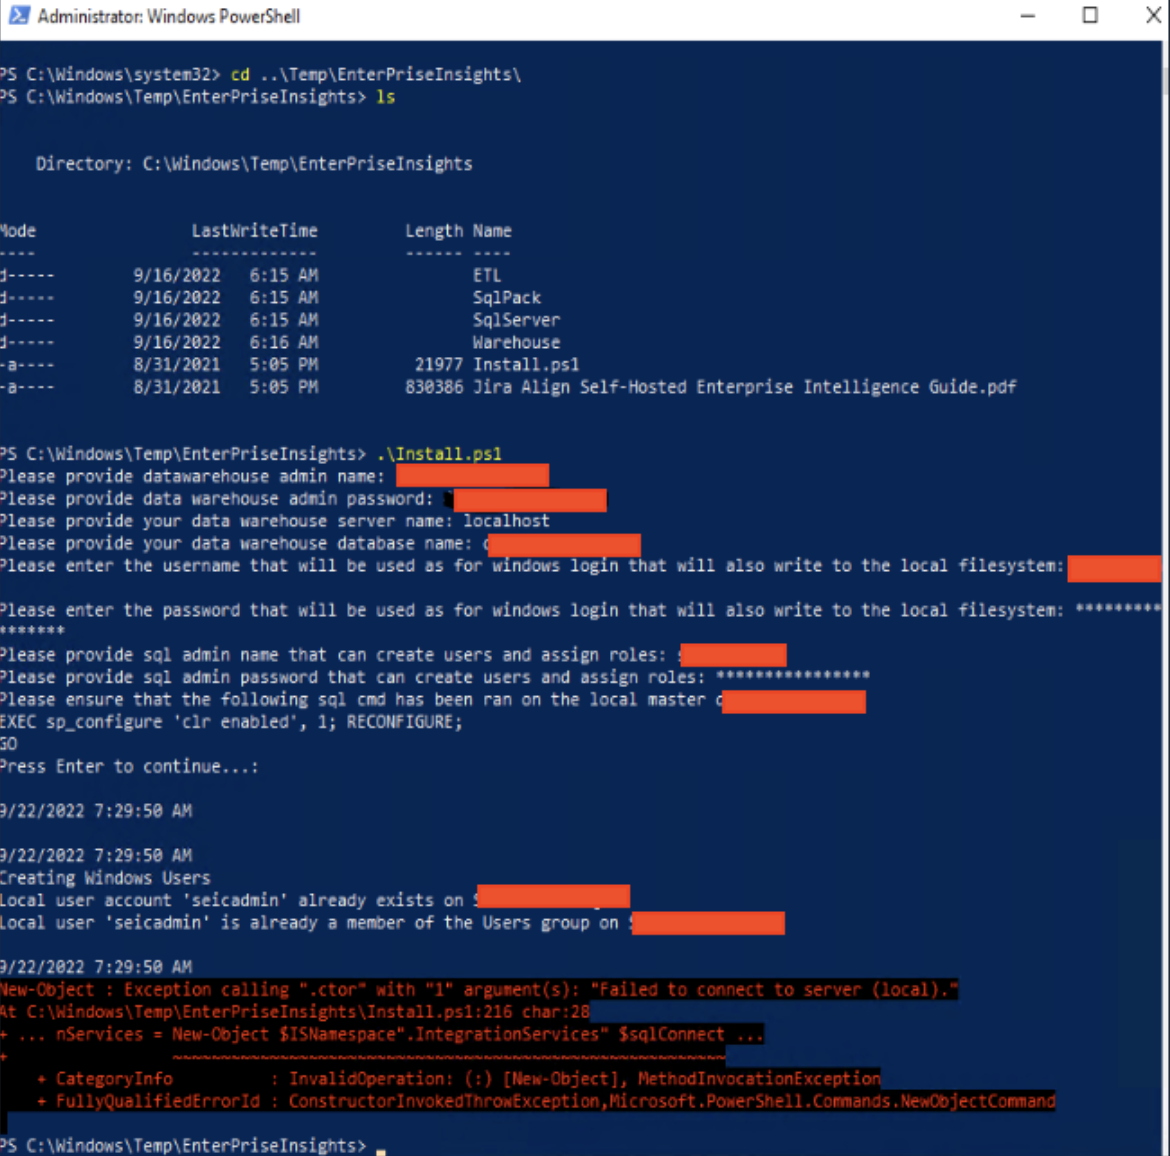
While deploying the script to install or upgrade the Enterprise Insights Self-Hosted, the script shows an error that can not connect to the database.
The error message is: “Failed to connect to server (local).”
Environment
Jira Align Self-Hosted
Diagnosis
Check if the user runs the PowerShell with Admin privileges.
Check the SQL Configuration where can see that the pipes named were enabled. TCP/IP connection must be enabled.
Check if there is no firewall enabled to block the connection.
SQL services, including "SQL Browser" and "SQL Agent" must be running and working.
Check if the SQL connection using SQL Management is accepted using "localhost", "(local)" and the IP.
Cause
This is happening because the user running the script through PowerShell is not a member of the SQL Server. When a Powershell is used in Admin mode, the user logged into Windows is associated with the Powershell session, therefore, this Windows user will communicate with the SQL Server. With this defined, it is necessary that the Windows user that is being used in Powershell, also be added to SQL Server, because it will be logged in using authentication via Windows users, otherwise, the connection between Powershell and SQL Server will be refused.
Solution
Go to the SQL Server, where the Enterprise Insights will be installed/upgraded.
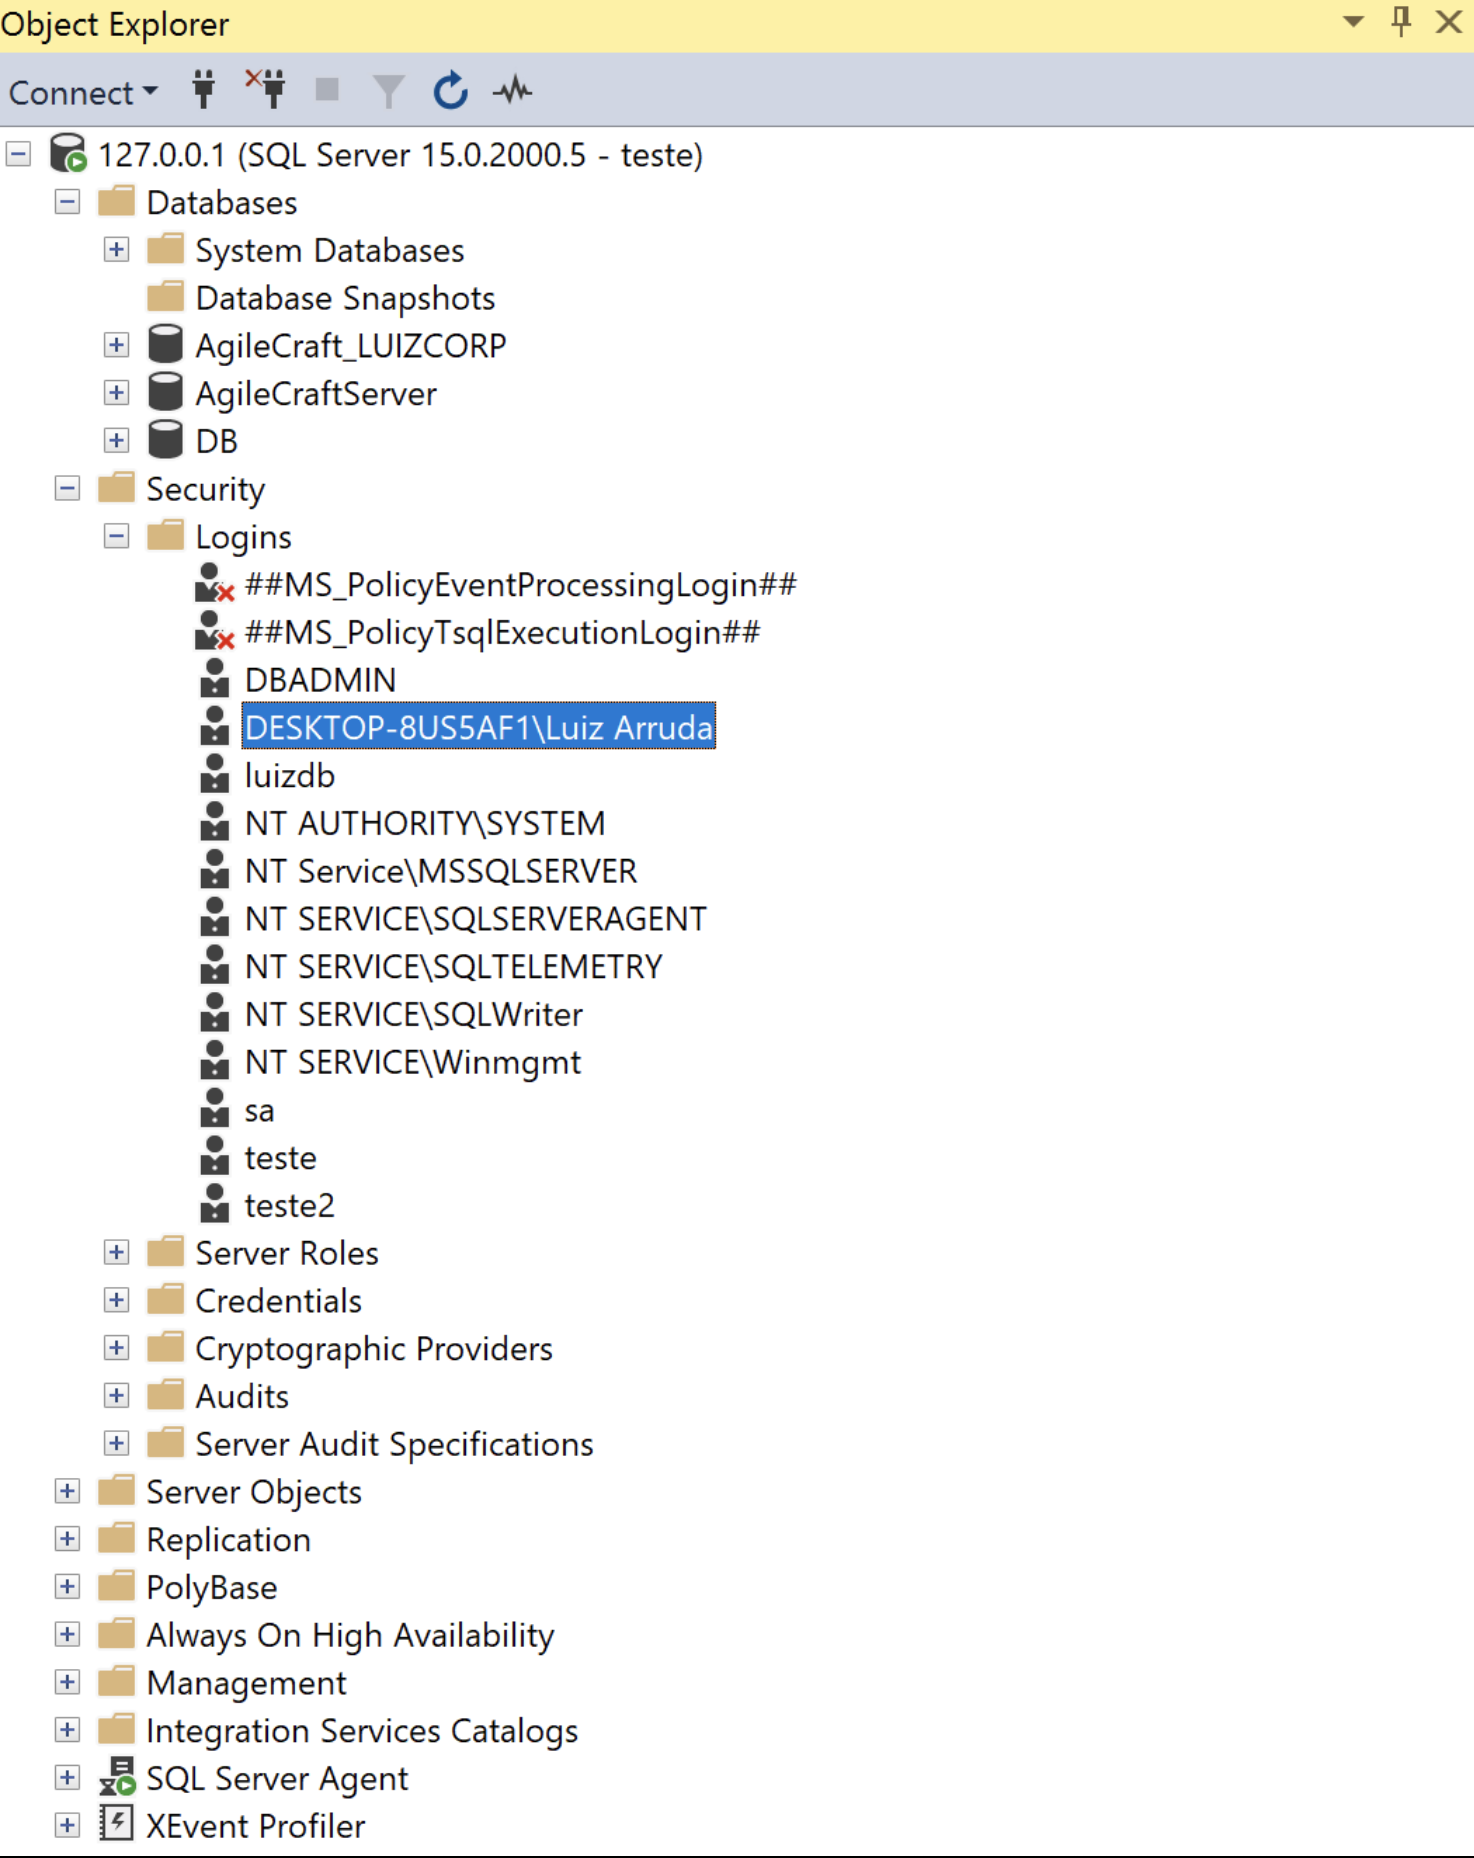
After connecting, go to Security/Logins
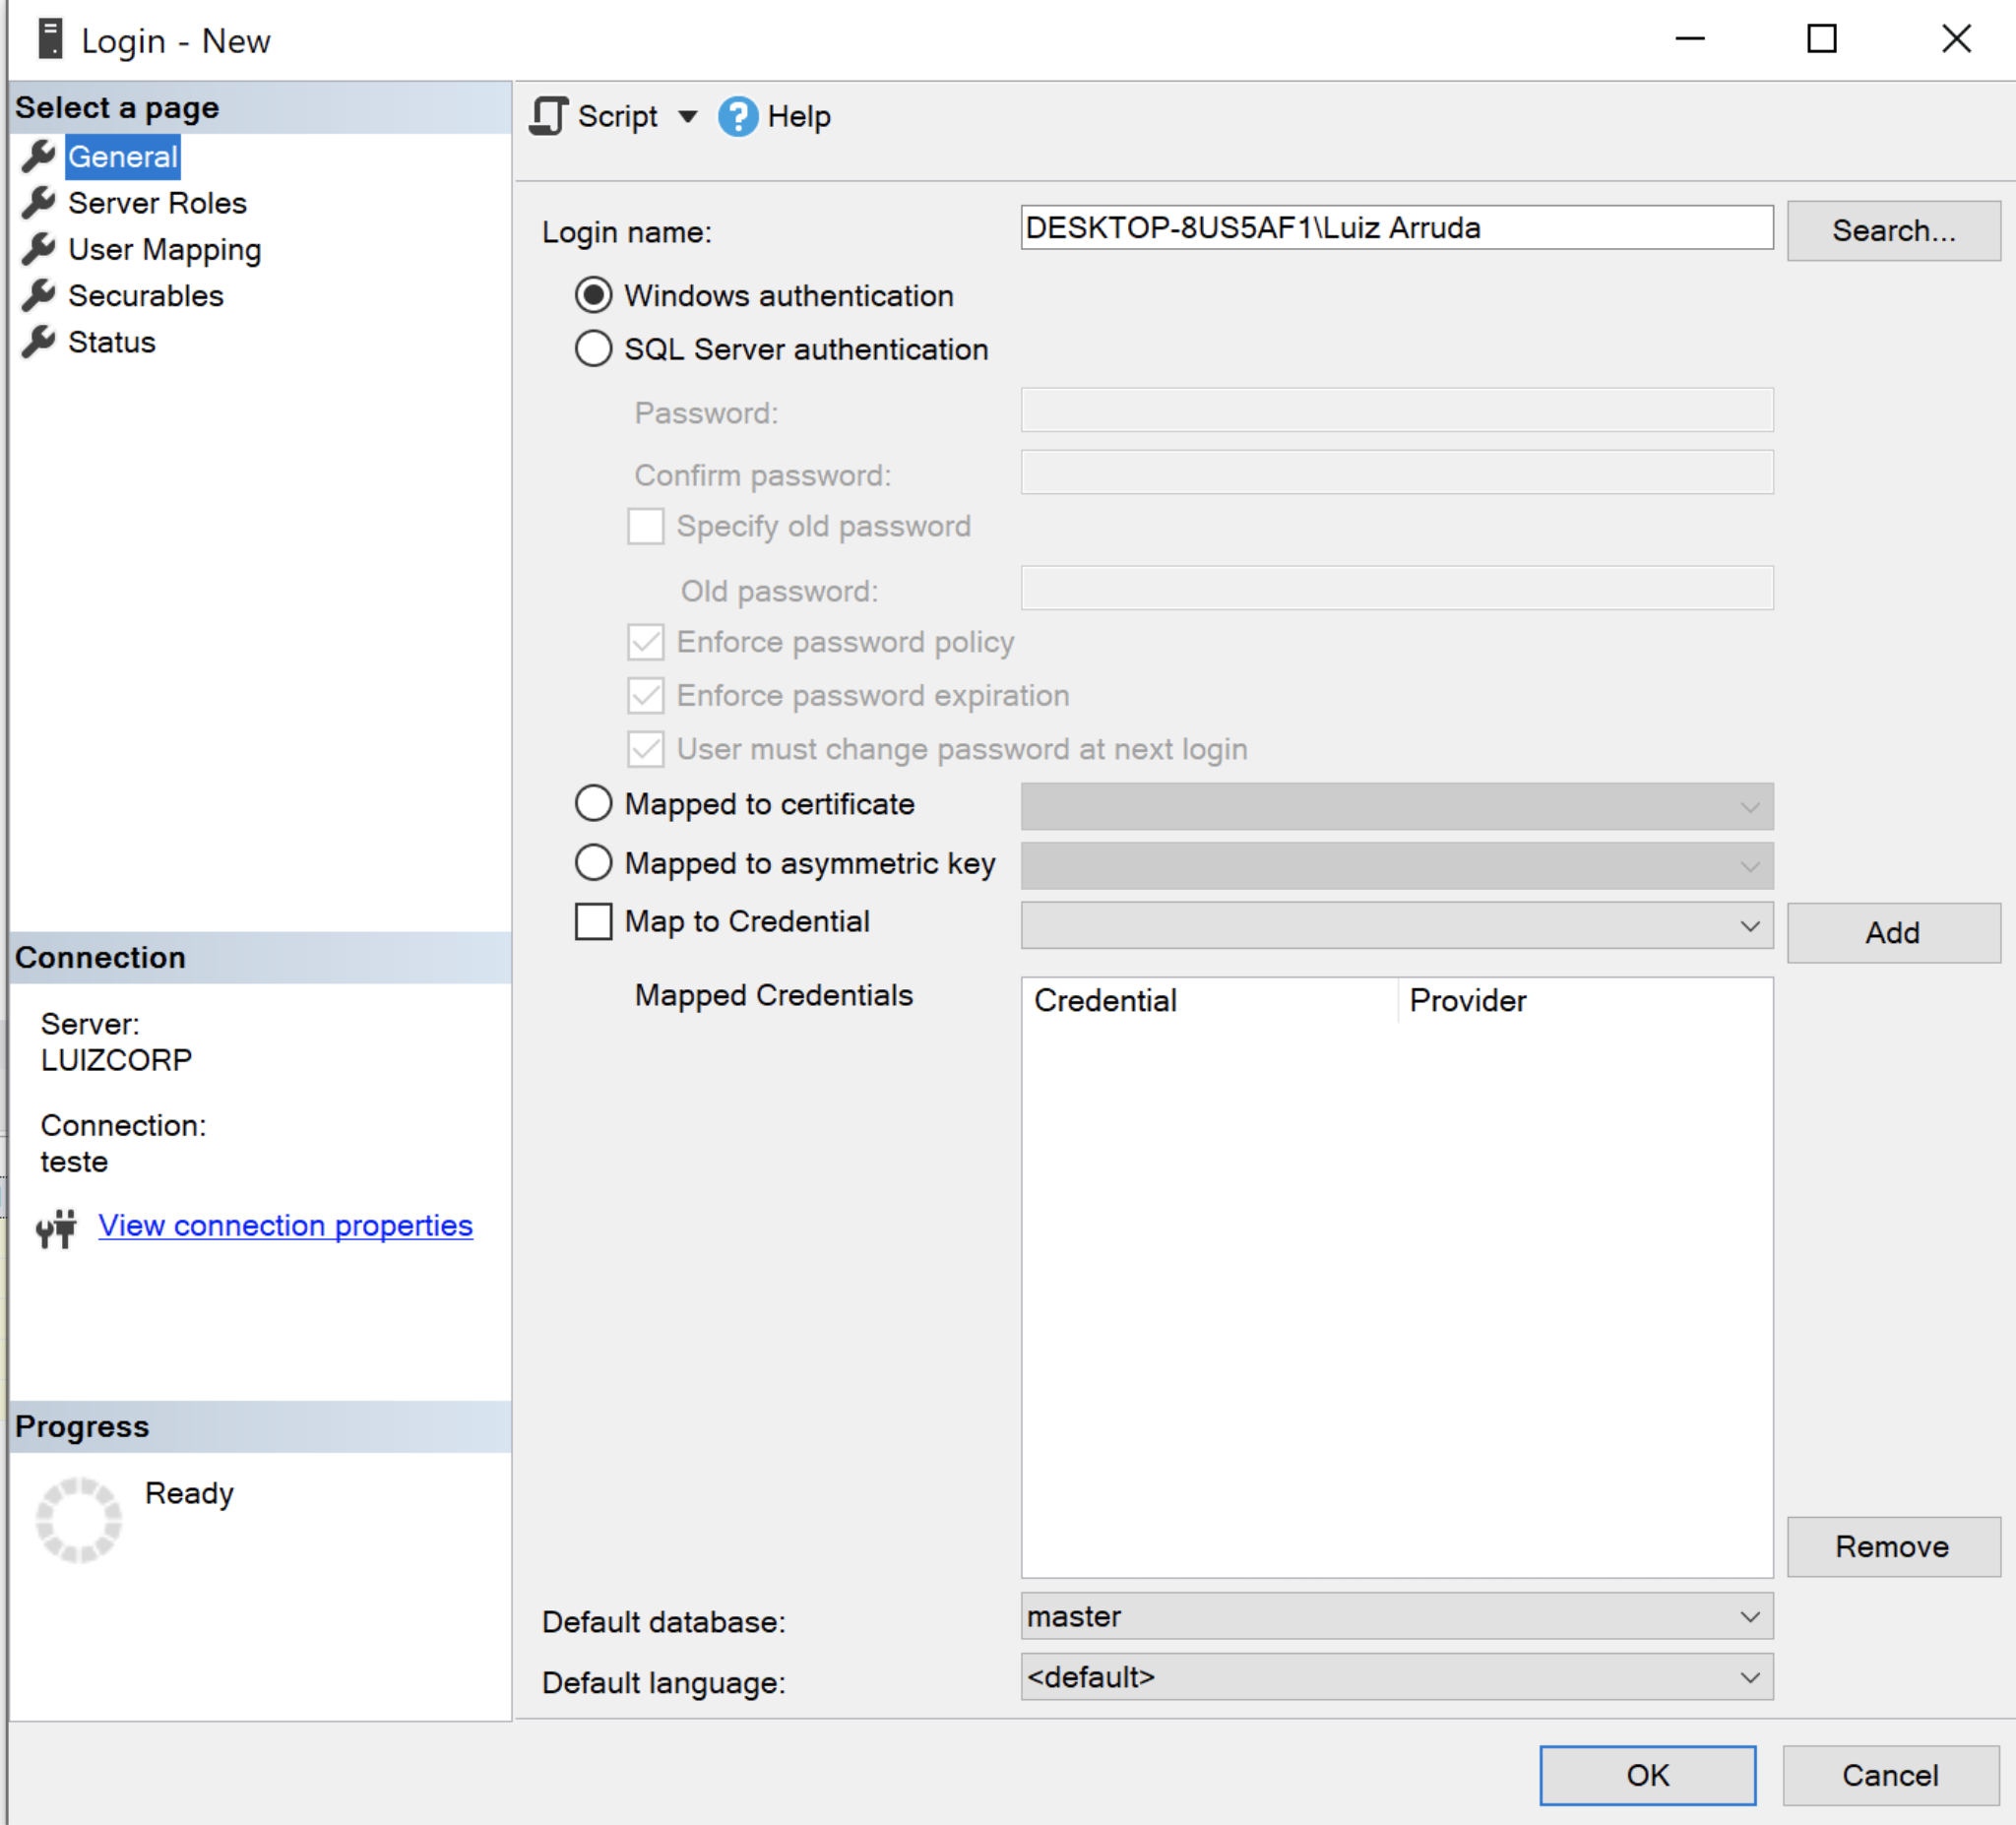
Right-click on Logins, click on “New Login…”
In the “Login Name” field, fill it with the Domain\User_Name.
Keep checking the “Windows Authentication” radio button.
Go to the “Server Roles” tab, and check the “sysadmin” checkbox.
Click on “Ok” to save it.
Refresh the database connection.
The user will be displayed on the Security/Logins path.
Was this helpful?