Configuring Jira connector credentials using Jira Cloud API service account
Summary
This article covers configuring the Jira connector credentials using the new Jira Cloud API service account.
Prerequisites
Jira Organization admin access to Atlassian Administration
Jira Align administrator
Solution
Create a Jira service account
Service accounts are created in Atlassian Administration and are not provisioned via IdP. An email and account ID are auto-generated; email cannot be changed later.
In Atlassian Administration, select the organization you want to create the service account.
Navigate to Directory > Service accounts, then select Create a service account.
Provide a name (6–30 alphanumeric chars) and optional description.
Select Jira app role for service account. App: Jira (not to be confused with Jira Administration) Roles: User
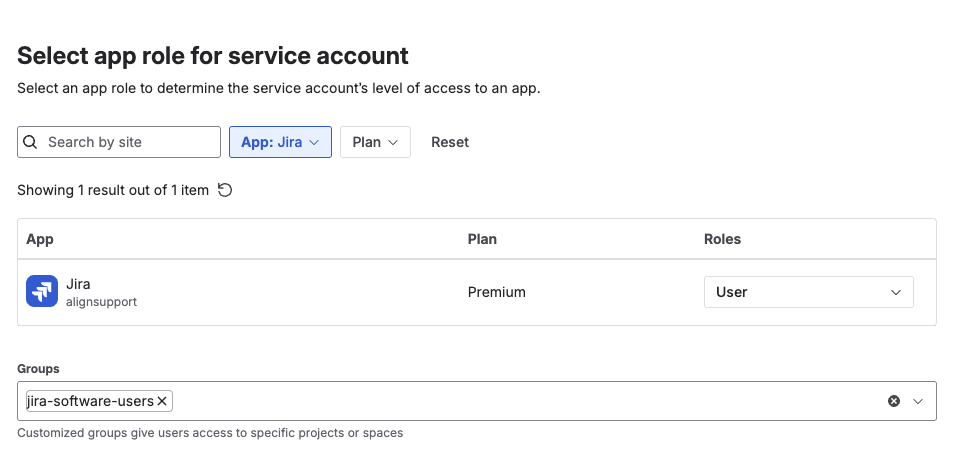
Add to appropriate groups that grant the least-required permissions.
Tip: Place the service account in a dedicated group (for example, “jira-connector-svc”) and manage all project/issue permissions via this group to simplify auditing and offboarding.
Select Create.
Create the API token
Select the service account you just created
Select Create credentials
Select API Token as authentication type
Enter the name of the API token
Set the expiry date (Tokens can last no longer than 365 days)
Select token scopes
Set the following filter:
App: Jira
Scope Actions:
Read
Write
Manage
Select the following scopes:
Classic
manage:jira-projectread:jira-userread:jira-workwrite:jira-work
Granular
read:board-scope:jira-softwareread:board-scope.admin:jira-softwareread:issue-details:jiraread:jql:jiraread:project:jiraread:sprint:jira-softwarewrite:board-scope:jira-softwarewrite:epic:jira-software
Note: For integrations like ServiceNow, confirm the required API token scopes in ServiceNow's integration documentation. If using a service account, ensure it complies with your organization’s IdP (e.g., AD or Okta) integration policies.
Select Next
Review your API token, and the SCOPES should like like the following below:
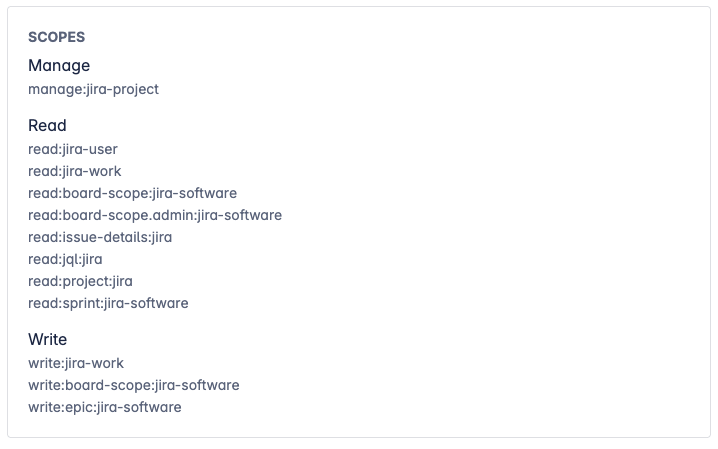
Select Create
Copy API token
Grant minimum Jira permissions
Align the service account’s permissions with what the connector needs to do:
Read-only integrations: Browse Users and Groups (Global Permission), Browse projects, View issues, View sprint/board info
Read/write integrations: Add/edit issues, transitions, comments, work logs (as needed), and assign Administer Jira permissions if required by specific tools like ConductorOne
Jira Software features: Board/sprint read access and board-scope writes if creating boards/epics/sprints. Note: OAuth 1.0a is not supported for Jira Align integration; use an API token as authentication type instead. Avoid site-admin or organization-admin roles for service accounts. Apply least privilege and restrict to required projects
Avoid site-admin or organization-admin roles for service accounts. Apply least privilege and restrict to required projects. Please refer to Jira integration prerequisites.
If you encounter errors related to permissions, ensure that the service account has the following minimum Global Permissions configured:
Browse Users and Groups and Administer Jira
For detailed requirements specific to your integration (e.g., ConductorOne, ServiceNow), consult the respective tool's documentation and confirm the required scopes.
Configure Jira connector using API service account
Cloud IDs are stable identifiers for a site. If you connect multiple Jira sites, retrieve the Cloud ID per site and configure a separate connector entry for each.
Important to take note of the Jira API URL endpoint when using the Jira service account. This is different from the Jira API endpoint used for a non-service account API credential.
Determine your Jira cloud ID by running this in your browser: 'https://<Jira Cloud URL>/_edge/tenant_info'. The cloud ID will be displayed in the resulting JSON response under the 'cloudId' key. Copy this value to use in your API URL.
Copy the CloudID.
In Jira Align, select Settings > Jira Settings > Jira Connectors
Enter the following:
Jira Link: Replace '<Jira Cloud URL>' with your organization's Jira cloud URL, e.g., 'https://example.atlassian.net/browse/{external}'.
Name: Provide a descriptive name for the connector.
Jira API URL: https://api.atlassian.com/ex/jira/<cloudid from step 2>.
Authentication Type: API service account token Authentication.
Jira Username: Replace with the email address of the Jira service account you created.
Jira API token: Replace with the API token generated for the Jira service account.
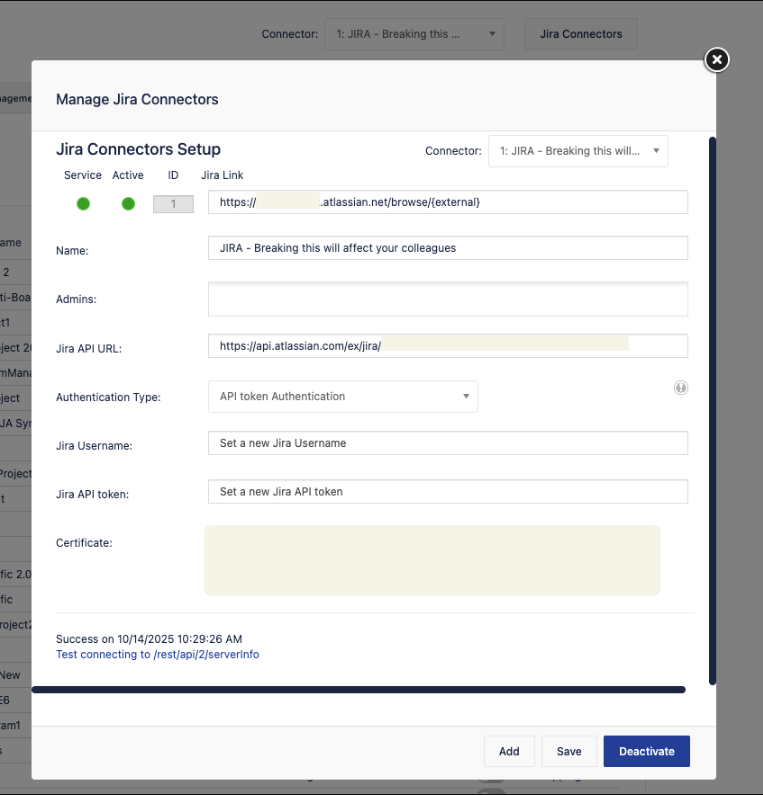
Select Save > Activate
Related references
Was this helpful?