Configuring elastic instances to use EFS (Elastic File System)
Platform Notice: Data Center Only - This article only applies to Atlassian apps on the Data Center platform.
Note that this KB was created for the Data Center version of the product. Data Center KBs for non-Data-Center-specific features may also work for Server versions of the product, however they have not been tested. Support for Server* products ended on February 15th 2024. If you are running a Server product, you can visit the Atlassian Server end of support announcement to review your migration options.
*Except Fisheye and Crucible
Why should I use the EFS with Elastic Bamboo?
The Amazon Elastic File System (EFS) provides simple, scalable file storage for use with Amazon EC2 instances in the AWS Cloud. When mounted on Amazon EC2 instances, an Amazon EFS file system provides a standard file system interface and file system access semantics. Multiple Amazon EC2 instances can access an Amazon EFS file system at the same time, allowing Amazon EFS to provide a common data source for workloads and applications running on more than one Amazon EC2 instance.
Because an elastic instance is stateless, and also is the elastic agent that runs on it, every time an elastic instance is restarted from the same image:
Any resources that its elastic agent must retrieve externally (for example, Maven repository artifacts), must be downloaded in their entirety.
Full checkouts must be performed by elastic agents when new Jobs are built.
Therefore, you can use the EFS to store these external resources in an EFS partition so that they do not have to be downloaded or source code checked out each time you start up an elastic instance from an image. If your jobs rely heavily on downloading such resources and/or you are not performing clean builds each time, the EFS may significantly improve your build times.
Creating the Amazon EFS File System
To create an Amazon EFS File System please follow the steps outlined on this page at Amazon's website.
ℹ️ On step 4 from the document above, please choose the 'elasticbamboo' security group for all the Availability Zones.
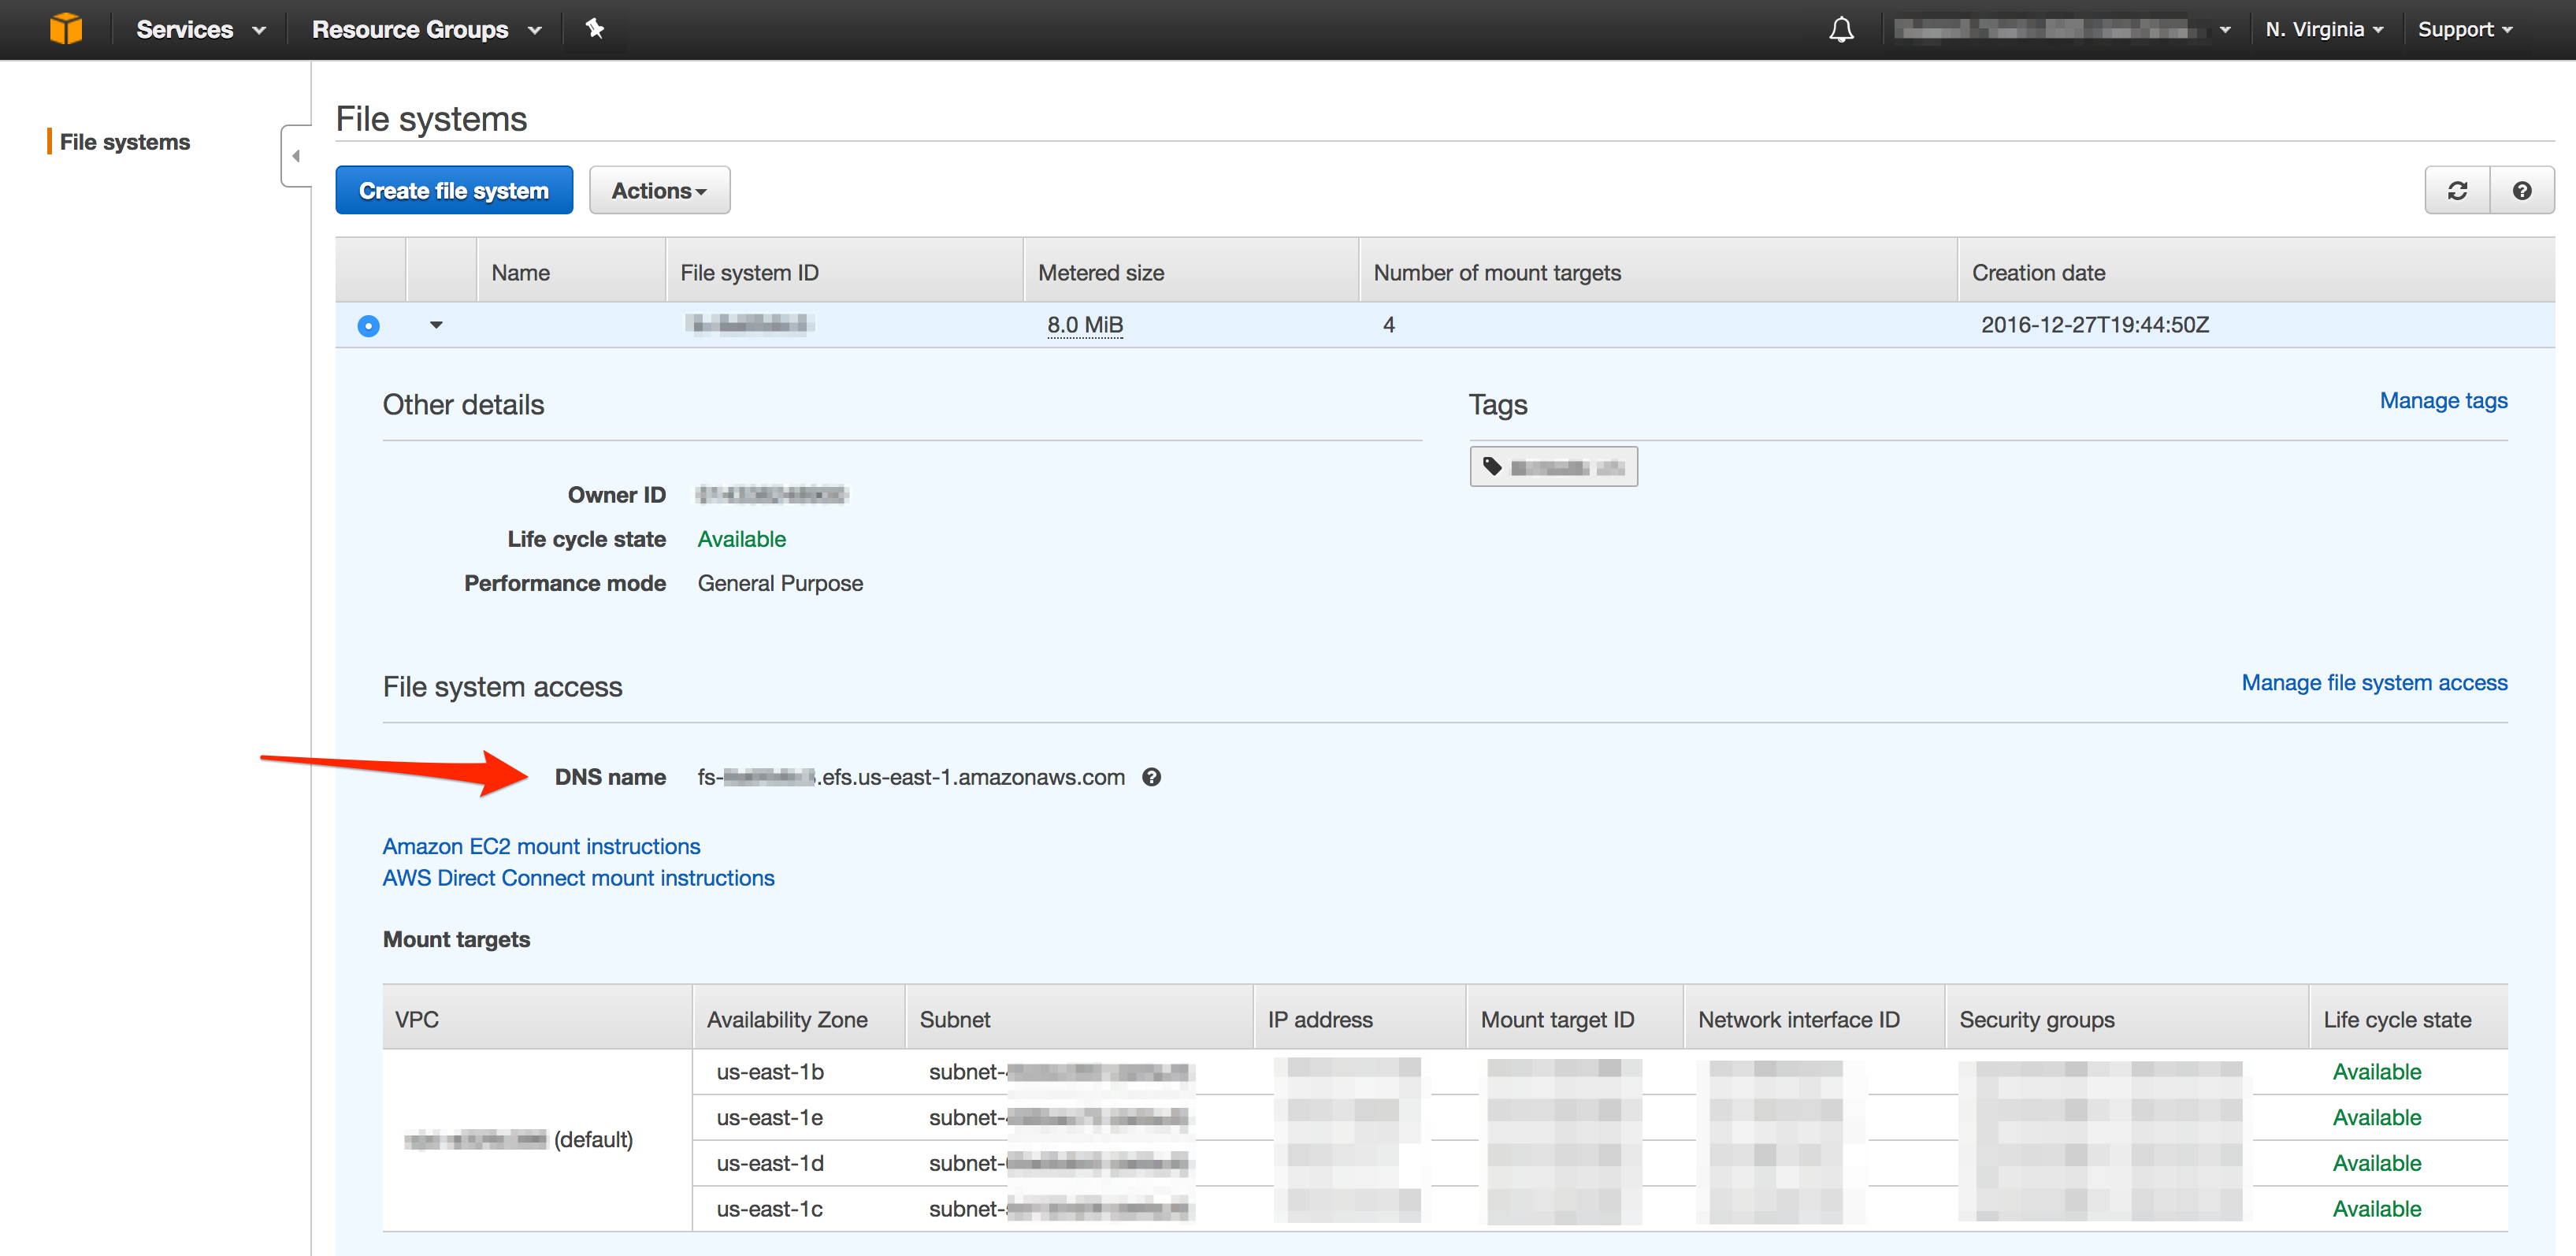
Once the EFS File System has been created:
Expand the File System details and copy/take note of your File System DNS name:
Editing security groups
Access the Security Groups panel in the AWS console (for the same region where you created the EFS File System on) and search for the 'elasticbamboo' security group to edit the inbound rules:
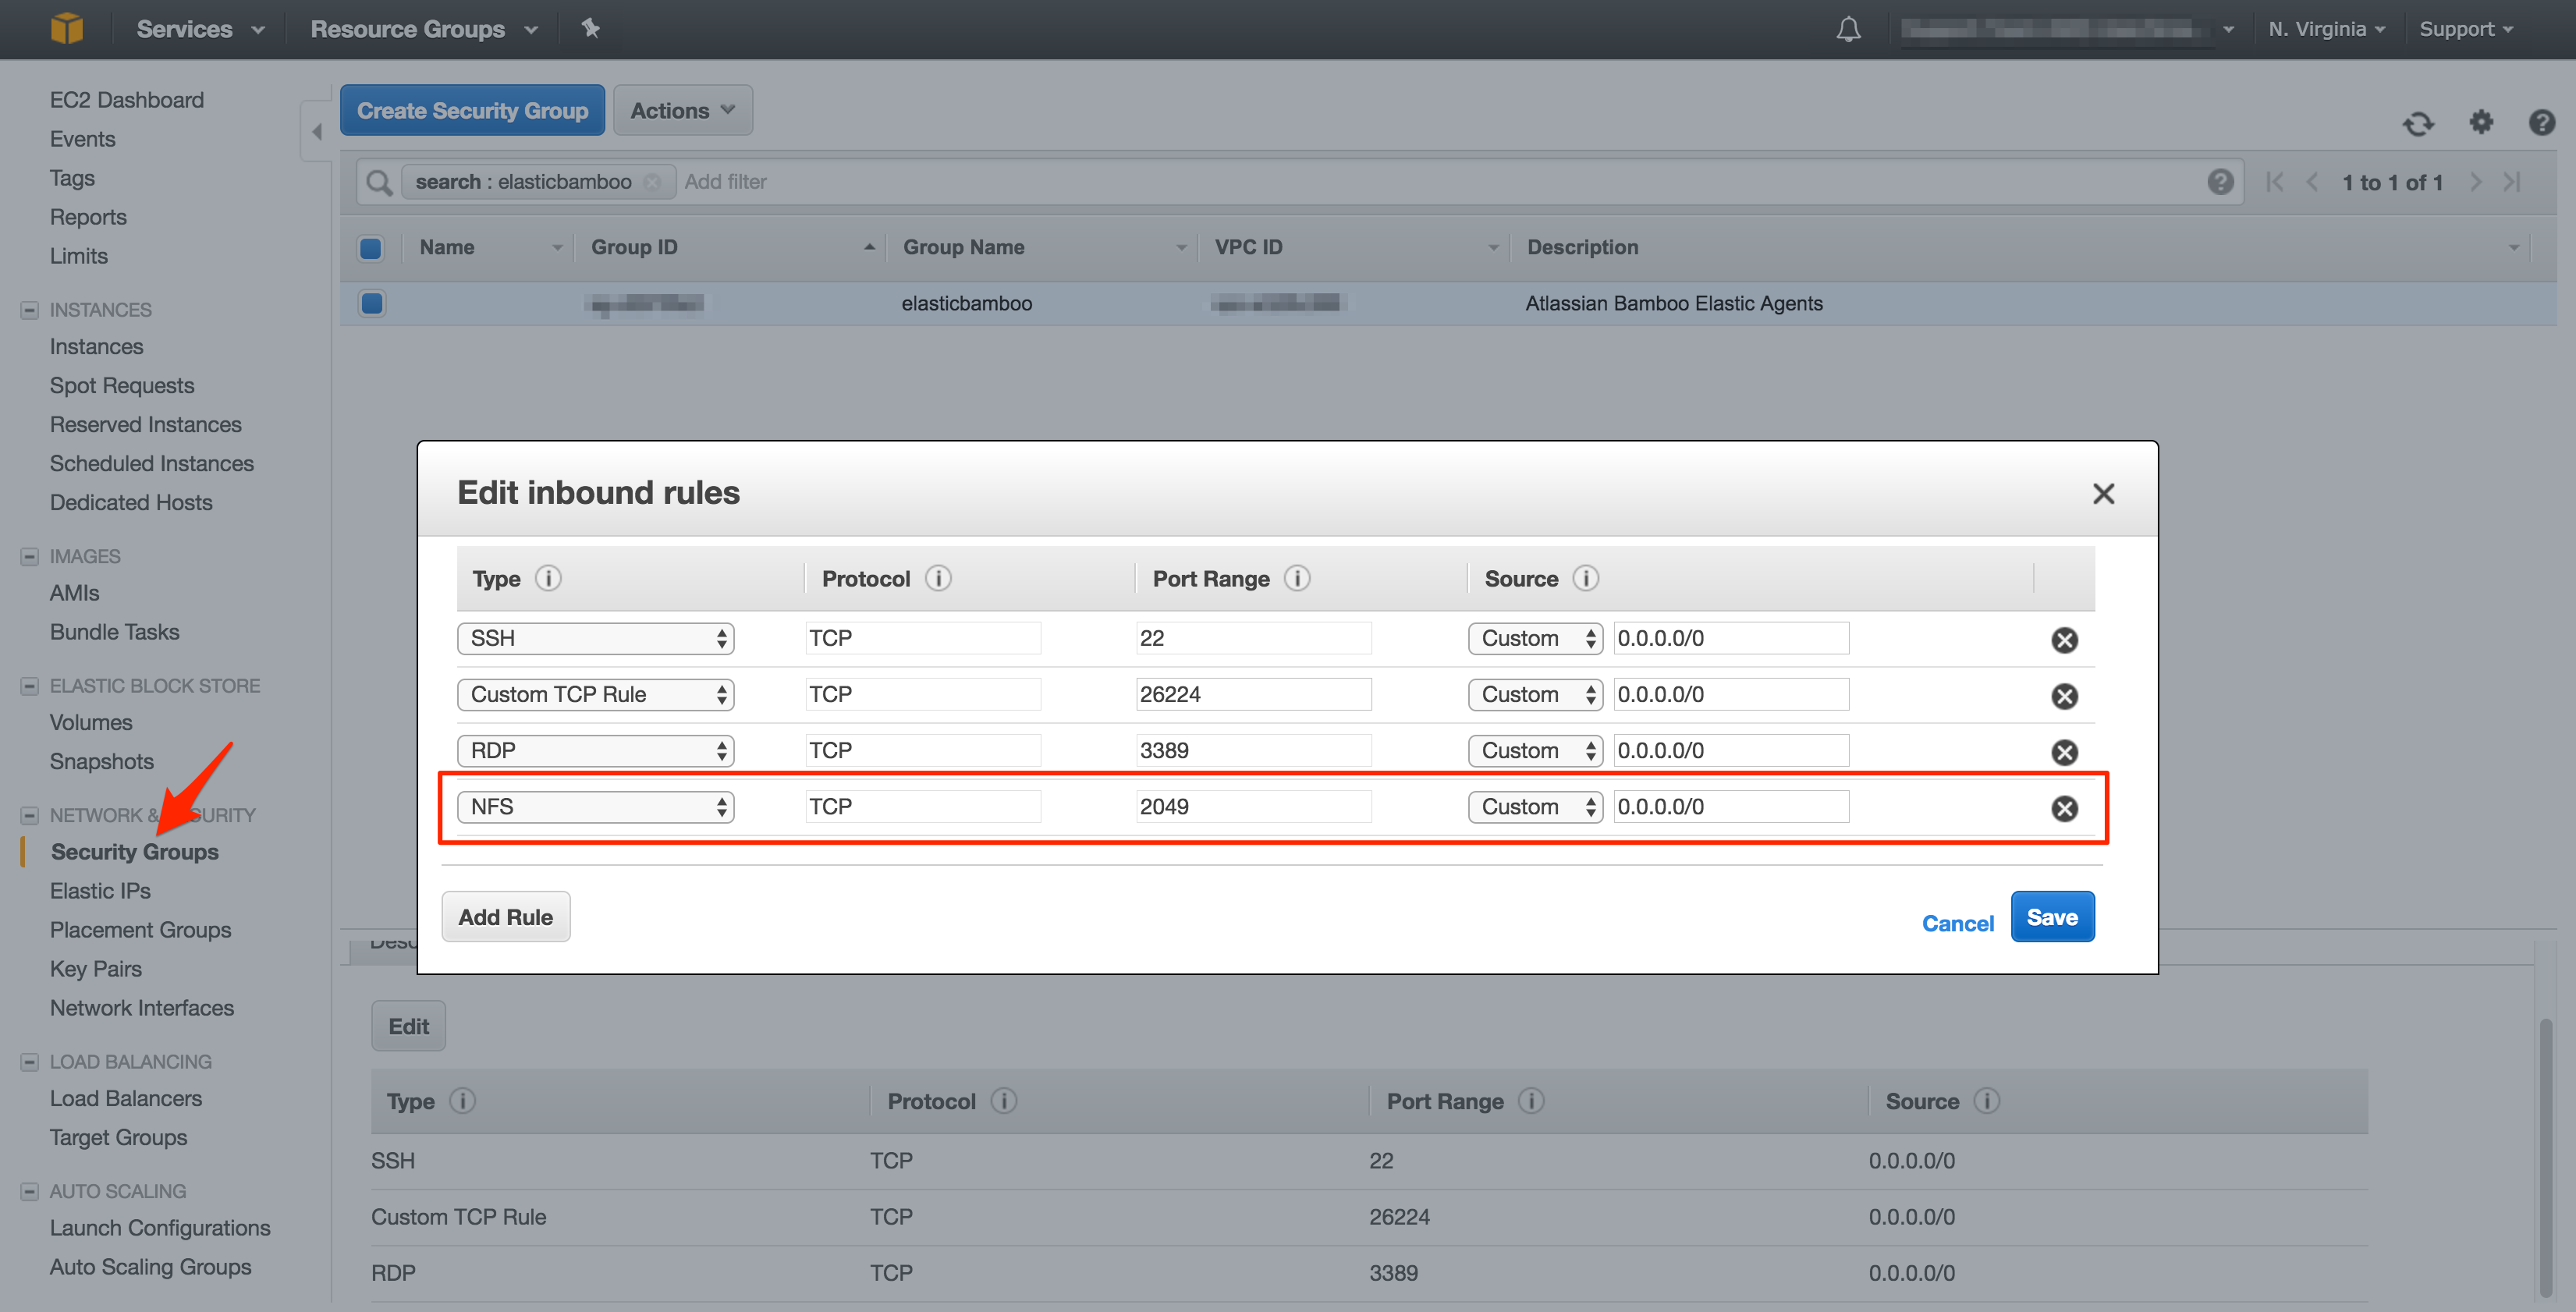
We need to add the NFS inbound rule on port 2049 and allow all connections. This is to ensure the EC2 instance started up by Bamboo can access the EFS File System through port 2049.
Configuring an elastic image to use the EFS File System
To configure Elastic Bamboo to use an EFS File System:
Click the

icon in the Bamboo header and choose Overview.
In the menu on the left, go to Elastic Bamboo > Image Configurations.
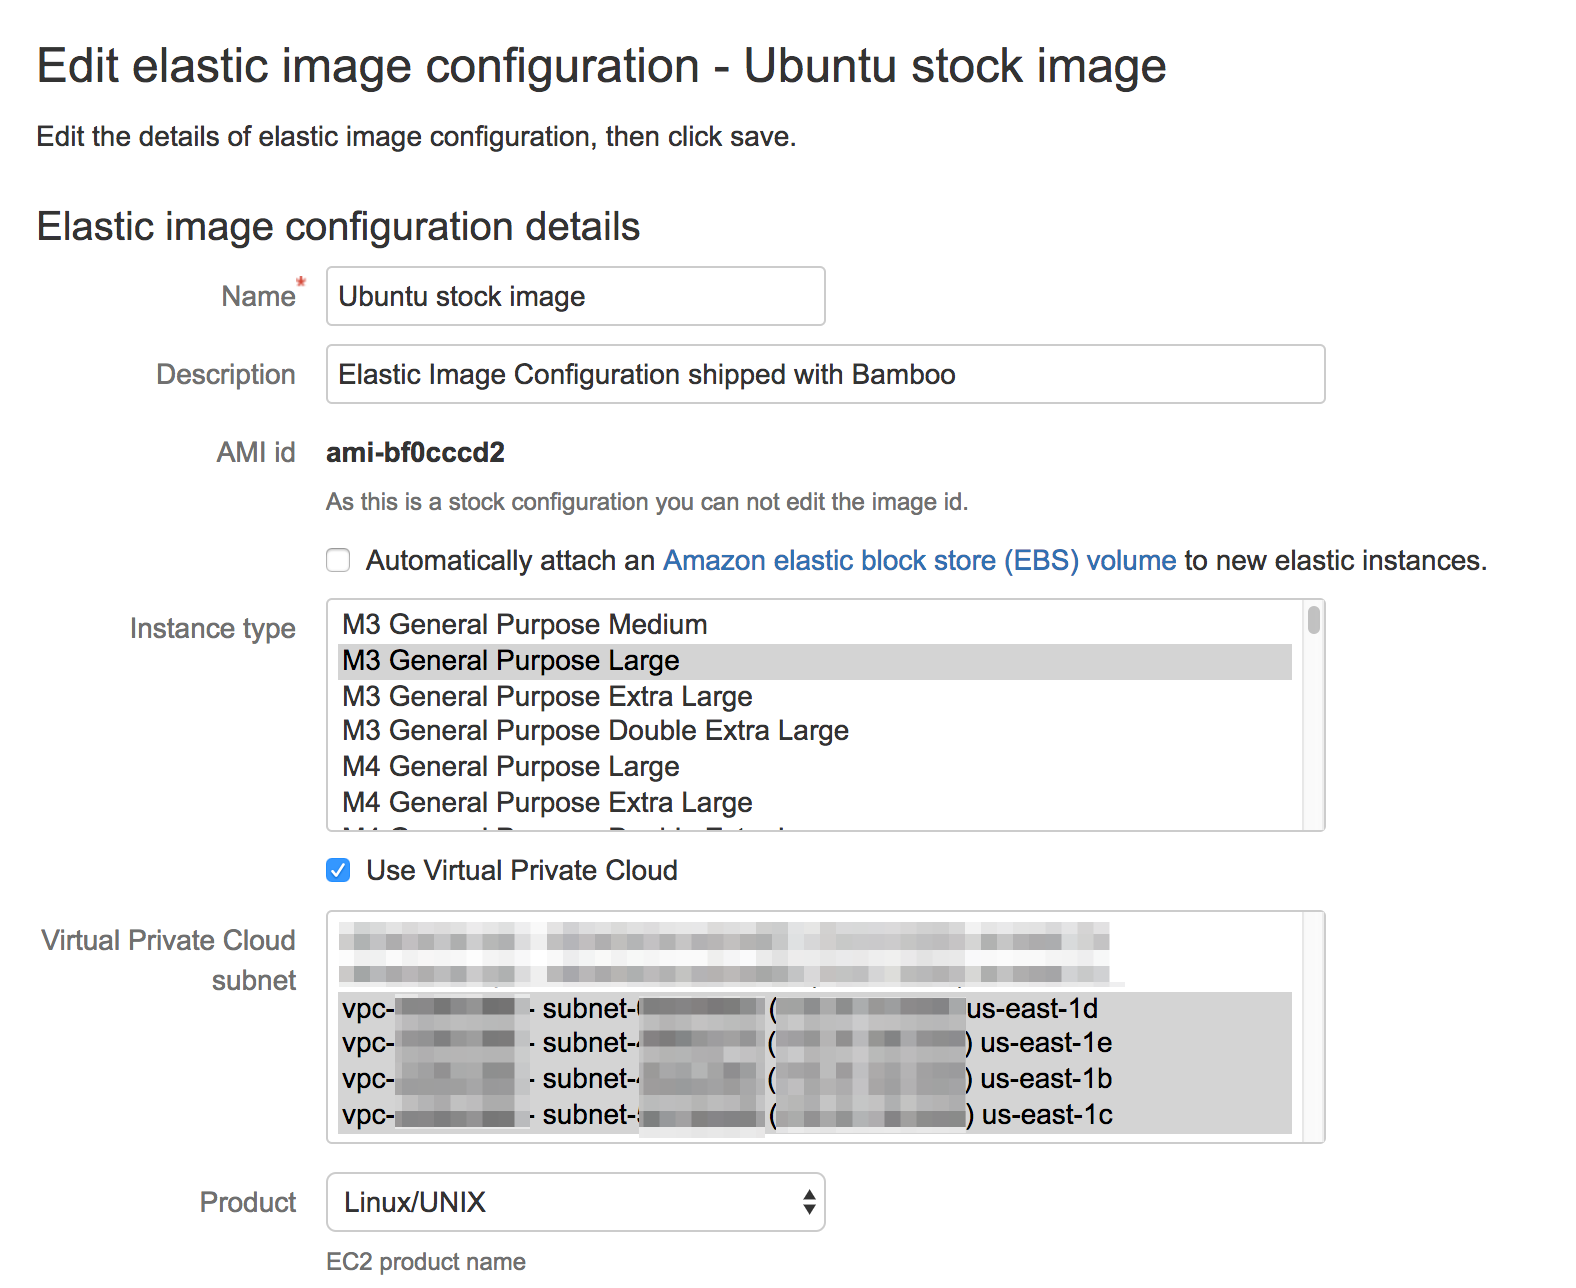
Click Edit in the 'Operations' column for the elastic image configuration that you would like to configure the EFS File System. The 'Edit Elastic Image Configuration - <imagename>' screen will display.
Select all subnets from the VPC list that were associated to the EFS File System at the very first step of this article (under 'Creating the Amazon EFS File System'):
Scroll the page down and locate the Instance startup script field.
Add the following script based on the image operating system:
On an Ubuntu instance:
#!/bin/bash

###
# Variables
##

DIR[0]='/home/bamboo/efs'
DIR[1]='/mnt/bamboo-ebs/bamboo-agent/'

###
# Shared Directory
##

function shared_directory_install_dependency {
  # Install the nfs client on your EC2 instance:
  sudo apt-get -y install nfs-common
}

function shared_directory_create {
  # Create a new directory on your EC2 instance:
  sudo mkdir "${DIR[0]}"
}

function shared_directory_mount {
  # Mount your file system using the DNS name:
  sudo mount -t nfs4 \
      -o nfsvers=4.1,rsize=1048576,wsize=1048576,hard,timeo=600,retrans=2 \
      fs-1a2fb3c4.efs.us-east-1.amazonaws.com:/ \
      "${DIR[0]}"
}

function shared_directory_change_permission {
  sudo chown -R bamboo:bamboo "${DIR[0]}"
}

##
# Define Shared Directory as new Build Working Directory
##

function working_dir_create {
  mkdir -p "${DIR[1]}"
}

function working_dir_agent_config {
  cp /opt/bamboo-elastic-agent/ebs-resources/bamboo-agent.cfg.xml "${DIR[1]}"
}

function working_dir_grant_permission {
  chown bamboo:bamboo -R "${DIR[1]}/../"
}

function working_dir_agent_config_update {
  sed -i "s:<buildWorkingDirectory>.*</buildWorkingDirectory>:<buildWorkingDirectory>${DIR[0]}</buildWorkingDirectory>:g" \
    "${DIR[1]}/bamboo-agent.cfg.xml"
  su - bamboo -c "/opt/bamboo-elastic-agent/ebs-resources/customiseInstance.sh"
}

##
# Run
##

shared_directory_install_dependency
shared_directory_create
shared_directory_mount
shared_directory_change_permission

working_dir_create
working_dir_agent_config
working_dir_grant_permission
working_dir_agent_config_update
On an Amazon Linux, Red Hat Enterprise Linux, or SuSE Linux instance:
#!/bin/bash

###
# Variables
##

DIR[0]='/home/bamboo/efs'
DIR[1]='/mnt/bamboo-ebs/bamboo-agent/'

###
# Shared Directory
##

function shared_directory_install_dependency {
  # Install the nfs client on your EC2 instance:
  sudo yum install -y nfs-utils
}

function shared_directory_create {
  # Create a new directory on your EC2 instance:
  sudo mkdir "${DIR[0]}"
}

function shared_directory_mount {
  # Mount your file system using the DNS name:
  sudo mount -t nfs4 \
      -o nfsvers=4.1,rsize=1048576,wsize=1048576,hard,timeo=600,retrans=2 \
      fs-1a2fb3c4.efs.us-east-1.amazonaws.com:/ \
      "${DIR[0]}"
}

function shared_directory_change_permission {
  sudo chown -R bamboo:bamboo "${DIR[0]}"
}

##
# Define Shared Directory as new Build Working Directory
##

function working_dir_create {
  mkdir -p "${DIR[1]}"
}

function working_dir_agent_config {
  cp /opt/bamboo-elastic-agent/ebs-resources/bamboo-agent.cfg.xml "${DIR[1]}"
}

function working_dir_grant_permission {
  chown bamboo:bamboo -R "${DIR[1]}/../"
}

function working_dir_agent_config_update {
  sed -i "s:<buildWorkingDirectory>.*</buildWorkingDirectory>:<buildWorkingDirectory>${DIR[0]}</buildWorkingDirectory>:g" \
    "${DIR[1]}/bamboo-agent.cfg.xml"
  su - bamboo -c "/opt/bamboo-elastic-agent/ebs-resources/customiseInstance.sh"
}

##
# Run
##

shared_directory_install_dependency
shared_directory_create
shared_directory_mount
shared_directory_change_permission

working_dir_create
working_dir_agent_config
working_dir_grant_permission
working_dir_agent_config_update
Locate the following information in the script above "fs-1a2fb3c4.efs.us-east-1.amazonaws.com" and replace it with your EFS File System DNS name from the first step of this article (under 'Creating the Amazon EFS File System').
Important EFS directories and files
We mount the EFS File System at /home/bamboo/efs inside the EC2 instance. It can be accessed by multiple EC2 instances simultaneously.
From now on, whenever you run your builds on elastic agents, the agents build working directories will point to /home/bamboo/efs. This is where the agent will check out the files and perform builds (similar to the Bamboo server's xml-data/build-dir/ directory).
Access the EFS File System from the EC2 instance
Start a single elastic instance via Bamboo. See Starting an elastic instance for instructions.
Access your elastic instance via SSH (see Accessing an elastic instance for instructions).
cd /home/bamboo/efsThis is how you access/manage the EFS File System from within your EC2 instance.
EFS vs EBS
EFS is
Generally Available, but may not yet be available in your region.
Network filesystem (that means it may have bigger latency but it can be shared across several instances; even between regions).
It is expensive compared to EBS (~10x more) but it gives extra features.
It's a highly available service.
It's a managed service.
You can attach the EFS storage to a EC2 Instance.
Can be accessed by multiple EC2 instances simultaneously.
Since December 2016 it's possible to attach your EFS storage directly to on-premise servers via Direct Connect.
EBS is
A block storage (so you need to format it). This means you are able to choose which type of file system you want.
As it's a block storage, you can use Raid 1 (or 0 or 10) with multiple block storages.
It is really fast.
It is relatively cheap.
With the new announcements from Amazon, you can store up to 16TB data per storage on SSD-s.
You can snapshot an EBS (while it's still running) for backup reasons.
But it only exists in a particular region. Although you can migrate it to another region, you cannot just access it across regions (only if you share it via the EC2; but that means you have a file server).
You need an EC2 instance to attach it to.
Was this helpful?