Organize your rules with labels
Platform Notice: Data Center Only - This article only applies to Atlassian apps on the Data Center platform.
Note that this KB was created for the Data Center version of the product. Data Center KBs for non-Data-Center-specific features may also work for Server versions of the product, however they have not been tested. Support for Server* products ended on February 15th 2024. If you are running a Server product, you can visit the Atlassian Server end of support announcement to review your migration options.
*Except Fisheye and Crucible
Summary
Labels are key words or tags that you can add to rules and use them to categorize, identify or bookmark content in Automation for Jira.
For example, you could assign the label 'Notifications' to all notification based rules. Yourself and others can then browse all rules with that label in a single click.
Labels are common across all of Automation for Jira Server, whether you are categorizing project or global rules, you can reuse the same label.
Solution
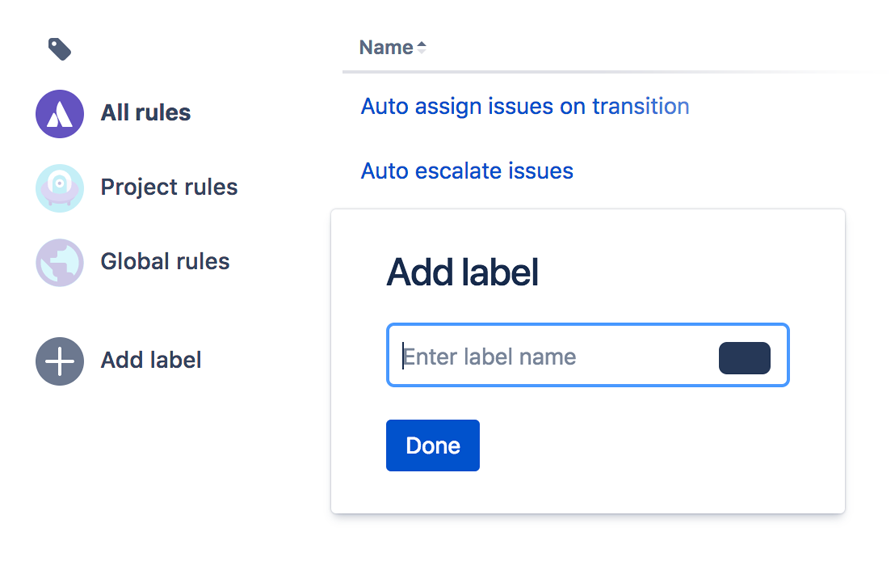
To add a label
Any user with permission to use Automation for Jira can add labels and apply them to rules. Simply click on Add Label, give it a name and choose a color.
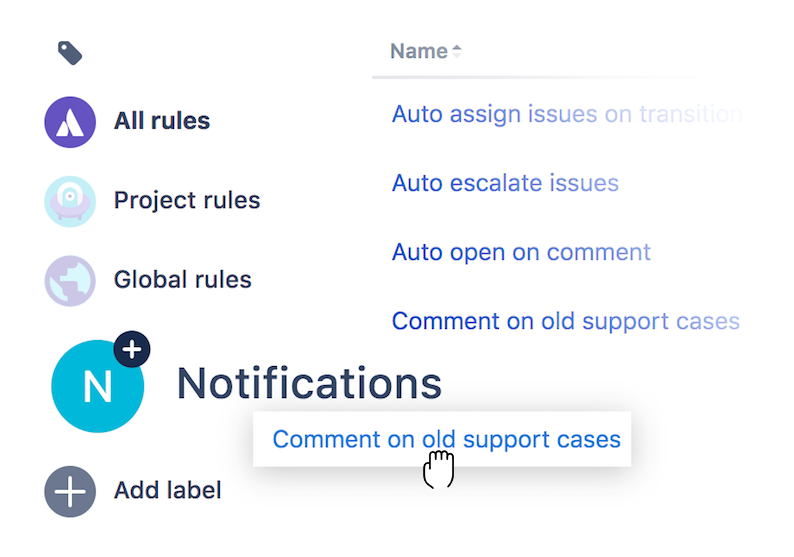
To add a label to rule
Drag the rule to the label you wish to add.
To remove a label from a rule
Next to every rule is a list of labels that apply to it, clicking the (x) removes the label.

Navigating labels
Selecting one of the filters (All, project or global), restricts the list of labels to those that apply to that list of rules.
Selecting a label filters the list further only including rules with that label. Selecting the label again remove the filter.
Was this helpful?