How to extend Automation for Jira with REST API calls
Platform Notice: Data Center Only - This article only applies to Atlassian apps on the Data Center platform.
Note that this KB was created for the Data Center version of the product. Data Center KBs for non-Data-Center-specific features may also work for Server versions of the product, however they have not been tested. Support for Server* products ended on February 15th 2024. If you are running a Server product, you can visit the Atlassian Server end of support announcement to review your migration options.
*Except Fisheye and Crucible
Summary
Not all Jira REST API methods are available on Automation for Jira as actions, but we have the Send web request that can be used to call REST APIs!
We'll use Jira as the destination, but any tool that accepts Personal Access Tokens is compatible too.
Solution
In this example, we'll assign an issue to a user
1. Create Personal Access Token in the application
All users are allowed to create their own PATs, which will match their current permission level. To create the tokens, you may follow these steps:
a. In your Jira application: Select your profile picture at the top right of the screen, then choose Profile. Once you access your profile, select Personal Access Tokens in the left-hand menu.
b. Select Create token.
c. Give your new token a name.
d. Optionally, for security reasons, you can set your token to automatically expire after a set number of days.
The EXPIRES SOON status appears 5 days before the actual expiration date. Once the token expires, you can't reactivate it. You must create a new token.
e. Click Create.
Your personal access token is created. Copy the token and store it in a safe space.
You won’t be able to see your token again once you click Close.
2. Create your rule and add the Send web request action.
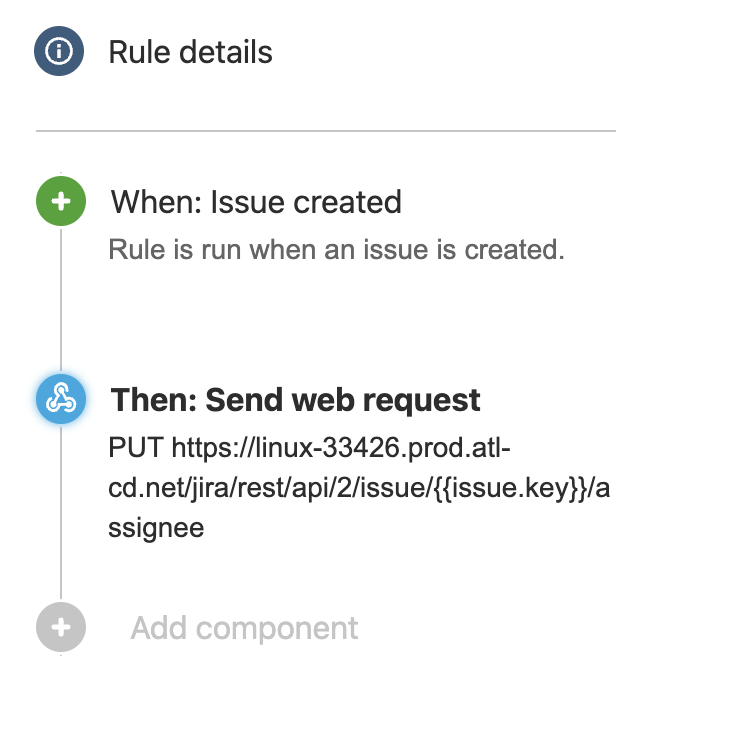
3. Let's configure it now!
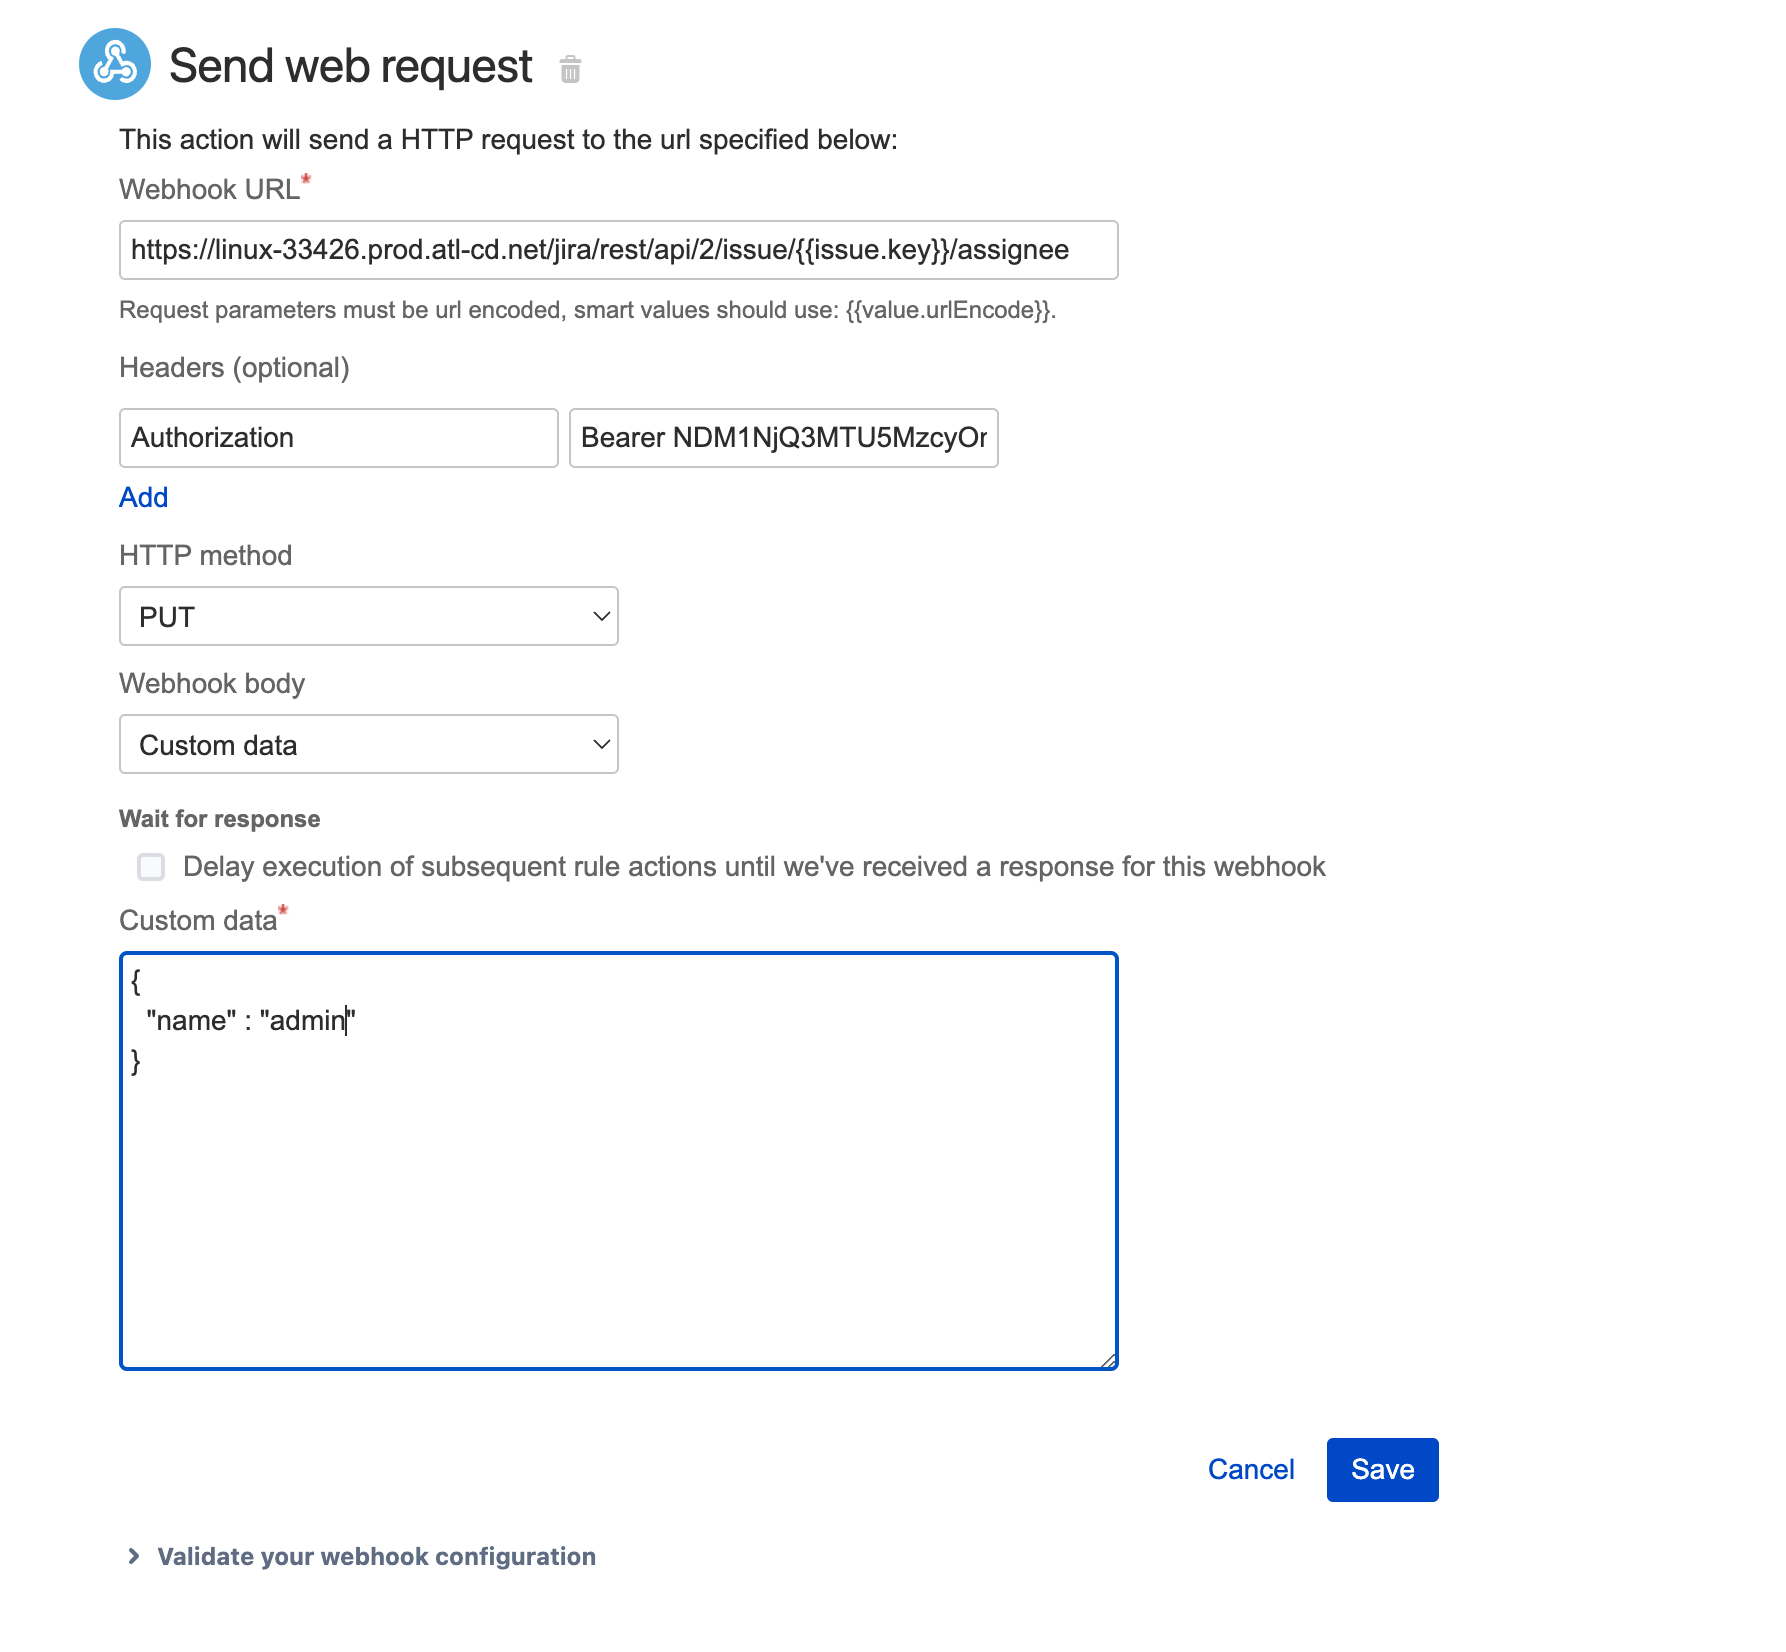
a. First, add the API URL:
http://myjira/rest/api/2/issue/{{issue.key}}/assigneeNote: in this case, we've used the smart value {{issue.key}} to add the issue key dynamically
b. On the Headers field, add the name as Authorization and the value as Bearer <Personal Access Token>
Note: Make sure to use the upper/lower case as shown
c. Select the method as PUT
d. Set the webhook body as Custom data
e. Set the custom data as the PUT payload: { "name": "assignee_name" }
The action will look something like this:
4. Publish and test!

For more details on Jira's REST APIs: https://developer.atlassian.com/server/jira/platform/rest-apis/
More about Smart Values at https://support.atlassian.com/jira-software-cloud/docs/what-are-smart-values/
Was this helpful?