Entra ID create additional apps for SAML based login for use in the Microsoft My Apps portal
Platform Notice: Cloud Only - This article only applies to Atlassian apps on the cloud platform.
Summary
In Entra ID(Azure AD), it's not possible to use the "Atlassian Cloud" Enterprise app to log into specific Atlassian products. For example, the "Atlassian Cloud" app can be configured to direct users after successful authentication to "my-example-site.atlassian.net" or "trello.com", but the end user is unable to select which specific app they want to access from myapps.microsoft.com. A common solution would be to set the relay state parameter in the Entra ID SAML configuration settings to direct users to home.atlassian.com where end users can view and launch apps that they have access to.
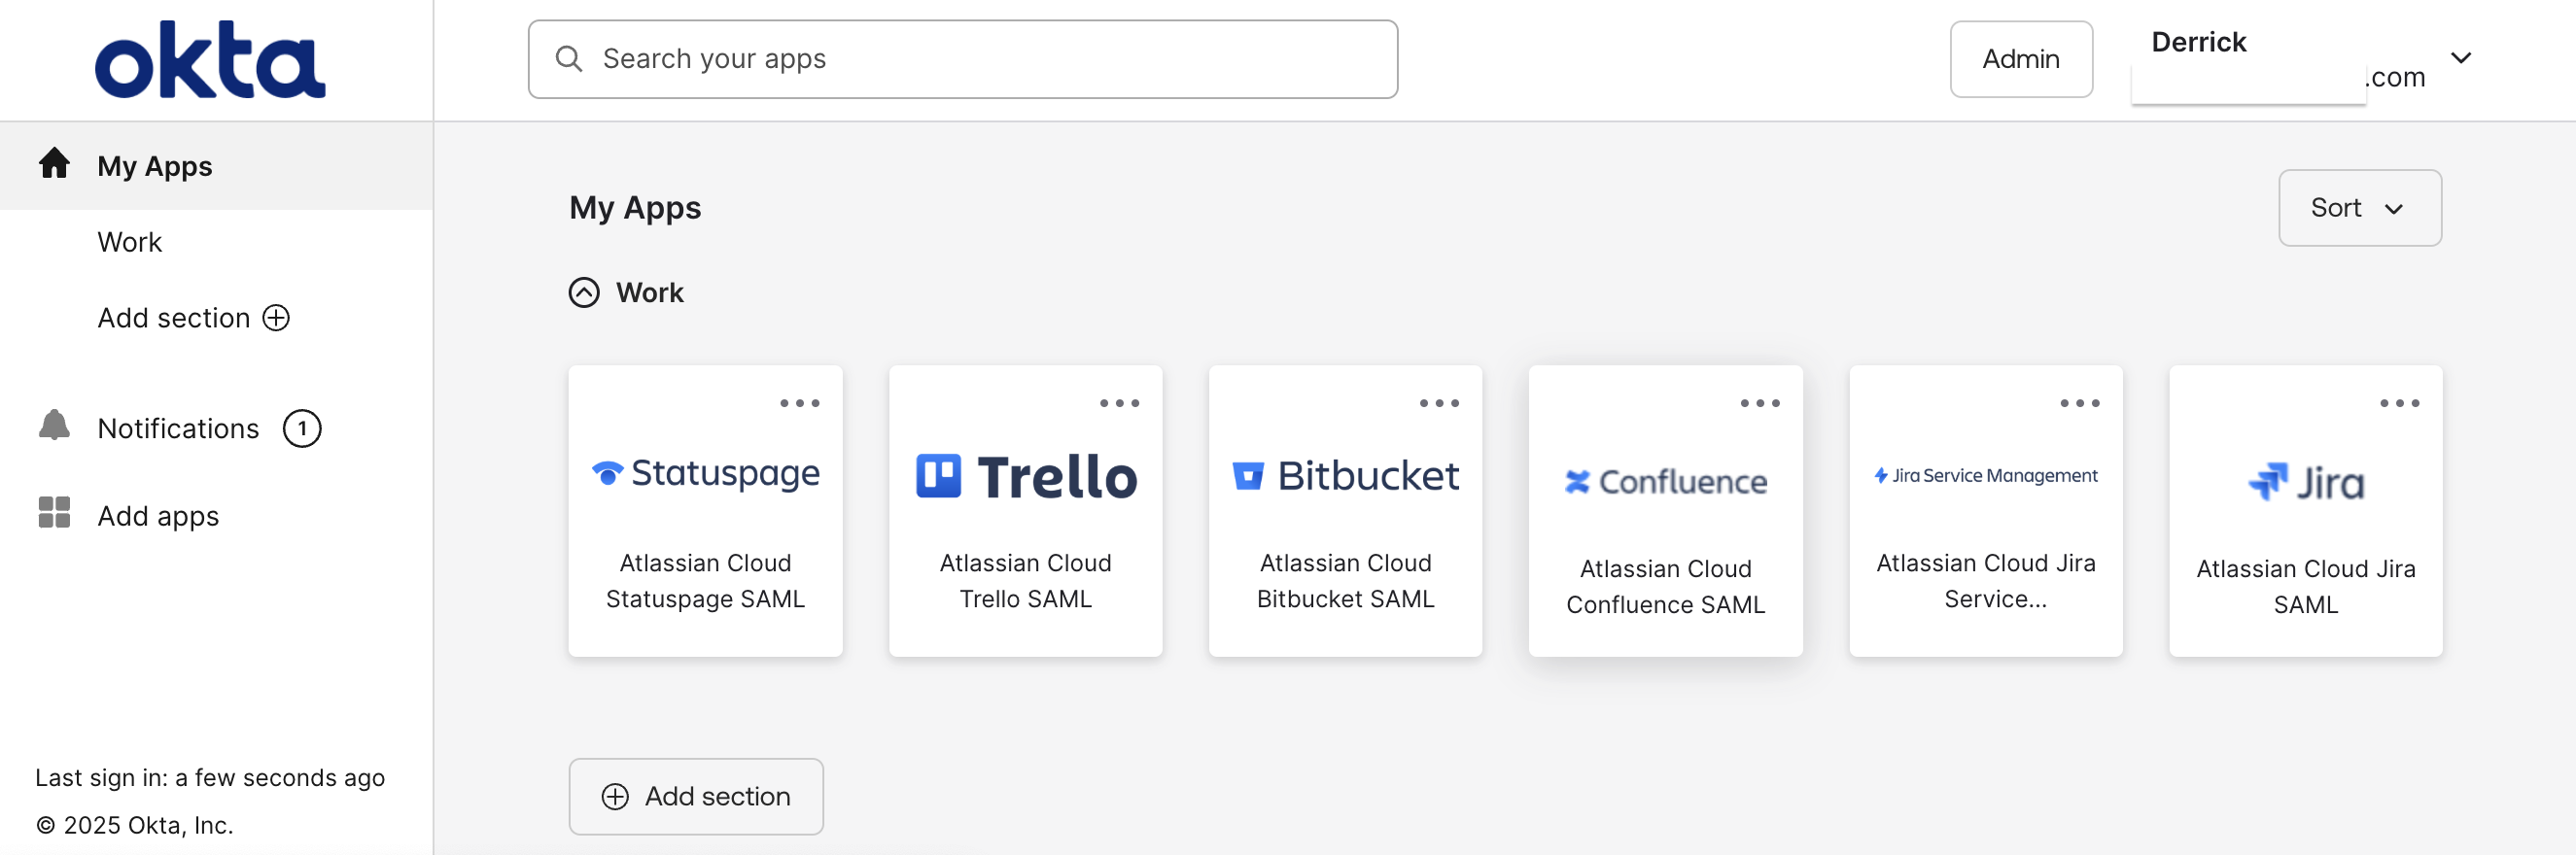
For comparison, the "Atlassian Cloud" app in Okta offers "chiclets"(icons, tiles, links) that an end user can click on to access a specific app:
Okta also supports a "bookmark" app: Create a bookmark app which allows admins to configure additional chiclets(tiles) for apps.
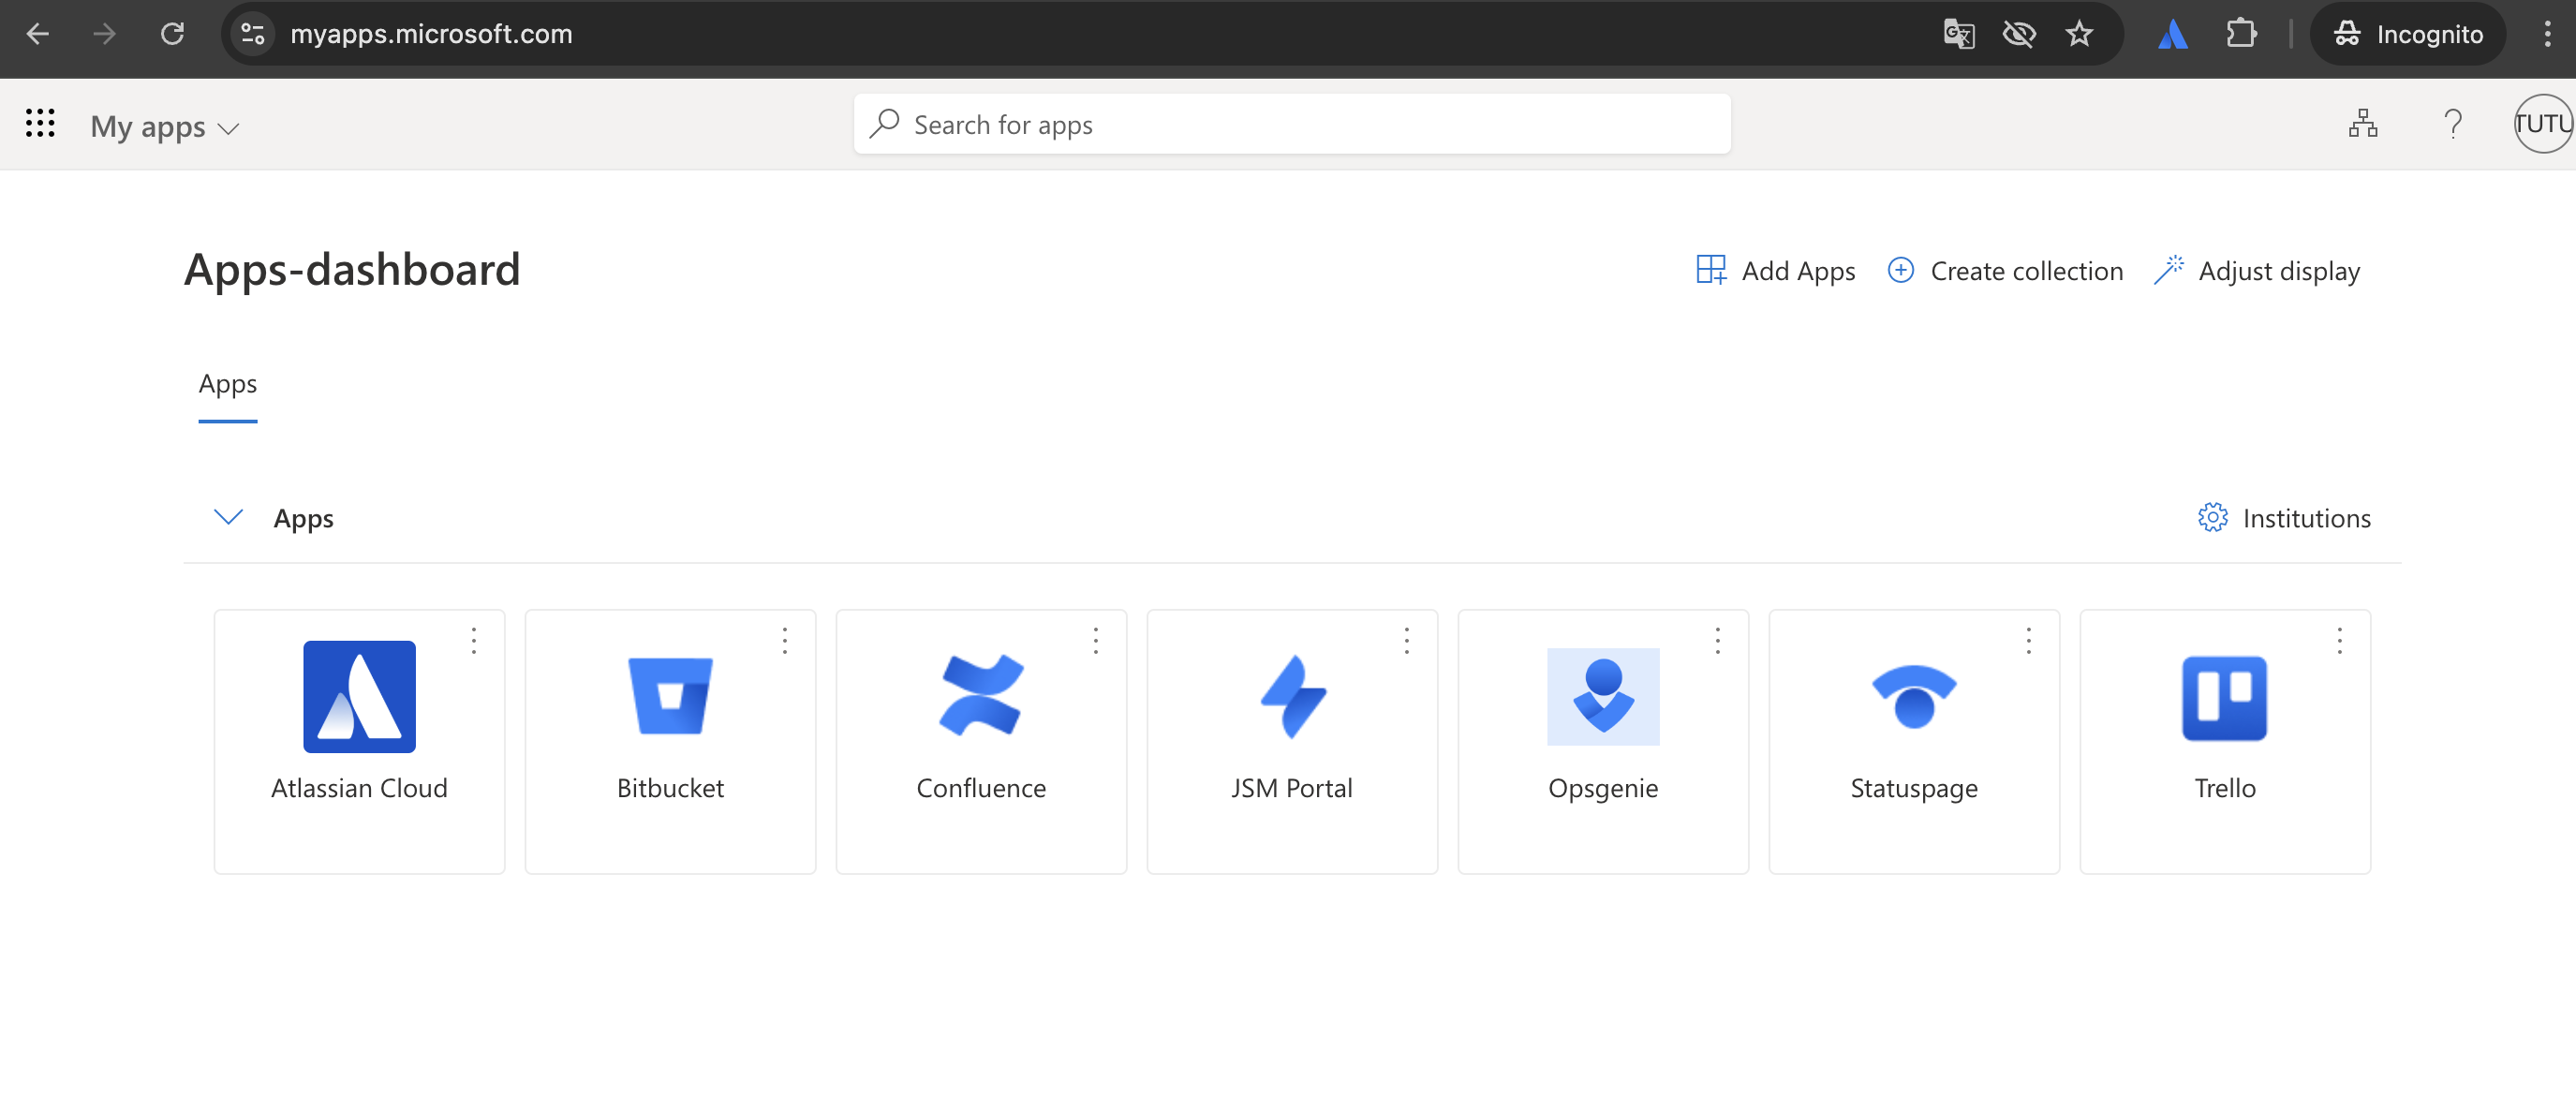
Although the "Atlassian Cloud" app on Entra ID doesn't support multiple product tiles, it is possible to achieve a similar result in Entra ID by using a "link-based" app: Configure linked sign-on
This is the result:
This document explains how to make this type of configuration in Entra ID.
Solution
Prerequisites
Working SAML configuration with Entra ID using Atlassian Guard. Documentation: Entra ID: Atlassian Cloud SAML configuration
Administrator access to Entra ID
Org. admin. privileges on your Atlassian organization
Enforced SSO enabled for the end user(s): Edit authentication settings and members
Some knowledge on how to generate and read HAR files will be helpful Generating HAR files and analyzing web requests
Configuring a linked application
More information can be found here: Microsoft: Add linked single sign-on to an application
In Entra ID, browse to Identity > Applications > Enterprise applications > All applications.
Search for Atlassian Cloud and add the app to your tenant
Give the app a name matching the product you are creating the app for, e.g. Trello
Click Single sign-on and then select Linked
Enter the Sign on URL value for that particular Atlassian app and Save the changes. See the "Sign on URL" section below for information on what value to enter in this field
Assign users/groups to the app - this will allow users to "see"(and use) the app on myapps.microsoft.com
Click Save
Test the app by navigating to https://myapps.microsoft.com and clicking on the newly created app
Jira Service Management(JSM) Portal SSO
In the context of this document, JSM Portal SSO refers to enforced SSO(SAML) for Atlassian accounts who have the customer role. For SSO with "portal-only" customers, please refer to this document instead: Configure SAML single sign-on for portal-only customers
"Sign on URL"
The Sign on URL isn't a simple copy/paste from this page as the URL contains information specific to your Entra ID tenant, Atlassian Cloud site and/or product
Product | URL |
|---|---|
Jira Service Management(JSM) portal | <YOUR_ATLASSIAN_CLOUD_APP_URL>&RelayState=https%3A%2F%2F<YOUR_CLOUD_SITE_NAME>.atlassian.net%2Fservicedesk%2Fcustomer%2Fportals |
Jira | <YOUR_ATLASSIAN_CLOUD_APP_URL>&RelayState=https%3A%2F%2F<YOUR_CLOUD_SITE_NAME>.atlassian.net%2F |
Confluence | <YOUR_ATLASSIAN_CLOUD_APP_URL>&RelayState=https%3A%2F%2F<YOUR_CLOUD_SITE_NAME>.atlassian.net%2Fwiki%2Fhome |
Bitbucket | <YOUR_ATLASSIAN_CLOUD_APP_URL>&RelayState=https%3A%2F%2Fbitbucket.org%2Faccount%2Fsignin |
Statuspage | <YOUR_ATLASSIAN_CLOUD_APP_URL>&RelayState=https%3A%2F%2Fmanage.statuspage.io%2Fauth%2Fatlassian%3Forigin%3D |
Opsgenie | <YOUR_ATLASSIAN_CLOUD_APP_URL>&RelayState=https%3A%2F%2F<YOUR_OPSGENIE_URL>%2Fauth%2Fsession-check%2F<YOUR_OPSGENIE_REGION> |
Trello | <YOUR_ATLASSIAN_CLOUD_APP_URL>&RelayState=https%3A%2F%2Fhttps%3A%2F%2Ftrello.com%2Flogin |
Example URL (Jira):
https://launcher.myapps.microsoft.com/api/signin/abcde-1234-1234-abcd-123456789abcde?tenantId=abcd1234-1234-1234-1234-12345abcde123&RelayState=https%3A%2F%2Fdnguyen4-demo.atlassian.net%2F
Example URL (Opsgenie):
https://launcher.myapps.microsoft.com/api/signin/abcde-1234-1234-abcd-123456789abcde?tenantId=abcd1234-1234-1234-1234-12345abcde123&RelayState=https%3A%2F%2Fdnguyen4-demo.app.opsgenie.com%2Fauth%2Fsession-check%2Fap-southeast-2
Locating your...
"Atlassian Cloud" Entra ID app URL:
In Entra ID, browse to Identity > Applications > Enterprise applications > All applications.
Search for the app where SAML has been configured - the default name for this app is "Atlassian Cloud"
Open the Properties page, locate and copy the User access URL - this will be "YOUR_ATLASSIAN_CLOUD_APP_URL"

Cloud site name
The Cloud site name is simply the hostname portion of the Cloud site URL. For example, dnguyen4-test21.atlassian.net - "dnguyen4-test21" is the Cloud site name
Opsgenie URL
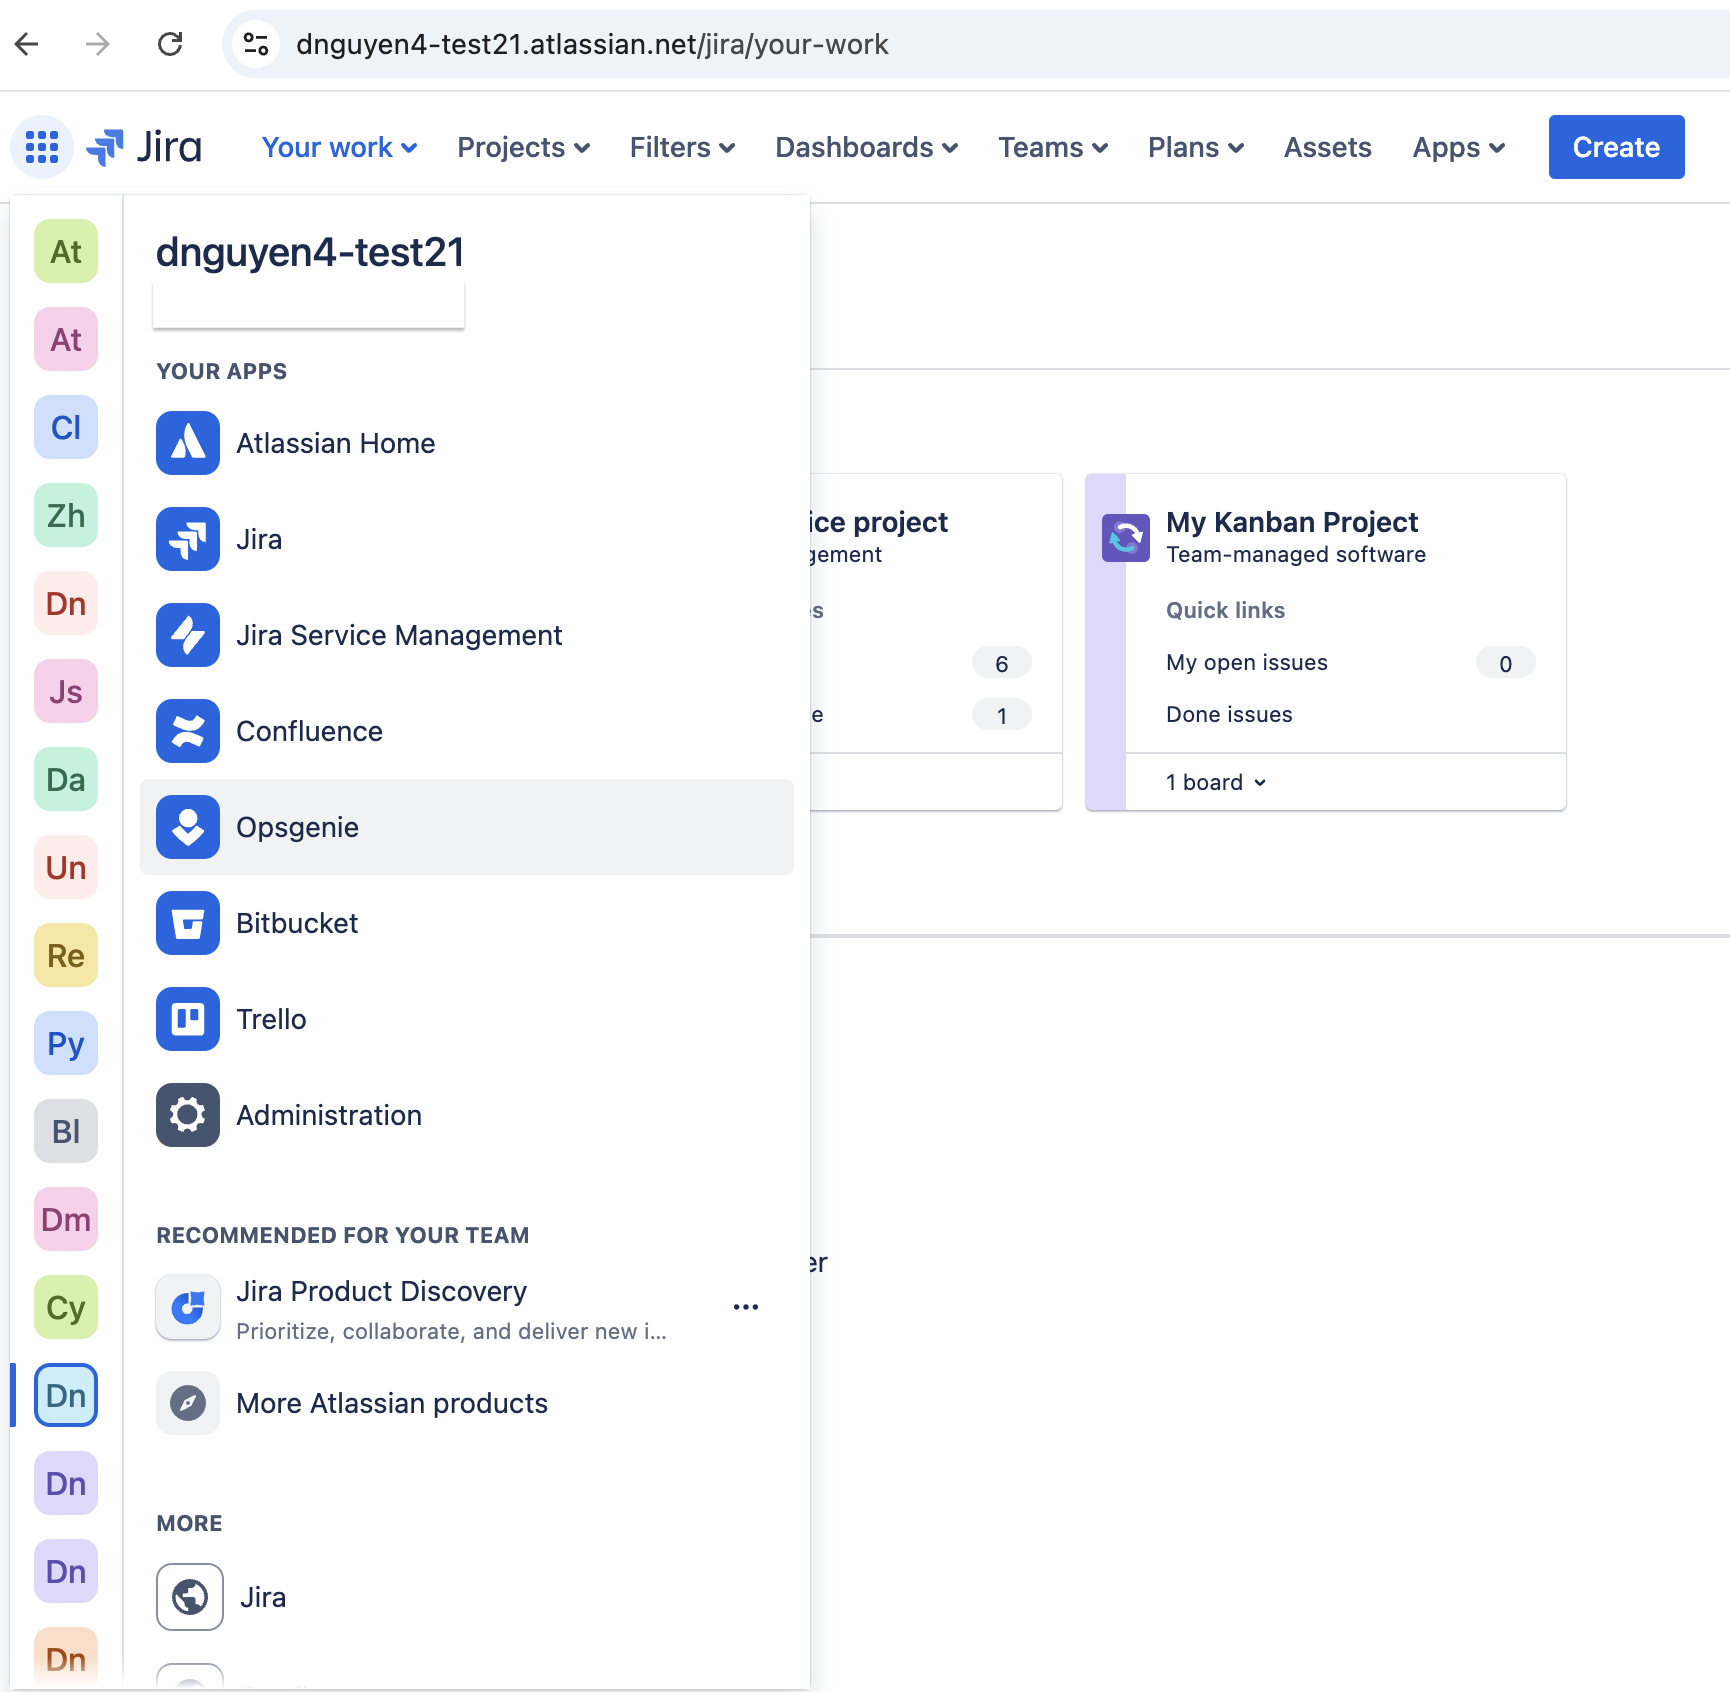
In the app switcher, select Opsgenie to launch the app. The Opsgenie URL is in the browser address bar, e.g. dnguyen4-test21.app.opsgenie.com
The site name(see: Cloud site name) is the same as the Opsgenie instance name. For example, if the site name Opsgenie is linked to is dnguyen4-test21, then the Opsgenie URL is: dnguyen4-test21.app.opsgenie.com
Note: There could be a situation where Opsgenie and/or other products(e.g. Jira/Confluence) are on separate Cloud sites - so the URL for Opsgenie can be different to the site name for your other products. In other words, Opsgenie could be linked to dnguyen4-test21.atlassian.net, but Jira is on a separate site called: dnguyen4-test21-jira.atlassian.net.
Opsgenie region
The Opsgenie URL requires a specific "session-check"(region) endpoint to work. There isn't a way in-product to find the Opsgenie region for the instance. The Opsgenie region, can be found by examining the network calls the browser is making when logging into the Opsgenie instance. To find the appropriate region for a specific Opsgenie instance:
In a web browser, open the web developer tools and select the
Network tab. Instructions: Generating HAR files and analyzing web requests
Navigate to the Opsgenie instance, e.g. <your_site>.app.opsgenie.com and login to Opsgenie with the Network tab open to record the calls that the browser is making
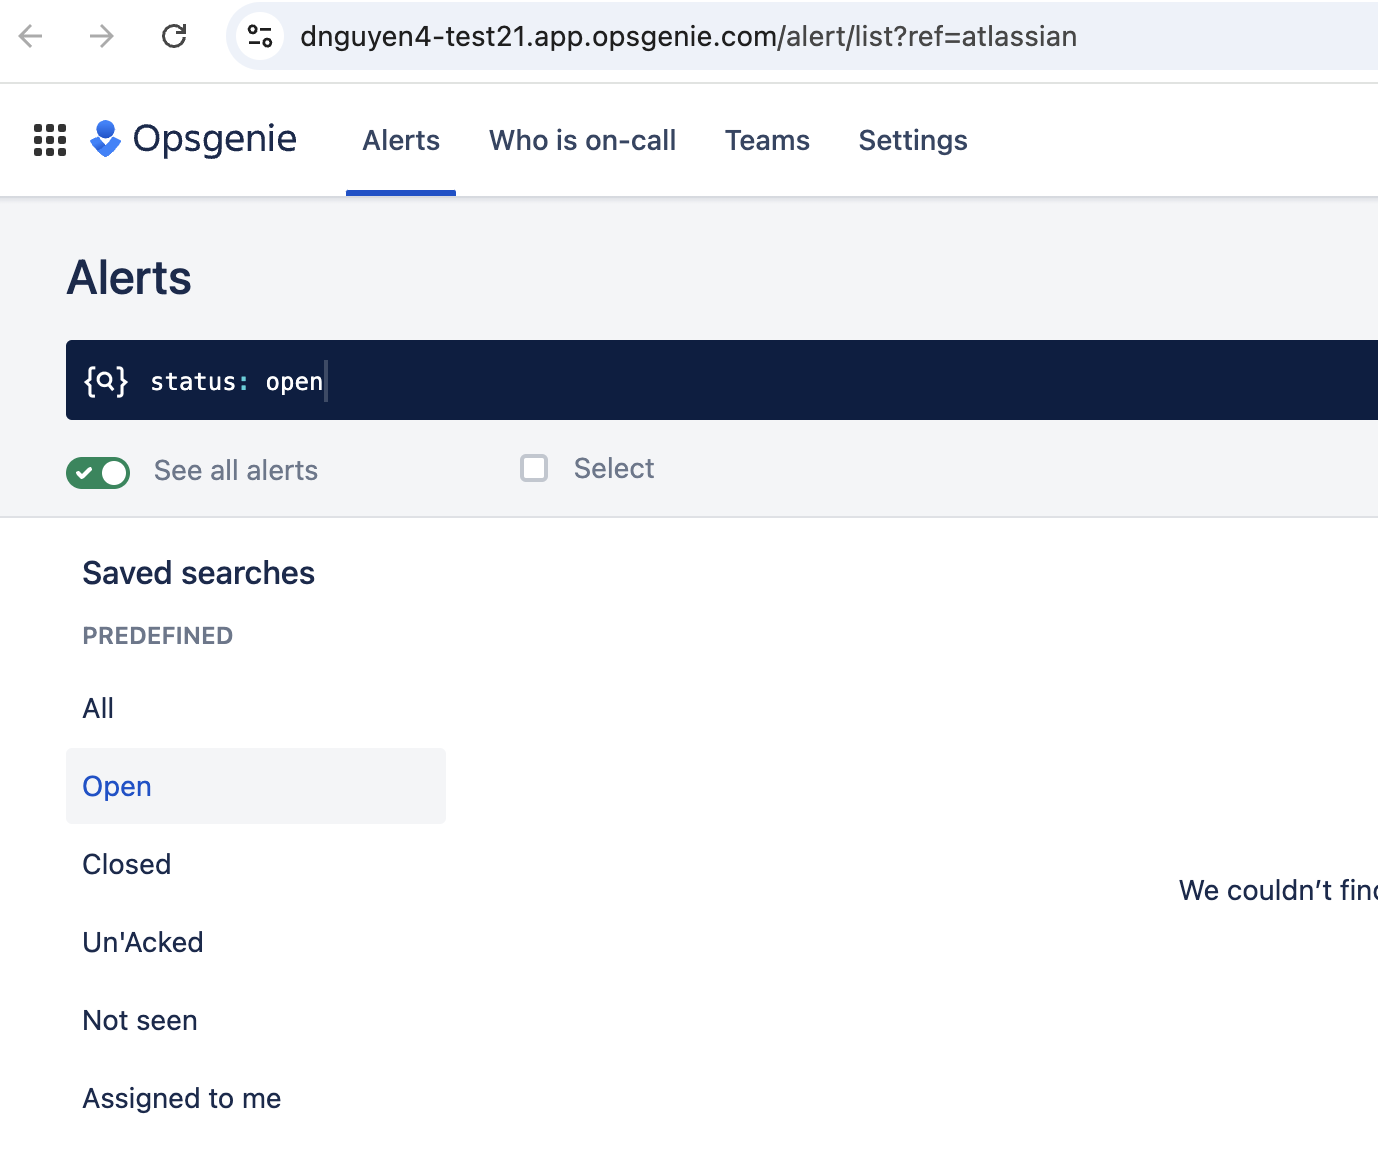
Search for "/session-check" in the filter and the endpoint with the Opsgenie region should be filtered out. In this example, the region is "ap-southeast-2"
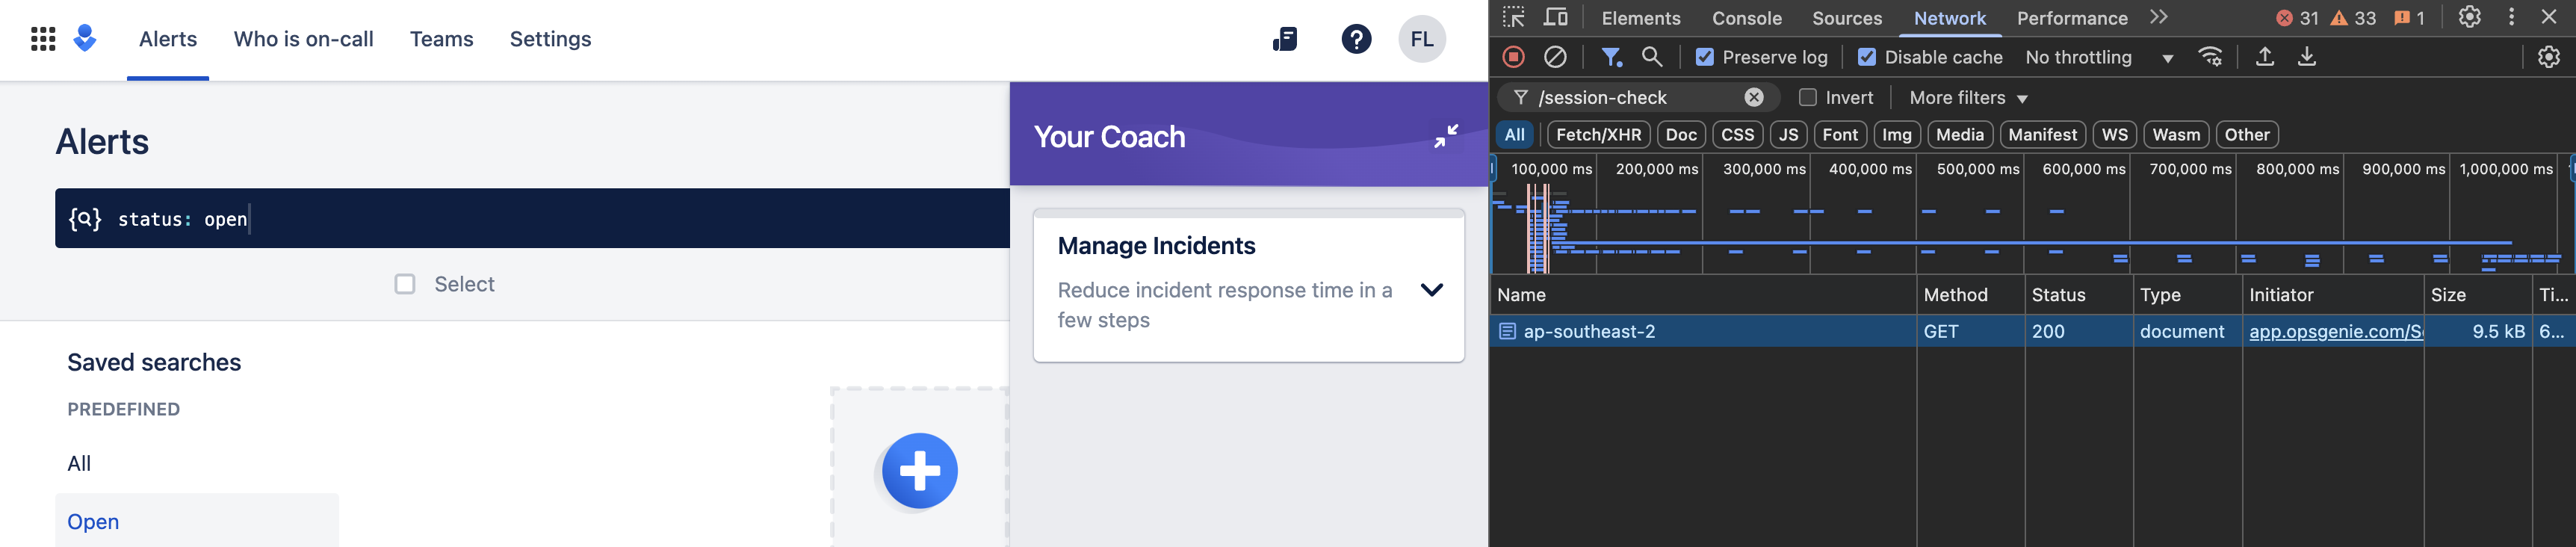
Use this region name in the URL for Opsgenie
Was this helpful?