How to Create Dependent Cascading Lists in Jira Data Center
Platform Notice: Data Center Only - This article only applies to Atlassian apps on the Data Center platform.
Note that this KB was created for the Data Center version of the product. Data Center KBs for non-Data-Center-specific features may also work for Server versions of the product, however they have not been tested. Support for Server* products ended on February 15th 2024. If you are running a Server product, you can visit the Atlassian Server end of support announcement to review your migration options.
*Except Fisheye and Crucible
Summary
Jira allows for the creation of custom fields of the type Select List (Cascading). One list can display options dependent on the selection chosen within the other.
The purpose of this knowledge article is to explain how to use this field type and its limitations.
Example of Cascading List
Consider a custom field called Location with the two levels Country and City:
First-Level: Country | Second-level: City |
|---|---|
United States | New York |
United States | Austin |
Brazil | Sao Paulo |
Brazil | Porto Alegre |
The Netherlands | Amsterdam |
The Netherlands | Utrecht |
Cascading Level Limitation
It is important to note that Jira's native Select List (cascading) field type only allows 2-level cascading.
A feature request to allow at least three levels of cascading can be tracked at JRASERVER-7936 - Add + level cascading custom field type.
If having three or more levels is necessary for your operations, you might want to check out the third-party app Multi Level & Tree Fields.
ℹ️ Note that third-party apps fall outside of Atlassian Support's scope, therefore, we advise reaching out to the app support team for assistance on how to use it.
Solution
Steps to Create the Lists
Go to Administration ⚙ > Issues.
Click on Custom Fields.
Click the Add Custom Field button.
Select Select List (cascading) from the pop-up window.
Add a name and description for your field, then click Next.
Select the issue types, which project(s) it should apply to, and click Create.
The pop-up window closes and reveals a list of all screens.
Select the screens that should display your field.
Finish the selection by clicking on Update, and you are back on the Custom fields page.
Find your custom field (<fieldname>), and on the Action ( ⋯) menu select Configure Context.
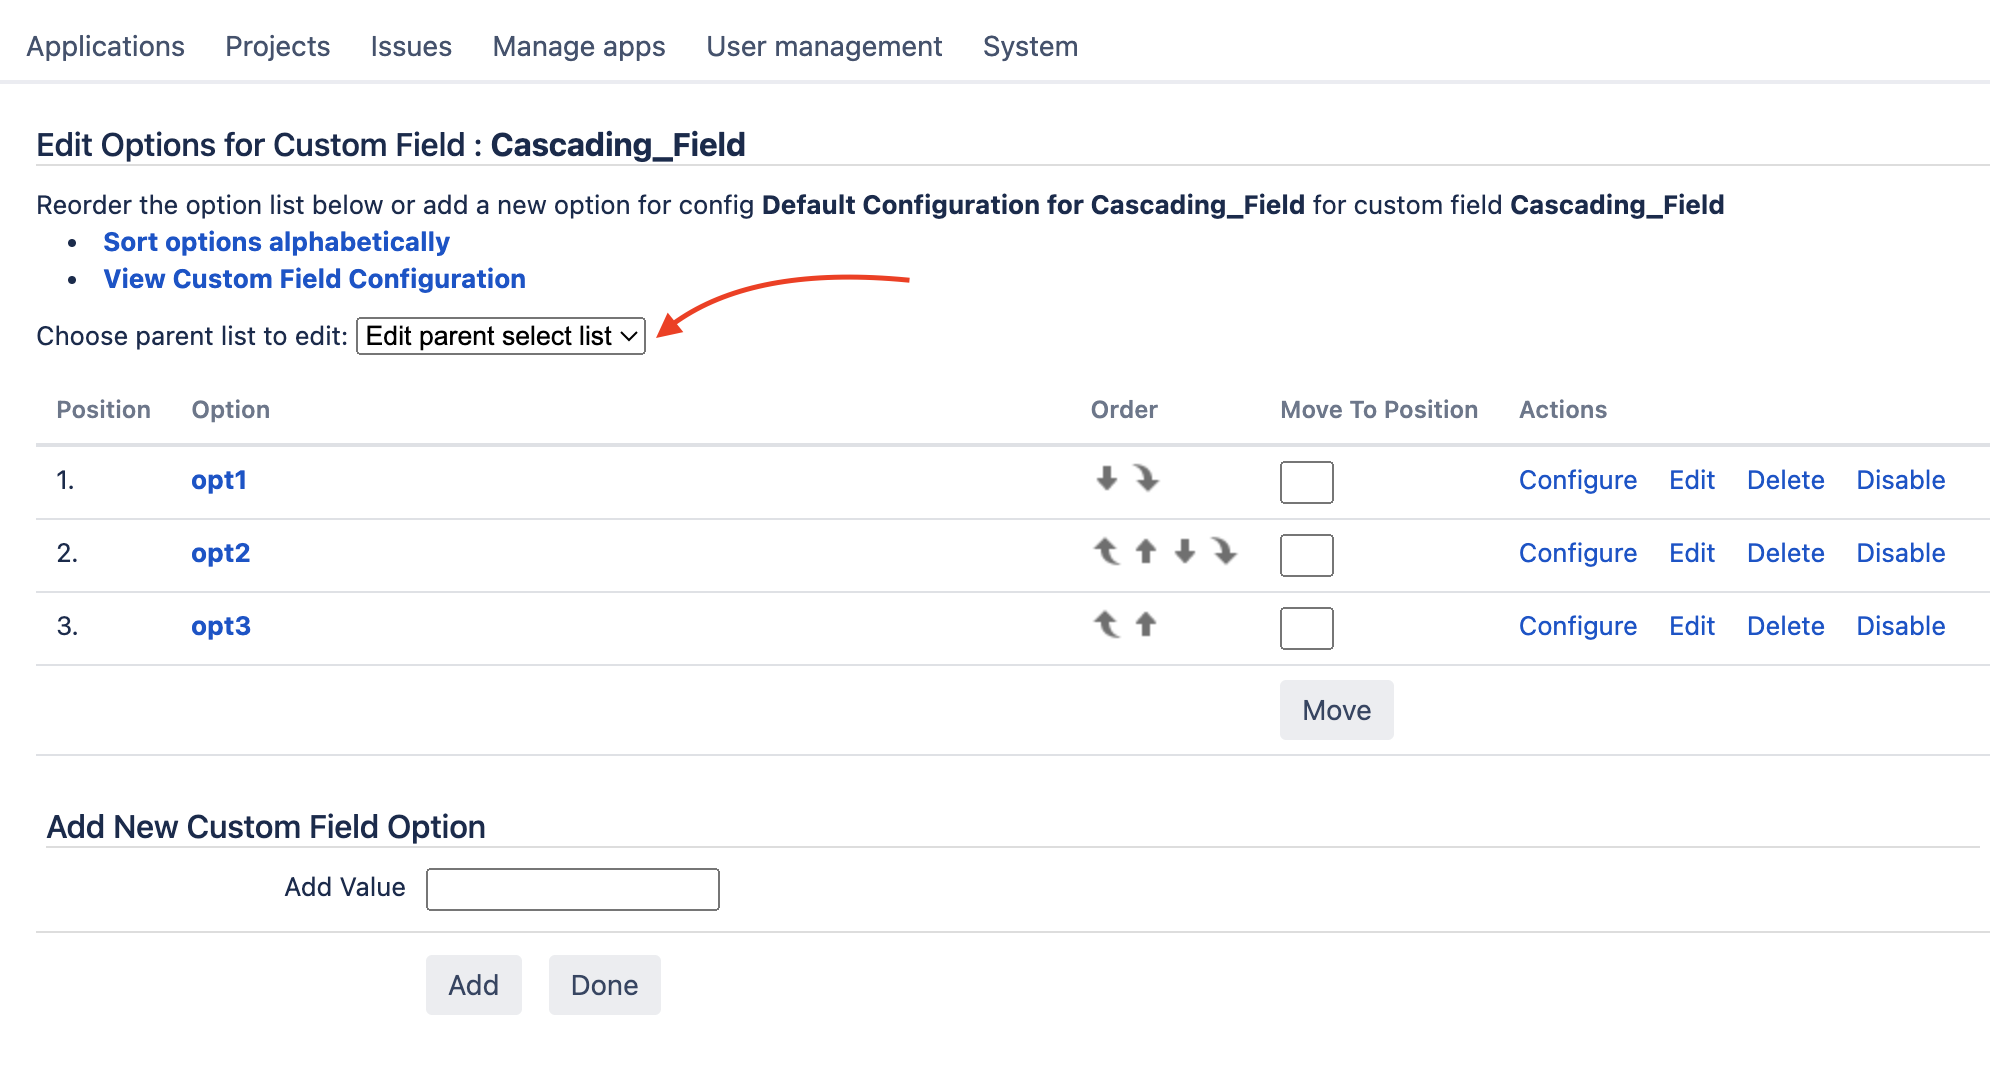
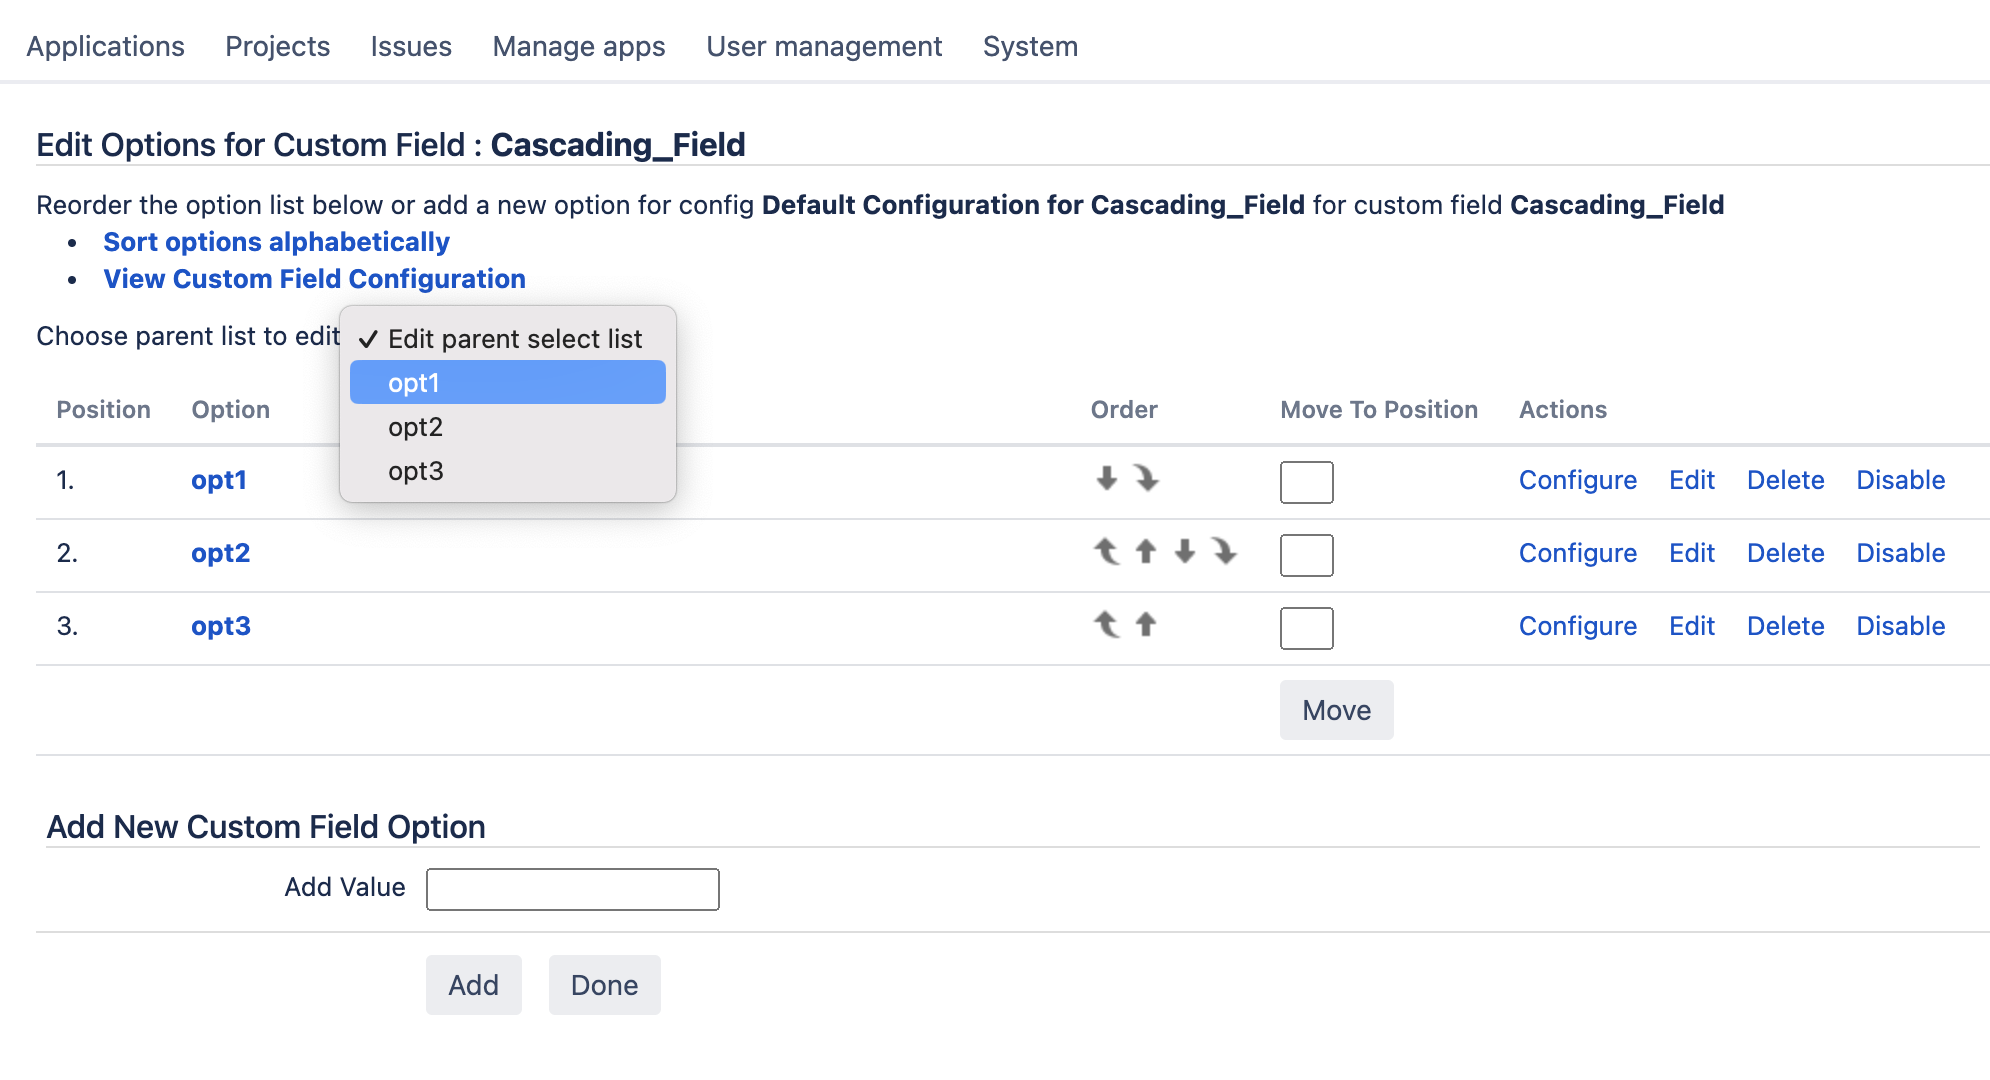
Under the Default context for <fieldname>, click on Edit Options.
Add the values for the first-level in the Add Value field for Add New Custom Field Option.
To add in the second-level field values, you have two options:
Change the drop-down Choose parent list to edit to the first-level value that you would like to configure.
Click Configure in the Actions menu of the first-level value list.
Add in the second-level field values for each parent option.
Select Done to get back to the Configure context for field: <fieldname> page
Screenshots:
Creating the first-level or parent options:
Creating the second-level or child options for each parent selection:
Was this helpful?