Use OAuth 2.0 in Postman for Jira Cloud APIs
Platform Notice: Cloud Only - This article only applies to Atlassian apps on the cloud platform.
Summary
Follow the steps in this article to access Jira Cloud via Postman using OAuth 2.0 successfully.
Solution
Step 1: Developer console settings.
Create a dummy app in https://developer.atlassian.com/console, choose OAuth 2.0 integration
This creates an AppID.
In the Sidebar, select Permission and add at least one scope.
Next, select Authorization in the Sidebar
Add the Authorization. For the Callback URL, give your site URL: https://<yoursite>.atlassian.net.
NOTE: The dialog will ask for granular scopes, but for our testing, any read scope is enough.
On the Settings page you can find the Client ID and secret in the Settings page. This information will be needed in the next steps.
Step 2: Generating an Access token from Postman
On the request page in the postman client
Select Authorisation type as OAuth2.0 and
Select Add authorisation data to as Request header
On the Authorisation tab scroll down to get to Configure New Token
Enter the following data
Token Name : give it a name
Grant Type : Authorization Code
Callback URL: https://<yoursite>.atlassian.net
Auth URL: https://auth.atlassian.com/authorize?audience=api.atlassian.com
Access Token URL: https://auth.atlassian.com/oauth/token
Client ID: Client id from Developer console from Step 1
Client secret: Secret from Developer console from Step 1
Scope: read:jira-work (app scope that you set in developer console)
Client Authentication: Send as basic Auth header
Scroll further down and click Get New access token after setting the above details. It will ask for Authorisation
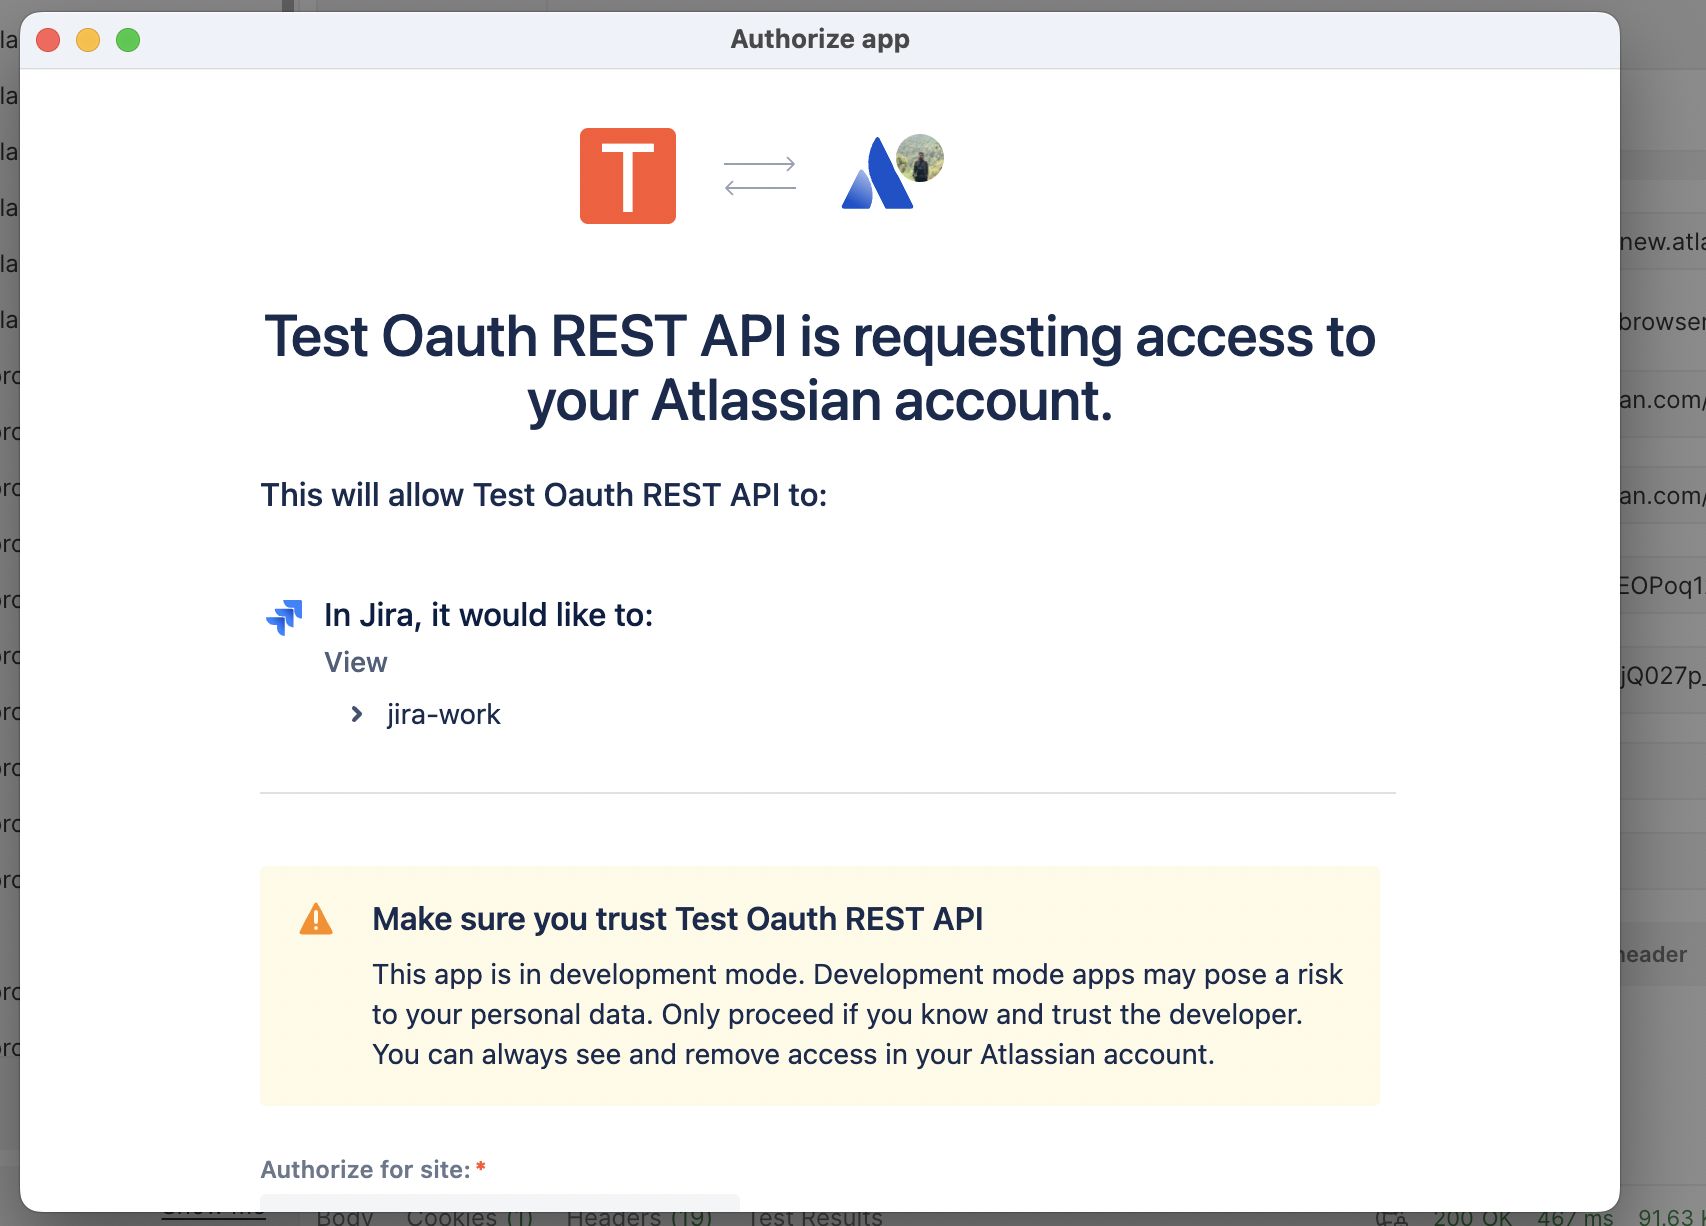
Provide the site details and select Allow.
Copy the new access token somewhere safe
Step 3 : Using the access token in a REST API call
You can call the REST api in the form shown in the example below.
Example:
Get all projects for site ID
xxxxxxxx-xxxx-xxxx-xxxxxxxxxxxxvia REST API.Notice the difference in URL compared to using the Basic Auth.
https://api.atlassian.com/ex/jira/xxxxxxxx-xxxx-xxxx-xxxxxxxxxxxx/rest/api/2/project
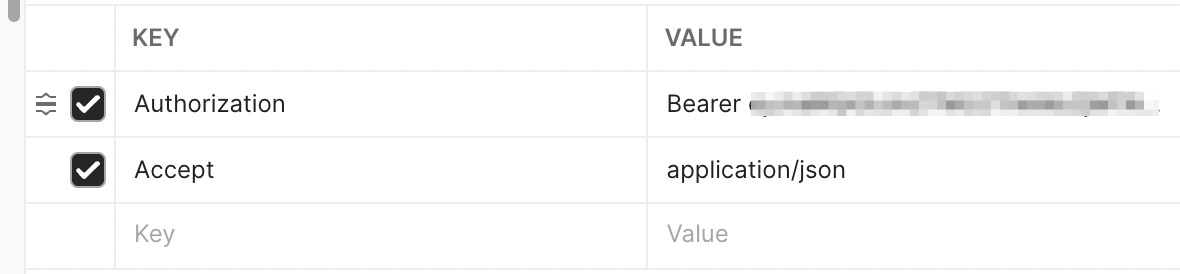
Pass the token in the new Authorization header as
Bearer <token>.
References
Was this helpful?