How to Create Issues from one Jira instance to another Jira instance using Automation for Jira Rules
Platform Notice: Cloud and Data Center - This article applies equally to both cloud and data center platforms.
Support for Server* products ended on February 15th 2024. If you are running a Server product, you can visit the Atlassian Server end of support announcement to review your migration options.
*Except Fisheye and Crucible
Summary
Automate rule for Issue Creation from one JIRA instance to another JIRA instance.
Solution
This is mostly configured when using a Jira Datacenter instance, but it can also be done with Jira Cloud.
To configure rules to work with this, you must configure two instances.
It is possible to do that by configuring rules on Automation for Jira in both instances. Here are the requirements for this to work::
Automation for JIRA must be installed on both instances, sending the webhook from the Source JIRA instance and receiving the webhook on the destination JIRA instance.
Need to create/identify the project on both the Jira instances in order to receive the issues created dynamically.
Now Create two rules, one for the "sending webhook" from the source instance and one for the "receiving webhook" on the destination instance.
Here's an example of how the rule can be configured in order to make it work:

Rule for Jira Source instance:
This rule will be responsible for sending the webhook to the Jira Destination instance. Some more details on the "Send web request" action:
Webhook URL: This URL is retrieved when creating the rule on another JIRA instance or on the Cloud instance. Please check on the description under the "Rule for JIRA Software instance" section.
Headers (optional): In order for this to work correctly, you must insert the same headers as on the screenshot ("Content-Type" and "application/json"). However, this is an optional setting and can be used based on requirements.
HTTP method: It is POST because you're sending information towards the webhook URL.
Webhook body: Select "Custom data" to make things simpler. You'll be sending all the required issue data using Smart values.
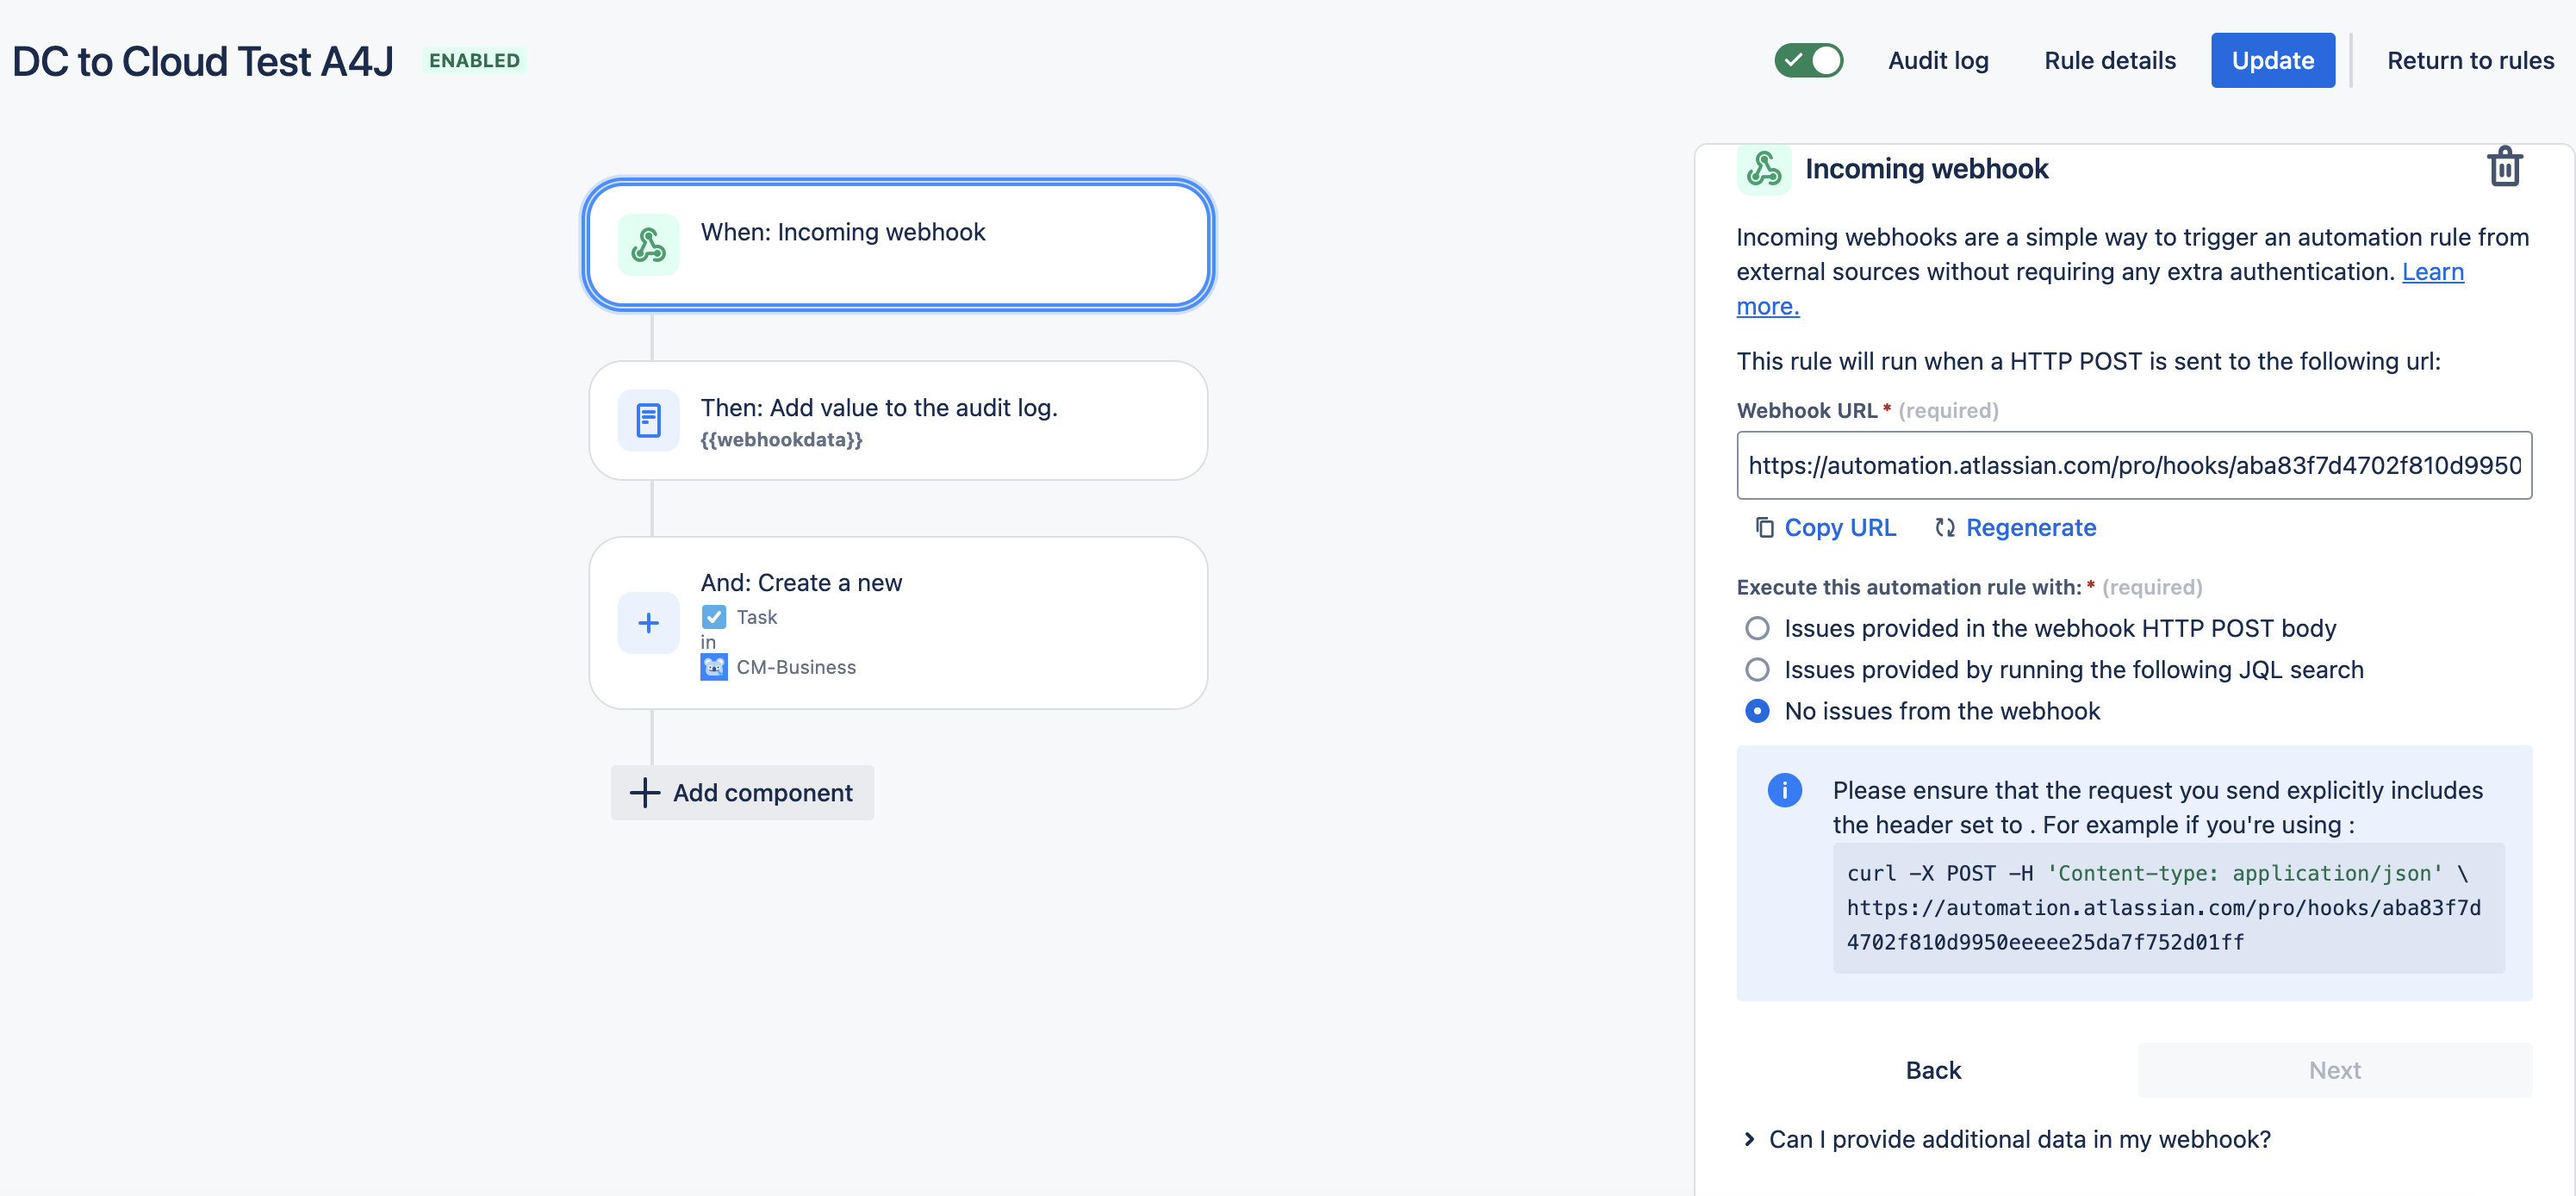
Rule for Jira Destination instance:
Screenshot1
Screenshot2
This rule will be responsible for receiving the webhook from the Jira source instance. Follow the description of each field in both Screenshot 1 and Screenshot 2.
Fields on Screenshot 1:
Webhook URL: This is the URL that we'll need to use on the "Webhook URL" field of the previous rule in order to direct the data towards this application. Copy and paste it carefully on the first rule.
Execute this automation rule with: Select "Issues provided by webhook HTTP POST body" as we are sending the issues directly through the POST body;
If you have selected the "Custom Data" in the rule configuration of the On-Prem Jira DC instance then the above option can be used. Or else you can select "No Issues from the Webhook"
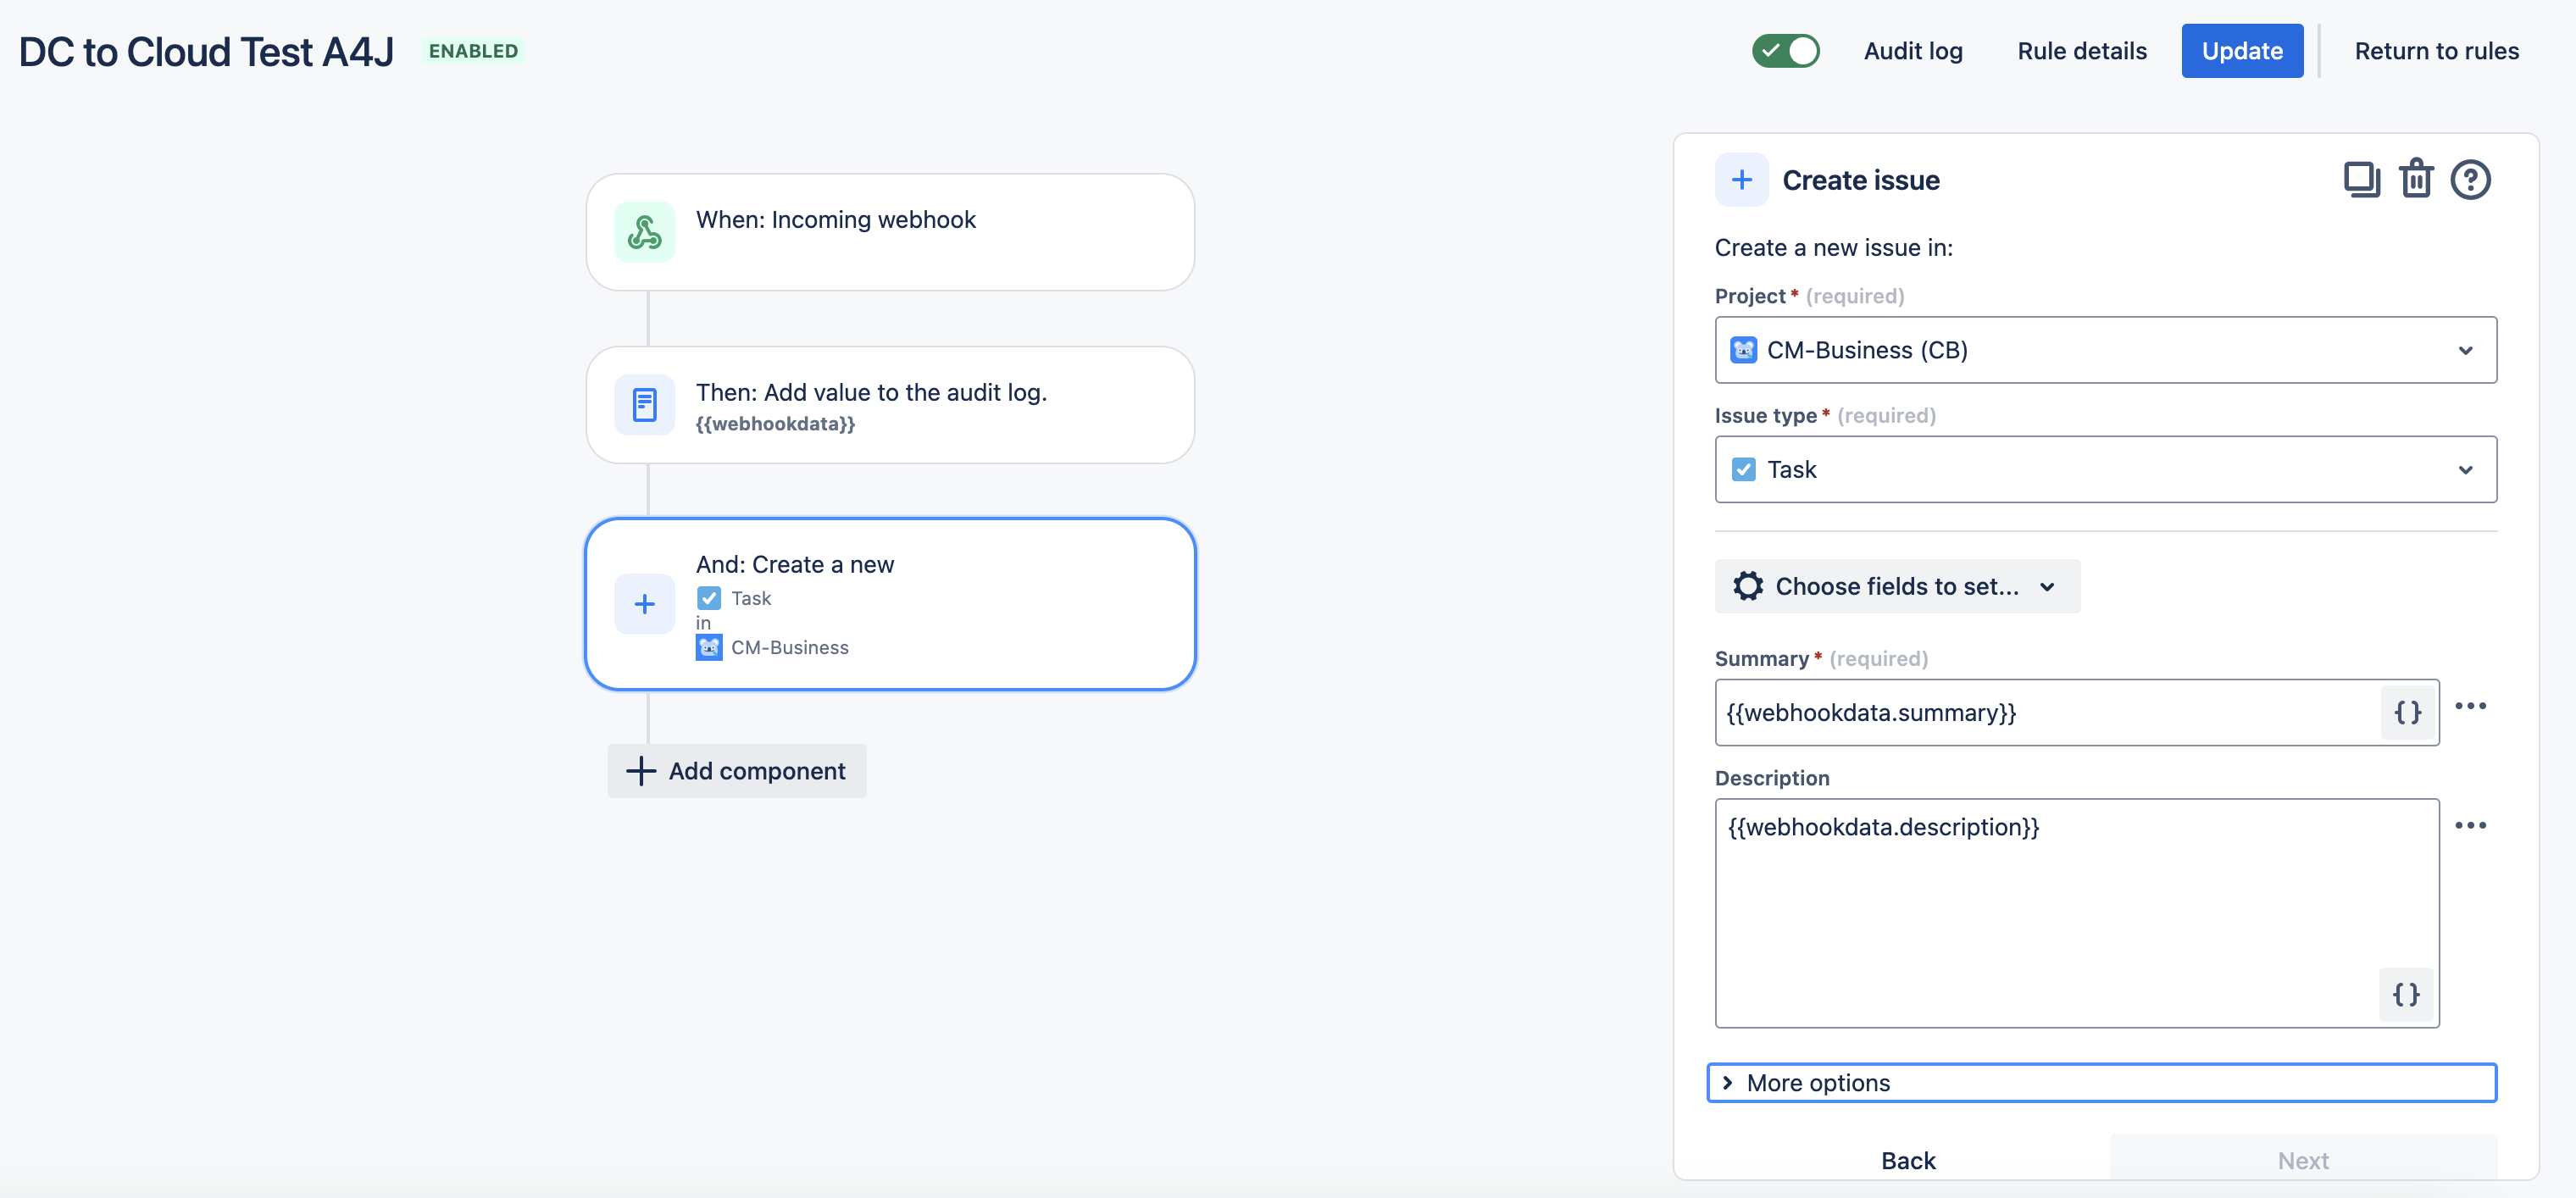
Fields on Screenshot 2:
Project: Here you'll need to select the project under your JIRA Software instance that must receive all the issues that will be created from the JIRA Service Desk issues;
Issue Type: Here you must select the issue type that the issue will be created on. In case you need to create issues from different issue types, it is possible to add some conditions with "If block condition" and make separate "Create Issue" actions for each of the issue types.
Summary and Description : Here we must use a "Smart value" that works as a way of retrieving data that came from the "Webhook data". The logic for this specific scenario is that the "webhookData" object contains the "fields" object in which all the fields are inside. So, for the summary, I've used {{webhookData.fields.summary}}, and for the description, I've used {{webhookData.fields.description}}. You'll need to add all the fields you want under the "Choose fields to set" option and then use the same logic to get the field values from the webhookData object.
Here are the details on how the log flow would look from the Audit Logs for the rule execution and issue creation.
The rule is executed from the Source Jira Instance

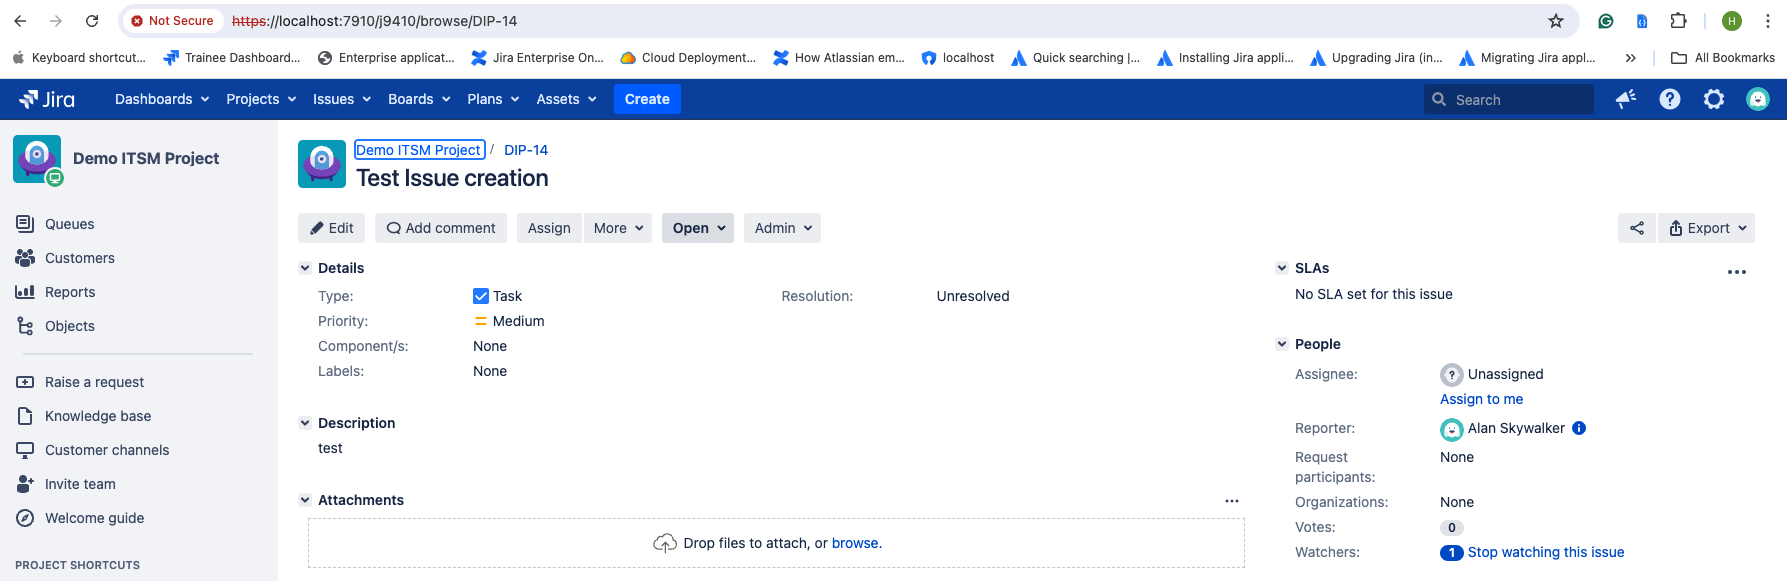
The Issue is created upon successful execution of the Automation Rule.
The rule is executed on the Destination Jira Instance
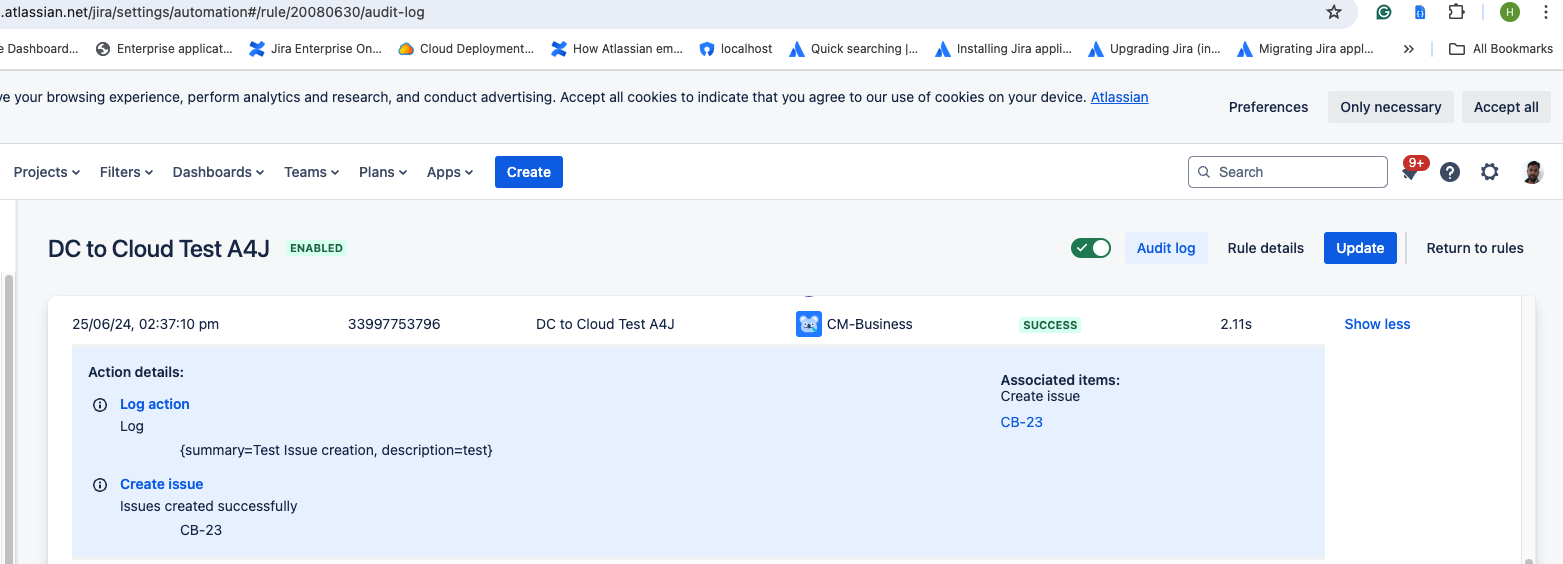
The Issue is created upon successful execution of the Automation Rule.
Tips for implementation:
In order to gather the Webhook URL, start both rules creation at the same time, so you can easily copy and paste the value;
Start implementing this with only summary and description fields and then you can improve by searching for the fields one-by-one;
You can add a "Log action" action on the rule for the JIRA Cloud instance in order to understand what was inside of the "webhookData" smart value; It helps in figuring out the pattern that is needed to follow to retrieve the fields as we wanted.
Was this helpful?