How to setup Enterprise Insights Self-Hosted with non-default SQL instance and custom SQL Port
Summary
There could be multiple instances of SQL other than the default instance <MSSQLSERVER> using custom port. This article provides guidance on verifying non-default instances, custom port configure and setting up self-hosted Enterprise Insights with a non-default instance.
Environment
Enterprise Insights Self-Hosted
Solution
Step 1: Verify if the SQL server is using a default instance or a non-default named instance. If using a non-default instance, note its name.
The default instance of the SQL server has the name "MSSQLSERVER". This can be seen next to the service name of SQL under services.msc. The non-Default instance has the instance name next to SQL Server service. Example: SQL Server(INSTANCE_NAME)

When connecting to the SQL server via SQL Server Management Studio, it is not required to enter the instance name for the default instance. However, to connect to a non-default instance, it is required to enter server name as <Server_name>\<Instance_name>
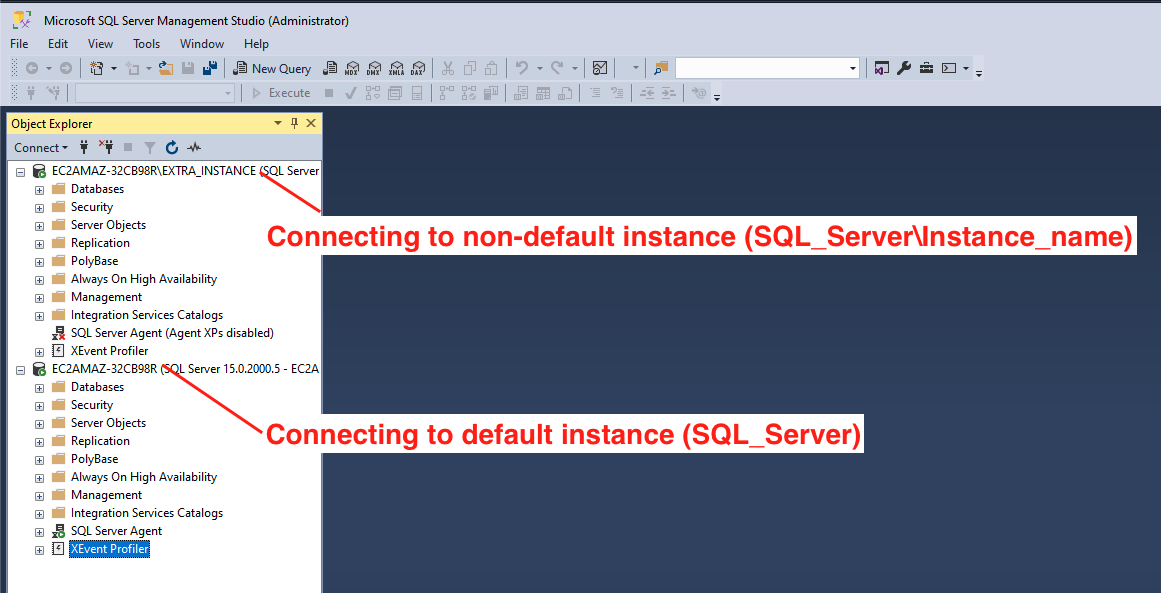
In the above screenshot example, the name of the non-default instance is "EXTRA_INSTANCE"
Step 2: Verify and determine if SQL is using the default port or custom port.
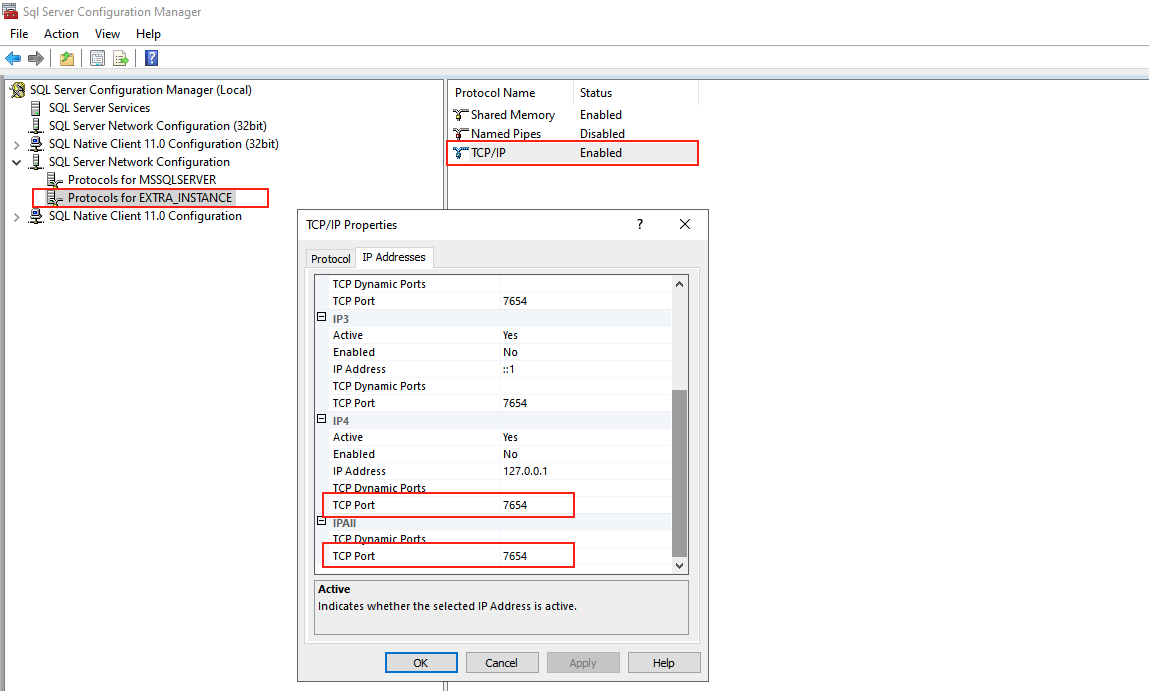
Open SQL Server Configuration Manager > SQL Server Network configuration > Protocols for $INSTANCE_NAME$ > TCP/IP > right click > Properties > IP Addresses > IPv4/IPAll > TCP Port
If the port defined is 1433, SQL server is using default port and no port related configuration is required
If the port defined is not 1433, SQL server is using a non-default port
Note the port number defined
Example screenshot:
Refer to https://learn.microsoft.com/en-us/sql/database-engine/configure-windows/configure-a-server-to-listen-on-a-specific-tcp-port on how to configure custom port for SQL
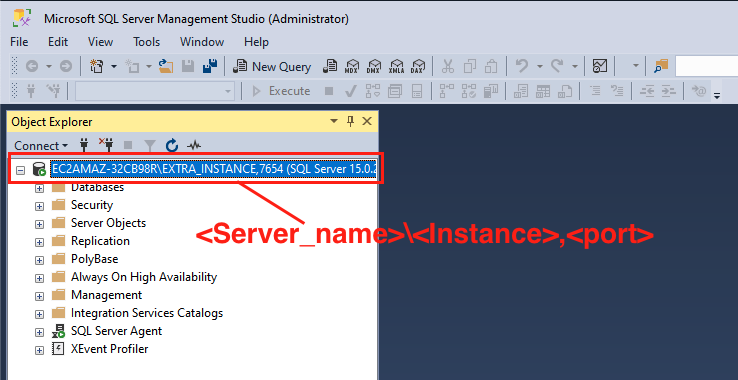
Step 3: Confirm that connection can be established using the custom SQL port via SQL Server Management Studio to Jira Align Database using the Server Name as <SQL_Server_Name>\<Instance_Name>,<custom_port>
Example Screenshot:
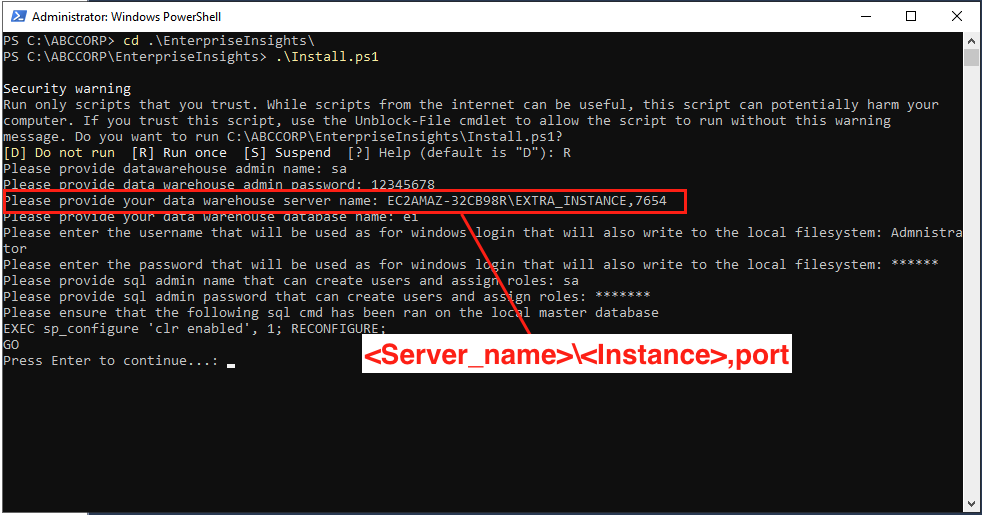
Step 4: Running the Enterprise Insights > install.ps1
When prompted for "Please provide your data warehouse server name:" enter the SQL Server name in the format <SQL_Server_name>\<Instance_Name>,<port_number>
Refer to the below example screenshot:
Related Article
Was this helpful?