サイト全体にバナーを追加する方法
プラットフォームについて: Cloud と Data Center - この記事は クラウド プラットフォームとデータセンター プラットフォームの両方に等しく当てはまります。
Server* 製品のサポートは 2024 年 2 月 15 日に終了しました。Server 製品を実行している場合は、 アトラシアン Server サポート終了 のお知らせにアクセスして、移行オプションを確認してください。
*Fisheye および Crucible は除く
要約
このガイドは参考情報として提供され、アトラシアンのサポート対象ではありません。このページの内容について質問がある場合、アトラシアン コミュニティでお問い合わせください。
Confluence 管理者がユーザーのためにサイト全体にバナーを追加したい場合があります。
環境
Confluence Server および Confluence Data Center
ソリューション
Confluence 管理者は、Confluence サイトのすべてのページの上部に表示される、サイト全体用のバナーを追加できます。
Example 1: Permanent Site-Wide Banner

スクリーンショット: サイト全体のバナーの例
サイト全体のバナーを追加するには、次の手順を実行します。
Confluence の管理領域に移動します。
左側のパネルの [ルック アンド フィール] セクションで [カスタム HTML] をクリックします。
[編集] をクリックします。
[本文の開始] テキストボックスに次のコードを追加します。
<!-- Message Banner --> <div style="background-color: yellow; border: 2px solid red; margin: 4px; padding: 2px; font-weight: bold; text-align: center;"> Your important message... </div>[保存] をクリックします。
バナーをページの下部に追加したい場合、コードを [本文の最後] テキストボックスに追加します。
Example 2: Close-able Site-Wide Banner
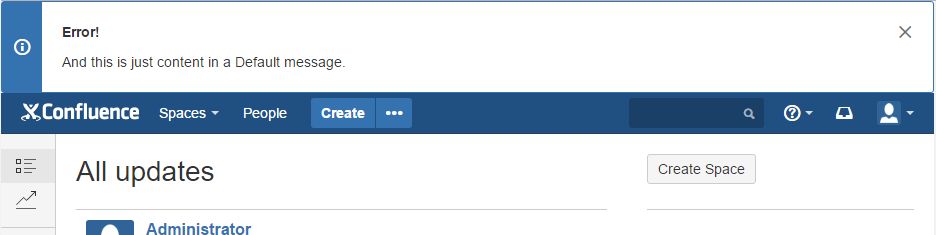
スクリーンショット: サイト全体の閉じられるバナーの例
サイト全体の閉じられるバナーを追加するには、次の手順を実行します。
Confluence の管理領域に移動します。
左側のパネルの [ルック アンド フィール] セクションで [カスタム HTML] をクリックします。
[編集] をクリックします。
[本文の開始] テキストボックスに次のコードを追加します。
<div class="aui-message closeable"> <p class="title"> <strong>Error!</strong> </p> <p>And this is just content in a Default message.</p> </div>[保存] をクリックします。
Example 3: Restricting the pages where the banner is displayed
バナーが表示されるページを制限するには、Javascript コードを使用できます。
Confluence の管理領域に移動します。
左側のパネルの [ルック アンド フィール] セクションで [カスタム HTML] をクリックします。
[編集] をクリックします。
On certain actions like creating and editing a page, the above code might not give the intended results. In those scenarios, we can use the following code
[本文の開始] テキストボックスに次のコードを追加します。
<!-- Message Banner -->
<div id="mytest" style="background-color: yellow; border: 2px solid red; margin: 4px; padding: 2px; font-weight: bold; text-align: center;">
Your important message...
</div>

<script type="text/javascript">
	AJS.toInit(function(){
		if (window.location.pathname != '/confluence/browsepeople.action'){
		  AJS.$('#mytest').hide();
		}
	});
</script>
On certain actions like creating and editing a page, the above code might not give the intended results. In those scenarios, we can use the following code
<!-- Message Banner --> <div id="mytest" style="background-color: yellow; border: 2px solid red; margin: 4px; padding: 2px; font-weight: bold; text-align: center; display: none;"> Your important message... </div> <script type="text/javascript"> AJS.toInit(function() { if (document.getElementById('editPageLink') != null) { document.getElementById('editPageLink').setAttribute('onClick', 'document.getElementById(\'mytest\').style.display = \'block\';'); } if (window.location.pathname == '/pages/createpage.action' || window.location.pathname == '/pages/editpage.action') { AJS.$('#mytest').css('display','block'); } }); </script>[保存] をクリックします。
The window.location.pathname option can be used in the if clause to indicate the pathname of the page where the site-wide banner can be displayed.
The id option can be used to reference different banners which can be displayed on different pages.
その他
ℹ️ If your banner significantly increases the height of your Confluence site footer, you may need to add HTML to allow for the extra height of a custom footer.
関連トピック
この内容はお役に立ちましたか?