Configure Cascading Dropdown Fields in Atlassian Analytics
Platform Notice: Cloud Only - This article only applies to Atlassian apps on the cloud platform.
Summary
Learn how to create dependent dropdown controls in Atlassian Analytics using cascading fields from Jira.
Understanding Cascading Fields
Cascading fields are represented in the Atlassian Data Lake in the “Issue custom fields” and “Issue field” tables under the “Jira family of products” section. The parent record will have (parent) appended to the field name, and the child record will have (child) appended to the field name, with its respective field values in subsequent rows.
If you have a cascading field called “Cascade” the parent and child values will be stored slightly differently depending on if you’re using the “Issue custom fields” or “Issue field” table. The table below has an example of how the cascading field’s data will be stored in the “Issue custom fields” table.
Cascade (parent) | Cascade (child) |
Fruit | |
Fruit | Mango |
Fruit | Strawberry |
The “Issue field” table will have one row with field name “Cascade (parent)” with the corresponding value, and separate rows with field name “Cascade (child)” and their corresponding values. The table below has an example of a cascading field’s data in the “Issue field” table.
Name | Value |
Cascade (parent) | Fruit |
Cascade (child) | Mango |
Cascade (child) | Strawberry |
Solution
1. Create the parent “Dropdown” control
From your dashboard sidebar, select Control > Dropdown.
Select Switch to control editor.
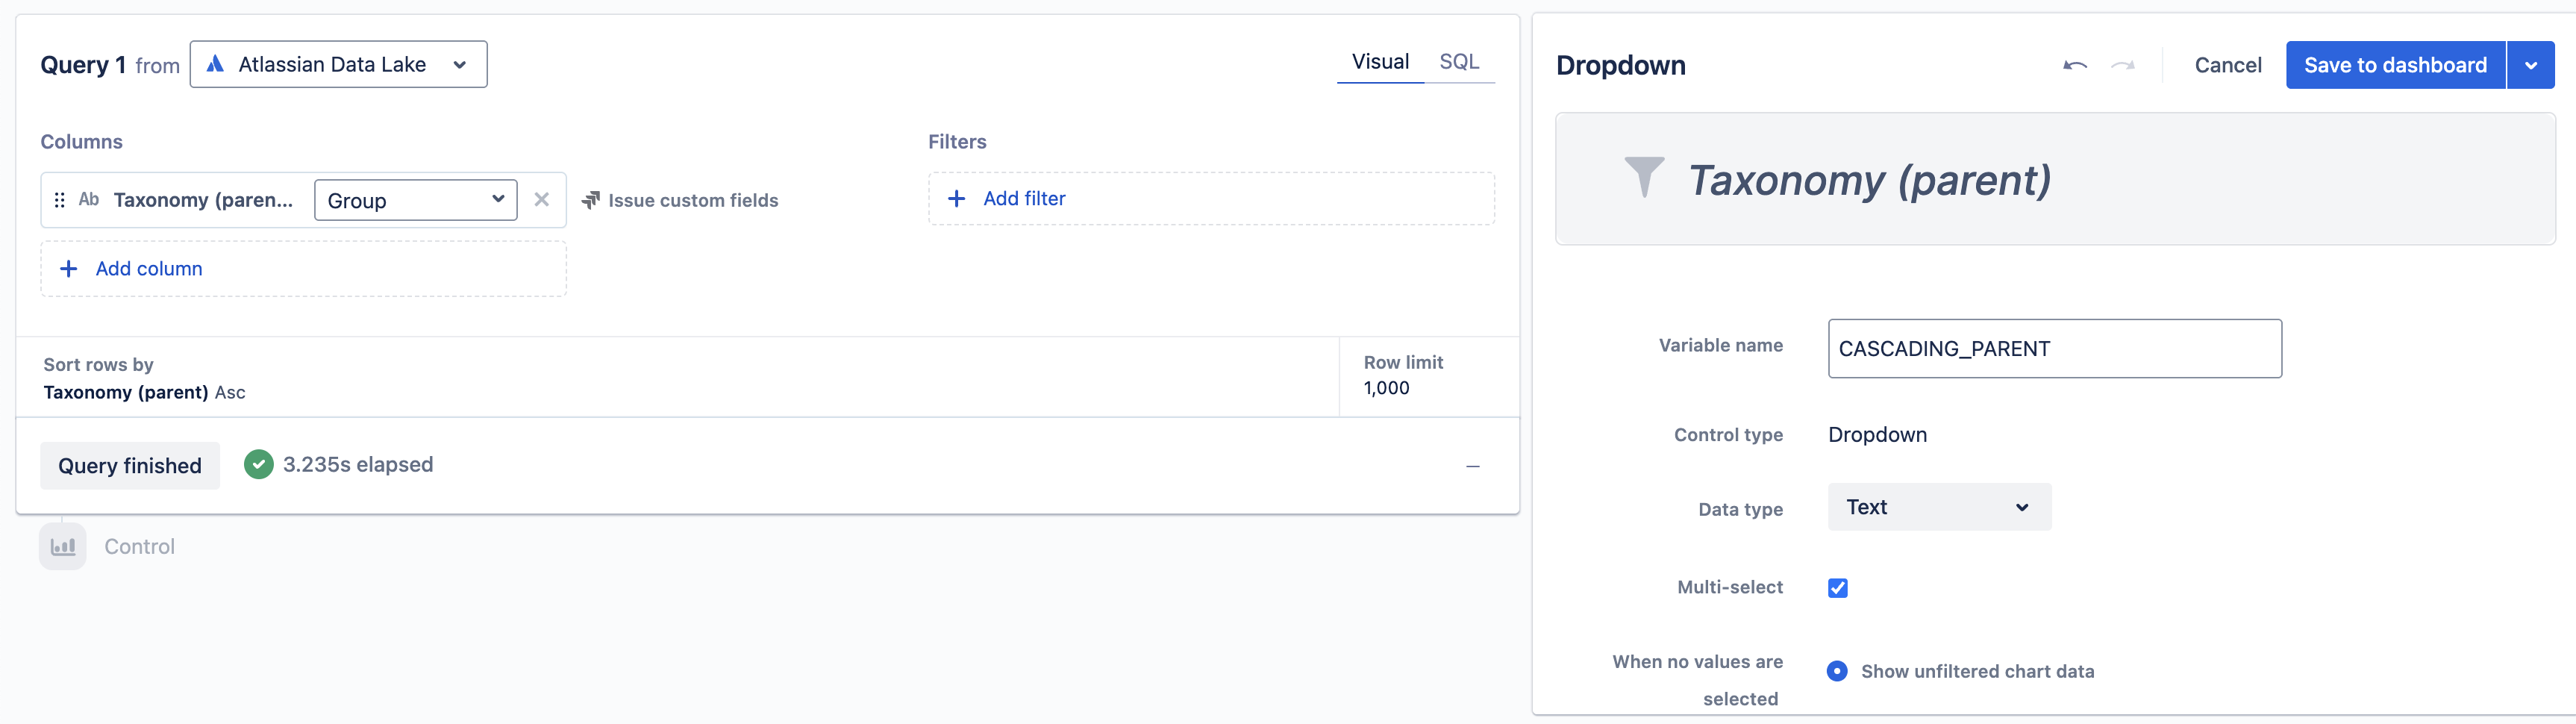
Search for the parent column’s name using the column search bar. Select the column from the Issue custom fields table under “Jira family of products” and use the Group aggregation. For example, my cascading field is called “Taxonomy”, so the column I’ll search for is “Taxonomy (parent)”.
Name the “Dropdown” control to also have a descriptive name.
Click Save to dashboard to place your new “Dropdown” control on your dashboard.
2. Create the child “Dropdown” control
From your dashboard sidebar, select Control > Dropdown.
Select Switch to control editor.
Add Issue ID from the Issue table, the parent column’s name, and the child columns' name from the Issue custom fields table under “Jira family of products” to the Columns section and use the Group aggregation for all three columns. For our example, we’ll add the Taxonomy (parent) and Taxonomy (child) columns from the Issue custom fields table.
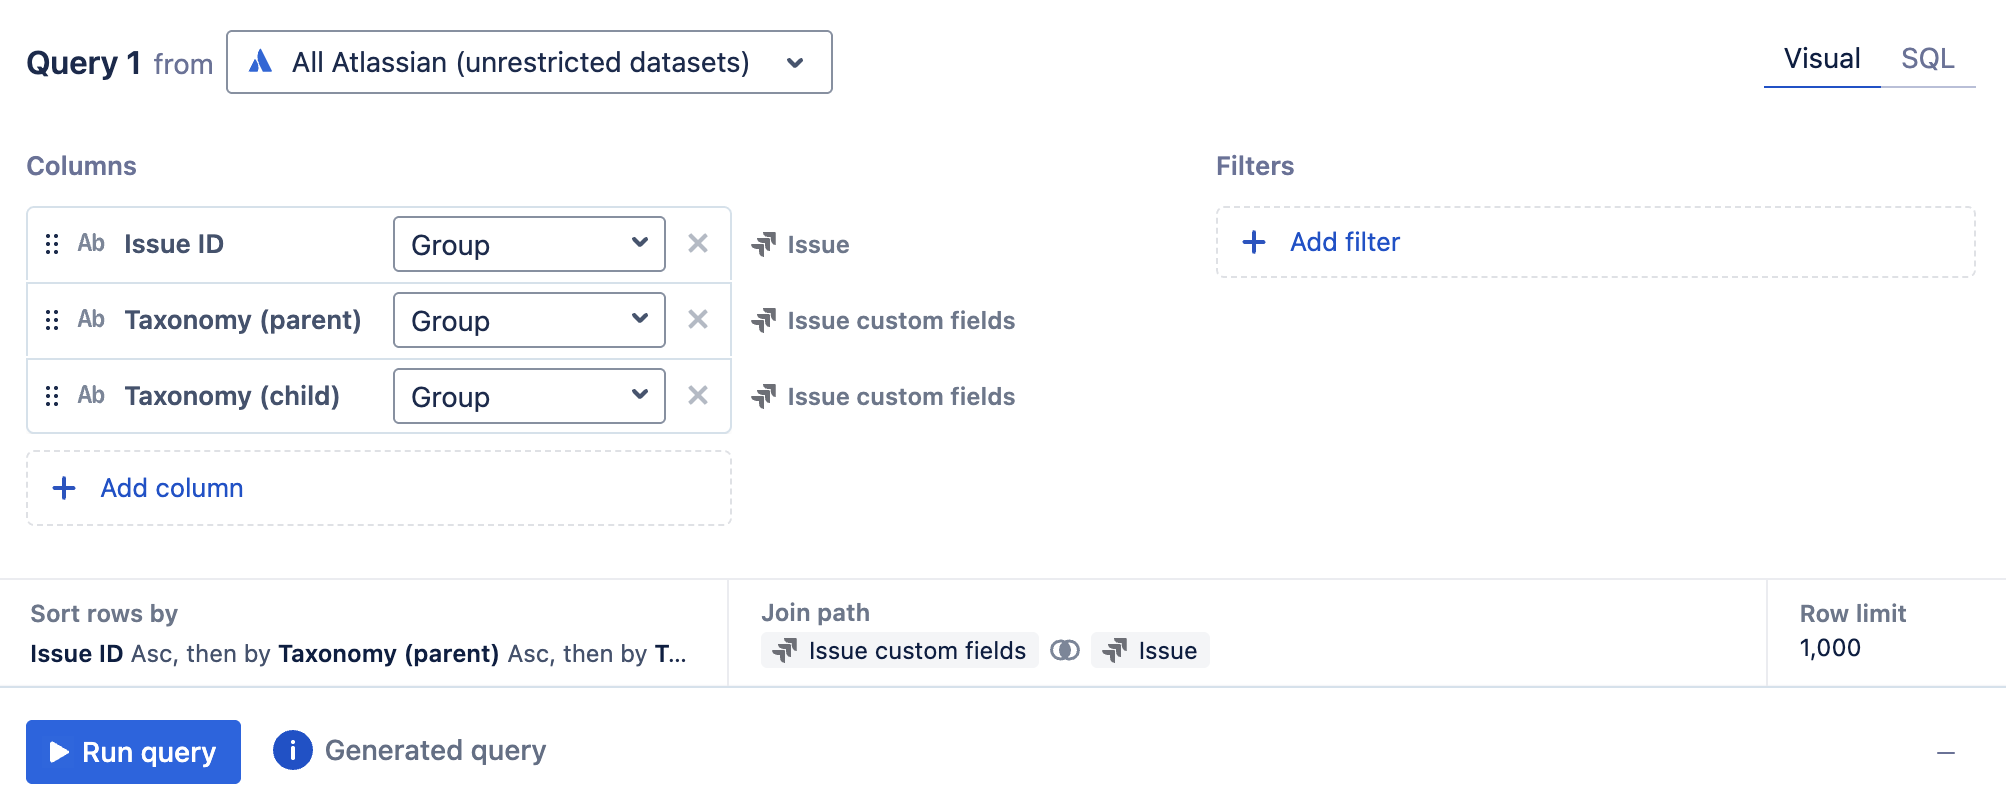
Add a “Filter” step to include rows where the parent column is equal to the parent “Dropdown”. For my example, this means it is filtering where “Taxonomy (parent) = {CASCADING_PARENT}”.

Hide the “Issue ID” and parent field columns, as they are no longer needed.
Name the “Dropdown” control to also have a descriptive name.
Click Save to dashboard to place your new “Dropdown” control on your dashboard.
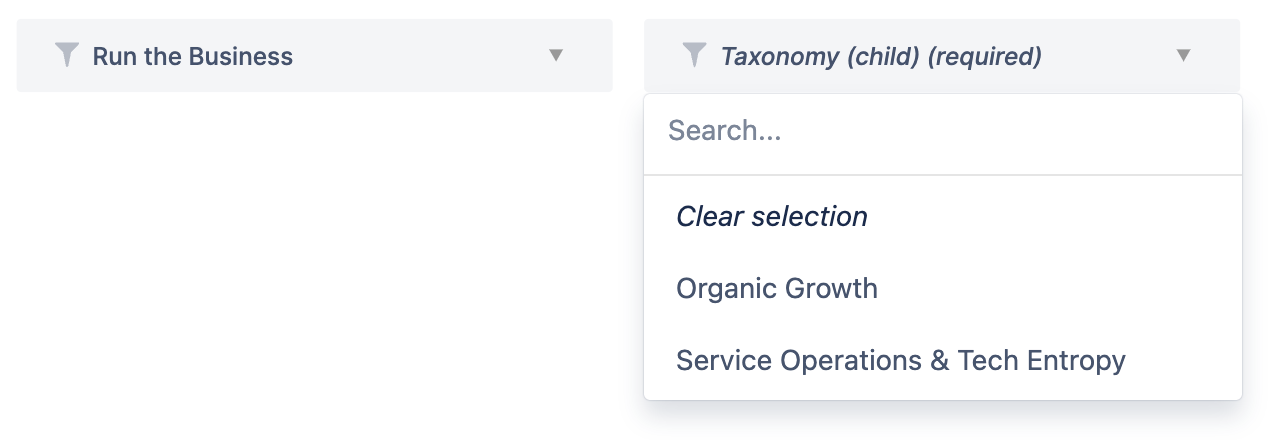
Now you have your cascading field represented as dependent “Dropdown” controls!
Was this helpful?